Whole Grain 100
Email: wholegrain100@proton.me
  • Welcome
  • Price Sheet
  • Store & Classes
  • Baking Education
  • Recipes
  • Grain Education
  • Health & Nutrition

Barley Mushroom Risotto

5/30/2019

0 Comments

 
Picture
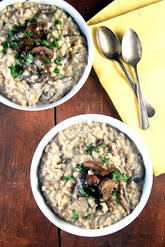
The instant pot is the perfect appliance to make a risotto, there's no standing at the stove top for 30 minutes stirring. This recipe can be also used for rice or even a cooked wheat berry. You may have to adjust the timing due to the absorption of the grain used. I  never attempted to make risotto before getting my Instant Pot, it's an easy side dish that everyone loves.

This recipe is for a 6 quart Instant Pot, so if you have a smaller one like I do half all the ingredients. I find 1/3 to 1/2 cup of  raw barley is about perfect for a single serving size.

Serves: 4 good sized servings

Ingredients:
  • 3 tsp oil, divided
  • 1/2 white onion chopped
  • 4 cloves of garlic chopped
  • 8 oz sliced mushrooms , white, cremini, portabella or mixed, 8 to 10 oz
  • 1/2 tsp salt , divided (use less if using salted broth)
  • 1/2 tsp dried thyme
  • 1/2 tsp tarragon or rosemary
  • 1/2 tsp poultry seasoning or add some thyme, sage, rosemary and onion powder
  • a generous dash of black pepper
  • 1 cup pearled barley or arborio rice or brown rice
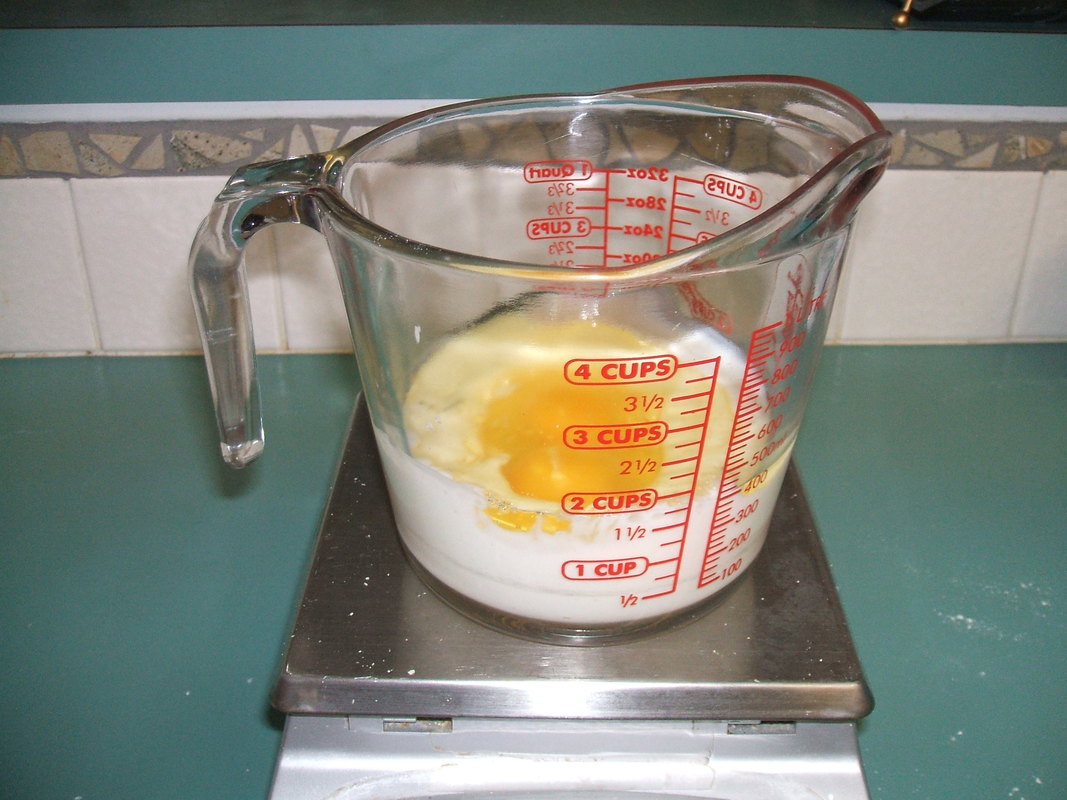
  • 2 1/4 cup water or veggie broth or chicken stock
  • 1-2 cups baby spinach
  • butter, Parmesan cheese, a handful of chopped parsley for garnish

Instructions:
  1. Put the Instant Pot on saute. Once hot, add 2 tsp oil. Add onion, garlic and a good pinch of salt and mix and cook for 1-2 mins.
  2. Add the mushrooms and mix in. Continue to cook for 3 to 4 mins. Add 2 tbsp water or white wine to deglaze in between.
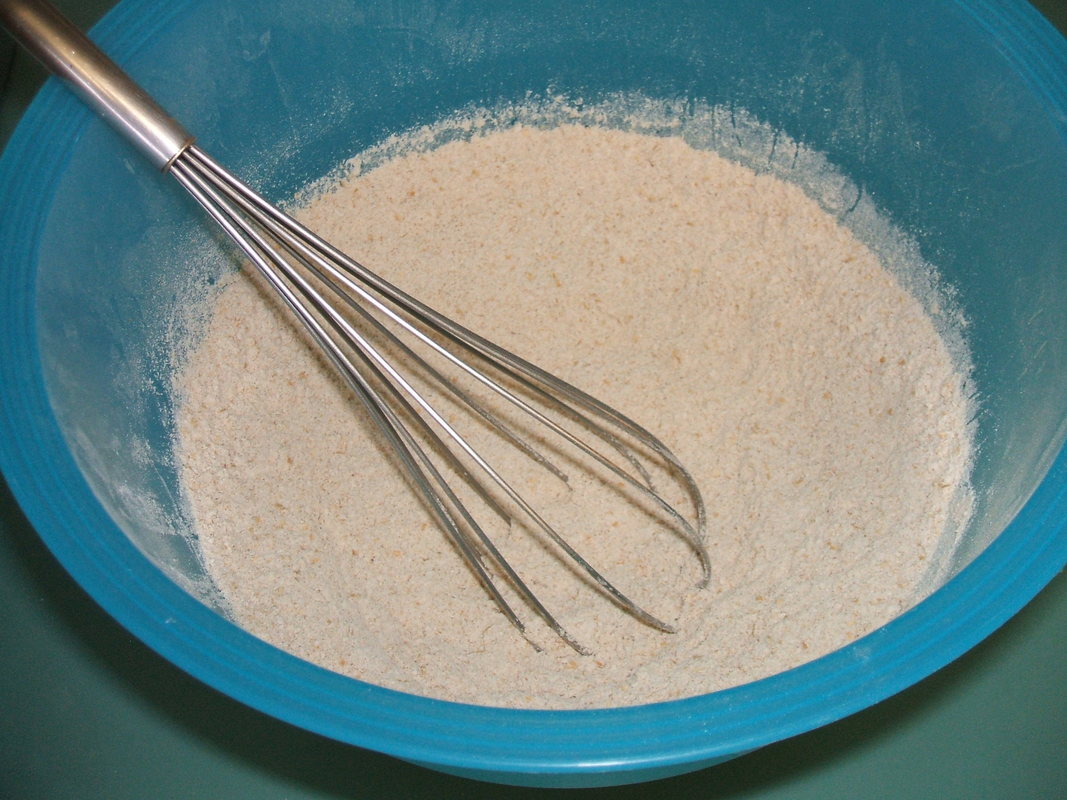
  3. Add the herbs and black pepper and mix in.  Add barley and 1 tsp oil and mix in well to coat. You can continue to roast for 1-2 mins here.
  4. Add water or broth and salt. Mix well. Cancel saute, close the lid, and Pressure cook for 20 mins (Manual High).
  5. Once the pot has finished the cooking time, press cancel so it does not stay on Keep warm.  I just let the pressure drop naturally it takes about 10 minutes. Let it sit longer with the barley it takes a while to become soft.
  6. Open the lid, give it a good mix. Taste and adjust salt and flavor if needed. Add in the spinach and mix in. Let sit for a minute. (If using hearty greens, add them earlier).
  7. Add some butter/extra virgin olive oil (about a tbsp). (For a creamier risotto, add 1/4 cup non dairy cream and mix in and bring to a gentle boil on saute.)
  8. Serve garnished with parsley or scallions and a good dash of black pepper.

Recipe Notes
For variation:  Add 1/4 cup dry white wine after adding the herbs.
  • Toast the grain before adding broth. The pan is hot enough and this takes just a minute or 2.
  • Caramelized onion and browned mushrooms add a deep flavor. Cook them long enough. 
  • The risotto can easily be made without oil by roasting in a bit of broth. 
  • Don’t like mushrooms?, use more onion, zucchini, cauliflower, broccolini etc and add more poultry seasoning.

0 Comments

Perfect Oven Fries

3/15/2019

0 Comments

 
Making oven fries is not rocket science, but great oven fries are a thing of beauty. I saw this recipe on American's Test Kitchen and gave it a try, these are the BEST oven fries you will ever make. Creamy on the inside and crunchy on the outside without all the grease.

The recipe calls for 2 pounds of potatoes, that is way to much for two people for lunch or dinner. So I will give you what I came up with for two and you can adjust the recipe as you need for your family.

Oven: 425 degrees
Bake: 20 - 40 minutes depending on size and amount of fries

Ingredients

1 large potato (any type will do)
1 T. cornstarch
1/4 c. water
Note: This amount of cornstarch and water will also work for 2 potatoes.
Recipe uses 3T cornstarch for 2 pounds of potatoes
Directions:
  • Wash potatoes, peel if the skin is thick or you prefer to do so.
  • Prepare Pan: Use my recipe for baking cream. The secret ingredient is Lecithin. If you use a spray make sure it has this ingredient. Once you spray your baking sheet, take 2 tsp. vegetable oil and put onto the pan and tilt the pan to coat the pan. The trick to using very little oil is this process of the lecithin and the vegetable oil. (3T oil for 2 pounds of potatoes)
  • Cut your potato length wise in half and cut into planks or fries.
  • In a glass bowl, mix the cornstarch and water. Put into the microwave and heat 10 seconds just until it is thick.
  • Add your cut up fries to the cornstarch thick mixture. With your hands coat the potato slices.
  • Lay the fries not touching each other onto the prepared oiled baking sheet. Cover with foil and place into hot oven for 10 minutes.
  • Remove from oven and remove the foil, this steams the potatoes. They will not be brown at this point.
  • Place back into the oven and cook another 10-15 minutes until golden brown on the bottom side.
  • Remove from the oven and turn over the potatoes on the pan to brown on the other side for another 10-15 minutes.
  • When done salt while they are hot and enjoy.


0 Comments

Chicken Taco's Instant Pot

3/12/2019

0 Comments

 
This recipe comes from one of my favorite Instant Pot web sites Amy + Jacky pressurecookfrecipes.com. This recipe is developed for the 6 quart model but you can make this in a 3 quart model or cut it in half. I have changed the recipe a bit to suit my taste.
Ingredients
  • 2 - 3 # (1262g) bone-in skin-on chicken thighs - (used skinless breast meat)                              
  • 4 (17g) garlic cloves , minced
  • 1 - 2 teaspoon (2.5 - 5g) chili powder
  • 1 teaspoon (2.5g) cumin seed , ground
  • 1 teaspoon (2.5g) paprika
  • 1 teaspoon (2.8g) garlic powder
  • 1 teaspoon (2.4g) onion powder
  • 1 tablespoon (15ml) regular soy sauce
  • ½ cup (125ml) unsalted chicken stock

Instructions
  • Marinate Chicken: Add 1 tsp (2.5g) ground cumin seed, 1 tsp (2.8g) garlic powder, 1 tsp (2.4g) onion powder, 1 tsp (2.5g) paprika, 1 - 2 tsp (2.5 - 5g) chili powder, 4 minced garlic cloves, and 1 tbsp (15ml) regular soy sauce in Instant Pot. Add in ½ cup (125ml) unsalted chicken stock. Give the sauce mixture a quick mix. Add in 2lb - 3lb bone-in chicken thighs. Let the chicken thighs marinate for 10 - 20 minutes. *Pro Tip: If you are marinating longer, place the whole inner pot in the fridge.
  • Pressure Cook Chicken: Pressure Cook at High Pressure for 12 minute and Natural Release for 12 minutes. After 12 minutes, release the remaining pressure by turning the Venting Knob to the Venting position. Remove the lid carefully.
  • Shred & Season Chicken: Place cooked chicken in a large mixing bowl. Shred the meat with 2 forks. 
    *Pro Tip: If you think the chili sauce is too oily, use a Fat Separator to remove the oil. Bring the chili sauce mixture back to a simmer by pressing the "Cancel" button, then "Saute" button. Let the sauce simmer and thicken a bit while you shred the chicken. Taste the sauce and adjust the seasoning with more salt (for reference, we used 3 large pinches of salt). Place the shredded chicken back in the sauce.
0 Comments

Split Pea Soup

3/9/2019

0 Comments

 
If you have an Instant Pot this is a very easy and fast soup to put together. The recipe comes from Amy + Jacky pressurecookrecipes.com. The recipe is made for a 6 quart Instant Pot, cut it in half for the 3 quart model. The Cooking times are the same.

Pressure Cook at High 10 Minutes
Release Right Away (DO OUTSIDE)


Ingredients
  • 1 (2lb.) ham bone or smoked port hock - cooked bacon will also work
  • 2T. butter or olive oil (28)
  • 2 bay leaves
  • 2 carrots, chopped
  • 6 cloves garlic, minced (24g)
  • 1 rib celery, chopped (75g)
  • 1 medium onion, diced (220g)
  • 1 pound green split peas (454g)
  • 6c. low salt chicken stock
  • dried thyme pinch

Instructions
  • Heat up the Instant Pot using the Saute function. Wait until it says HOT about 8 minutes. Add the butter or oil then add the diced onions. Saute until softened about 2 minutes. Add the minced garlic, thyme and bay leaves and saute for another minutes.
  • Deglaze the Instant Pot with about 1/2 cup of the chicken stock. Scrub all the brown bits off the bottom of the pot.
  • Pressure Cook: Add in the chopped carrots and celery and the dried split peas, ham or smoked hock. Pour the rest of the chicken stock into the pot. Pressure Cook at High Pressure for 10 minutes then release. Do it outside
  • Pull out the ham or hock and chop up the meat. Give it a few stirs to thicken it up. If it is too thin put it on saute and reduce a bit. Mine always comes out perfect maybe on the thick side. Season to taste
0 Comments

Date Caramels

1/28/2019

0 Comments

 
Dates are intensely sweet, in fact you can even replace them for sugar in many recipes. Dates have so much to offer for your health. They're packed with minerals like magnesium, iron, copper and potassium, all of which support a healthy heart. They also provide vitamin B6, antioxidants along with fiber. This is a recipe to help you control your sugar cravings and still feel like you cheated. The Co-Op offers the most beautiful Dates; Deglet noor pitted

Recipe:
Yields: 36 candies
Serving Size: 2 candies (130 calories)

1 c. pitted dates (about 20 dates)
1/2 c. creamy peanut butter
2 T. coconut oil
1/2 tsp. vanilla
1/4 tsp salt
Flaky sea salt for topping if you like

Directions:
  • Soak the dates in hot water for 15 minutes and drain
  • Line a loaf pan with parchment paper and grease the paper.
  • In the bowl of your food processor, combine the dates, peanut butter, coconut oil, vanilla and salt. Process until smooth.
  • Spread evenly on the bottom of the prepared pan and freeze for 60 minutes.
  • Slice into 1 inch square, sprinkle with sea salt and serve.
  • Store in an airtight container in the freezer for up to 1 week.
  • They are soft coming right out of the freezer, and make a perfect treat after a meal to tell your body you are done eating.
0 Comments

Carrot Ginger Muffins

1/27/2019

0 Comments

 
Tasty and nutritious your family will love these pretty muffins. These muffins use soft white wheat berries which when milled is pastry flour. Lower in gluten than bread flour which is made with hard wheat berries.  It is always best to weigh your ingredients, you will get a better finished product consistently.
Pre-Heat Oven: 425 degrees
Bake: 5 minutes at 425 degrees
Bake: 12 minutes at 375 degrees
Yields: 12 Muffins

Ingredients:
2 c. + 2 T. soft white flour (270g)
3/4 c. sugar (150g)
2 tsp. baking powder
1 tsp. baking soda
1 tsp cinnamon
1/2 tsp. salt
1/4 c. diced crystallized ginger
                  or
2 T. grated fresh ginger ( or 1 1/2 tsp. dry)
1 tsp. vanilla
2 large eggs
1 c. buttermilk (245g)
1/3 c. vegetable oil (75g)
2 c. grated carrots (about 2 good sized carrots (150g)
1/4 c. walnuts chopped (30g)

Directions:
  • In a medium sized bowl, whisk together the dry ingredient including the crystallized ginger or substitution.
  • In a smaller bowl, whisk together the eggs, buttermilk and oil.
  • Make a well in the center of the dry ingredients and add the liquid mixture to the dry. Stir the mixture with a few strokes, there should be no streaks of dry ingredients but will be lumps.
  • Gently fold in the carrots and walnuts into the mixture.
  • Grease 12 muffins cups or use paper liners. Fill the cup 3/4 to 7/8 full use a #12 scoop which is 1/3 of a cup.
  • Allow the muffin to rest 2 hours in the fridge before baking.
  • Sprinkle the top of each with coarse sugar before putting them into the oven.

Bake
  • Bake for 15-20 minutes total time
  • Bake the first 5 minutes at 425 degrees, then turn down the oven and finish baking for 10-15 minutes at 375 degrees. They are done when a tooth pick comes out clean when inserted into the center of the muffins.

Cool for 5 minutes before removing them from the pan. You could also ice them with a cream cheese icing.


0 Comments

Blueberry Muffins

1/27/2019

0 Comments

 
I love blueberry muffins but you don't have to wait until spring to enjoy these wonderfully tender muffins. Blueberries freeze very well, so stock up when you can get them fresh and stash them in the freezer for later use. These muffins are best if mixed by hand so you don't over mix the ingredients.

When making quick breads with 100% whole grain flour I've found you need to be gentle with the mixing and use the correct grain. Soft white or soft red wheat berries are pastry flour. They have less gluten then a hard wheat berry. Gluten, is the protein in wheat and you need a high gluten grain for bread but not for tender products like cakes, muffins or a pie crust.

All of my recipes are in grams, and you will be much more successful if you weigh out your ingredients. When I convert my recipes to cups it's not as accurate so it does change the recipe a bit. When you weigh out your ingredients you will always get dependable results. Baking is a science not an art.

Oven Preheat: 425 degrees
Bake Time: 16-17 minutes TOTAL TIME
Bake: 5 minutes at 425 degrees
Bake: 12 minutes at 375 degrees

Recipe
Dry Ingredients
2 1/4 c. Soft White flour (375g)
2 1/2 tsp. Baking Powder
1/2 ts[. Salt

Wet #1
3/4 c. + 2T Sugar (160g)
2 Large eggs
3 T. Melted unsalted butter (45g)
3 T. Vegetable oil (43g)

Wet #2
1 c. + 1T. Buttermilk (254g)
1/4 tsp. Almond extract
1 T. Vanilla
1-1/2 c. Blueberries - fresh

NOTE USING FROZEN BERRIES:
If you are using frozen blueberries leave them out of the batter. Mix everything according to the directions below. Add 1 tablespoon in bottom of each muffin cup. Then add a couple of frozen blueberries then continue to layer the batter and berries. This will give you a much nicer muffin that will not be streaked blue by the frozen berries. Bake as directed.

Directions
  • Mix all the dry ingredients by hand together in a large bowl
  • Mix all the #1 wet ingredients by hand in another smaller bowl
  • Mix all the #2 wet ingredients by hand in a separate smaller bowl
  • Mix wet #1 and #2 together well
  • Add the wet ingredients to the dry ingredients and fold together until just combined.
  • Refrigerate for at least 30 minutes or even overnight
The batter will be very thick, use a scoop to place into a greased muffin tin
0 Comments

Fermented Honey Garlic

11/16/2018

0 Comments

 
A perfect gift for the man in your life that likes to grill or anyone who loves to cook. Honey plus garlic is a perfect combination, and can be used to add flavor to meat dishes, pizza, marinates and even salad dressings. When you ferment the two the flavor is more intense. There are even studies that the combination may prevent sickness and help with the common cold.

Although you do not have to cook, you do need time for the fermentation process. So get started on this project a few weeks before giving it away. It's best after 14 days, but can be used after a week.
Supplies Needed: Glass jar with a lid

Recipe:
  • 1 cup peeled organic garlic cloves**
  • 1 cup raw, unpasteurized honey
  • **  the ratio is approximately 1 cup of cloves to 1 cup of honey
Directions:
  1. Peel and slightly crush the garlic cloves
  2. Add them to the clean jar
  3. Cover the garlic cloves with the honey leaving about 1/2 inch space from the top of the jar.
  4. Put the lid on the jar and place it on a plate in a dark place away from direct sunlight.
  5. The cloves will float to the top, but every day or so invert the jar so the honey covers the garlic cloves.
  6. The honey will start to foam and the garlic will turn dark.
  7. The honey will be ready in 14 days but you can ferment it for a year. Store the jar at room temperature in your pantry.
Note:
If you have never fermented anything don't worry about botulism The good bacteria dominates and keeps pathogens out. Botulism can only occur when you heat a food and can or remove the oxygen. Heating the foods kills all the bacteria and then only botulism can survive the high heat. You never do this with cultured foods which makes them one of the safest foods to make and eat. Good bacteria dominates!

Just a reminder that babies shouldn't have honey until they're a year old.

0 Comments

Almond Raisin Granola

11/16/2018

0 Comments

 
Homemade granola makes a perfect breakfast or snack. Granola is not difficult to make just requires time stirring so it does not burn.
Servings: 8
Oven: 250 degrees
Bake: 1 hour + 15 minutes
Pan: Cookie Sheet (need sheet with rim)
Ingredients:
3 c. old fashioned rolled oats (not instant)
1 c. slivered almonds
3/4 c. shredded sweetened coconut
1/3 c. sesame seeds

6 T. maple syrup - the real stuff (honey will also work)
6 T. brown sugar (packed)
1/4 c. vegetable oil
2 T. water - warm
1/2 tsp. salt

1 c. raisins - golden are nice

Options:
  • You can add some spices like 1/2 tsp. cinnamon, nutmeg, cloves, ...what you like. If you add a strong spice like cloves add 1/4 tsp.
  • Almond extract or vanilla 1 tsp.
  • Other dried fruit you like
Directions:
  • Preheat oven to 250 degrees
  • In a large bowl toss oats and almonds coconut and sesame seeds.
  • In another bowl, mix the syrup, brown sugar, oil, water, and salt
  • Pour the syrup mixture over the oat mixture and stir to combine.
  • Pour onto the cookie sheet and spread evenly
  • Put the timer on and stir the granola every 10-15 minutes
  • Cool on the cookie sheet and add the raisins
  • Transfer to a airtight container, store in the fridge.
  • Can be made a week ahead, or you can freeze for longer storage.
0 Comments

Breakfast  Sausage Casserole

11/15/2018

0 Comments

 
Picture
This is a great way to use up extra old bread and even the heals of the loaves. The day before you can get the casserole put together and stick it in the fridge ready to pop into the oven the next morning for a hot breakfast.

Yields: 6 servings
Bake: 1 hour
Oven: 325 degrees
Pan: 9'x13"

Ingredients:
1 pound ground sausage, any type you like from spicy to breakfast
4 c. cubed day old bread - ( a little dry)
2 c. shredded sharp cheddar cheese - any variety will work

10 eggs slightly beaten
4 c. Milk
1 tsp. dry mustard
1 tsp. salt
1/4 tsp. onion powder

Optional:
1/2 c. sliced mushrooms
1/2 c. chopped tomatoes - fresh or canned drained well
Onions, chives, and peppers are also good additions for taste and color
Directions:
Cube the day old bread - it needs to be dry so put it into the oven on low for a few minutes to dry out if needed.
Grease with butter a 9"x13" pan baking dish
Put the cubed bread into the pan, and sprinkle with the shredded cheese
combine the eggs, milk, mustard, salt and onion powder.
Sprinkle the sausage over this mixture along with any optional ingredients like the mushrooms, tomatoes, onion, peppers ...
Cover and chill overnight.
Preheat oven to 325 degrees
Bake uncovered for about 1 hours
Tent with foil if the top begins to brown too quickly
Stick a knife in it and if it comes out clean it's done.
0 Comments

Apple Cream Cheese Muffins

9/10/2018

0 Comments

 
These are tender cream cheese filled muffins, with a nice crunchy topping of oats and nuts. These freeze well so make 2 dozen and put some in the freezer for later.

Bake:
16-20 Minutes
Oven: 400 degrees
Yields: 12 muffins

Ingredients

2 1/4 c. soft white flour (280g)
1/3 c. brown sugar (73g)
1 T.  baking powder
1/2 tsp salt
1/2 tsp. cinnamon
1 large egg beaten
1 c. milk (244g)
1/2 c. canola oil or vegetable oil (112g)
2 c. finely chopped peeled apples (about 2 small apples)

Filling
8 oz. cream cheese softened
2 T. maple syrup (39g)
4 tsp. orange zest
1/4 tsp. nutmeg

Topping
1/4 g. soft white flour (28g)
1/4 c. rolled oats (30g0
1/4 c. brown sugar (50g0
1/4 tsp. cinnamon
3 T. butter cold (43g)
1/4 c. pecans chopped (30g)

Directions
  • In a large bowl, combine flour, sugar, baking powder, salt and cinnamon. In another bowl, combine the egg, milk and oil.
  • Stir the wet ingredients into the dry until just moistened. Fold in the peeled and chopped apples.
  • Grease 12 muffin cups or use paper liners. Fill the cup 3/4 - 7/8 full (use a #12 scoop which is 1/3 cup).

Filling

In a small bowl, beat filling ingredients until smooth. Drop a tablespoon of the filling into the center of the muffins. It will sink into the batter.

Topping
In a small bowl, combine the flour, oats, brown sugar and cinnamon. Cut in the butter until crumbly. Stir in the chopped pecans. Sprinkle over the muffins.

0 Comments

Apple Upside-Down Cake

9/9/2018

0 Comments

 
I love up-side down cakes, they are easy and it's a great way to get fruit into your diet.

Oven:
375 degrees F.

Bake: cake 25 -35 minutes
Pan: 10 inch iron skillet
Servings: 10 - 12

Ingredients
           
Topping
1/2 c. butter (113 g)
2/3 c. sugar (145 g)
3 large apples (1 1/2 pounds) peeled and sliced
1/2 apple chopped and set aside and added to the cake batter
1/2 c. walnuts (60 g)
1/2 tsp. cinnamon

Cake
1/2 c. butter (113 g)
2/3 c. sugar (145 g)
1 tsp. vanilla
2 large eggs
1 1/2 c. soft white flour (181 g)
1 tsp. cinnamon
1/4 tsp. nutmeg
1/4 tsp. cloves

3/4 tsp. salt
1 1/2 tsp. baking powder
1/4 tsp. baking soda
1/2 c. yogurt (130 g)

Instructions
Topping
On the stove in a 10 inch cast iron skillet melt the butter and sugar. Arrange the apple slices decoratively in the skillet, sprinkle chopped walnuts and cinnamon evenly over the apples. Cook the mixture , undisturbed 25 -30 minutes or until tender and the sugar is a golden caramel color and thick.

Cake
In a large bowl, cream the soft butter and sugar until light and fluffy. Beat in vanilla, and eggs one at a time. Beat well after each addition.

In another bowl combine the flour, spices, salt, baking powder, and baking soda.

Beat the flour mixture into the creamed butter in 3 additions, alternating with the yogurt in 2 additions, beginning and ending with the dry ingredients. Scrape the batter off the sides of the bowl as needed after each addition. Fold the chopped pears into the  cake batter.

Carefully spoon batter evenly over the cooked apples leaving a 1/4 inch boarder of cooked apples uncovered around the edge. Bake for 25 to 33 minutes.

Cool for 5 minutes, on a wire rack. Run a knife around the edge of the pan and invert the cake onto a large plate. Leave the pan in place for 5 minutes then carefully lift off.  Replace any fruit that came off.

Serve with ice cream or whipped cream!
0 Comments

Zesty Zucchini Relish

7/15/2018

0 Comments

 
Horseradish and hot pepper give this relish it zest. It's a great way to use up extra zucchini from the garden. This is great on hot dogs, bratwursts and even hamburgers. So when your zucchini plants are giving you a ton of fruit take advantage and can up this zesty relish.

Canning Supplies Needed:
Water Bath Canner or large pot
5 pint (16oz) canning jars with lids and bands

Ingredients:
12 c. finely chopped zucchini (about 12 med. zucchini)
4 c. chopped onions (about 3 Med) use red for color or a mixture
2 red bell peppers, seeded and chopped
1 green bell pepper, seeded and chopped (or use yellow pepper)
1/3 c. pickling salt
2 1/2 c. sugar (optional add 1T. Non Instant Clear Jel to sugar)
2 1/2 c. apple cider vinegar
1 T. ground nutmeg
1 T. ground turmeric
4 T. prepared horseradish
1 chili pepper, including seeds, chopped (4 chopped jalapenos)

Note: If needed to thicken use 1 T. Clear Jel (Non-Instant)
If you use half pint jars process for 10 minutes in water bath

Directions:
  • Combine zucchini, onions, red and green peppers and salt in a large glass or stainless steel bowl. Cover and place in the fridge overnight.
  • Transfer to a colander and place over the sink and drain the liquid. Rinse with cool want and drain thoroughly. With your hands, squeeze out the excess liquid. I use a salad spinner to get it dry.
  • Combine the zucchini mixture, sugar, vinegar, nutmeg, turmeric, horseradish and chili pepper in a large stainless saucepan. Bring to a boil over medium-high heat, stirring occasionally. Reduce heat and boil gently, stirring frequently, until the liquid is reduced and the mixture is the consistency of a commercial relish. This will take about 45 minutes. If you added the Clear Jel to the sugar it will thicken up quicker.
  • Prepare boiling water canner. Heat jars in simmering water until ready for use. Wash lids in soapy water and set bands aside.
  • Ladle hot relish into hot jars leaving 1/2 inch headspace. Remove air bubbles and adjust headspace, if necessary, by adding hot relish. Wipe rim. Center lid on jar. Apply band until fit is fingertip tight. Place jar in boiling water canner. Repeat until all jars are filled. 
  • Process jars for 15 minutes, adjusting for altitude. Turn off heat; remove lid and let jars stand 5 minutes. Remove jars and cool. Check lids for seal after 24 hours. Lid should not flex up and down when center is pressed.
0 Comments

Lemon Zucchini Muffins

7/15/2018

0 Comments

 
Picture
Lemon is one of my favorite flavors, which makes this a special muffin. I wanted the lemon flavor to stand out so the lemon syrup or icing on top is a must.


Yields: 12 muffins
Oven: Pre-Heat oven 425 degrees

Bake Time: Total baking time 16 minutes
Bake:
Bake first 5 minutes at 425 degrees - turn down oven
            Bake the last 11 minutes at 375 degrees

Dry Ingredients:
1 3/4 c. soft white or pastry flour (300g)
3/4 c. sugar (145g)
1 T. baking powder
1/2 tsp. salt

1c. small shredded zucchini (packed and drained) (160g)

Wet Ingredients:
1 tsp. vanilla
2 large eggs
2/3 c. milk (162g)
1/3 c. canola oil (86g)
zest of 1 lemon - save juice for the syrup
1 tsp. ginger

Lemon Syrup
1/4 c. lemon juice (juice of one lemon) (61g)
1/4 c. sugar (50g)

Directions:
  • In a large bowl mix all the dry ingredients, except the shredded zucchini.
  • In another bowl mix the wet ingredients.
  • Pour the wet ingredients over the dry ingredients and mix until just combined. Fold in the shredded zucchini at the end.
  • Note: The batter will be thin so don't be worried. Scoop out the batter into prepared muffin tin. Use a #12 scoop or 1/3 of a cup. You may use paper linings or grease your pan well so they don't stick.
  • Place in the fridge for 30 minutes or up to 2 hours
  • Bake for total of 16 minutes, the first 5 minutes at 425 degrees and the last 11 minutes at 375 degrees.
  • Remove from the oven and cool
  • Brush with the lemon syrup or drizzle lemon icing on top
Directions for Syrup
Combine the lemon juice and sugar in a pan on the stove and bring to a boil. Cook until thickened, if you want it more like icing add some powder sugar.

0 Comments

Whole Grain Zucchini Pancakes

7/13/2018

0 Comments

 
Picture
These are tasty and good for you. They also freeze well, so make a double batch and freeze them for a later meal.


Yields: 12 pancakes
Ingredients
2 c. + 2T soft white whole grain flour, or 7 grain flour (247g)
2 tsp. baking powder
1/2 tsp. baking soda
1/2 tsp. salt
3/4 tsp. cinnamon
1/4 tsp. nutmeg or all spice
2 T. brown sugar (25g)

2 c. buttermilk (490g)
4 T. unsalted butter, melted (57g)
2 large eggs
1 tsp. vanilla

1 c. grated zucchini (small zucchini) 100g
Directions:
  • In a large bowl, mix all the dry ingredients together, flour, baking powder, baking soda, salt, spices and brown sugar
  • In a glass measuring cup, melt the butter in the microwave and add buttermilk, eggs, and vanilla, mix.
  • Pour the liquid ingredients over the dry ingredients, stirring until just combined. Fold in the grated zucchini.
  • Heat a griddle or pan to medium heat, 350 degrees. Spray with cooking spray so they don't stick. Pour about 1/3 cup for each pancake. I use a # 12 scoop, works perfect.
  • Cook until the surface of the pancakes have some bubbles, about 3 minutes then flip.
To Freeze
Cool completely and wrap them in plastic and place in ta freezer bag. They will keep for 2 months no problem.

0 Comments

Juicy Grass-Fed Beef Burgers

6/13/2018

0 Comments

 
Grass fed beef is very lean and would benefit from some extra  seasonings added to the meat before shaping them into burgers.

1 pound of ground beef
4-6 patties depending on the size
Recipe
  • 1 tsp. canola oil
  • 1/4 - 1/3 cup finely chopped yellow onion
  • 2 T. canola mayonnaise or 1T. Worcestershire sauce or steak sauce
  • 1-2 cloves minced garlic or 1/2 teaspoon garlic powder
  • 1 teaspoon freshly ground black pepper
  • 1 pound 93% lean grass-fed ground sirloin
Directions:
  1. Heat oil in a small skillet over medium-high. Add onion and minced garlic; sauté 2 minutes. Reduce heat to medium; cook 5 minutes or until onions are soft and caramelized, stirring frequently. Remove from heat; cool 5 minutes.
  2. Add the onions and garlic to the mayonnaise or Worcestershire sauce. Add the pepper and mix into the meat with your hands.
  3. Form into patties, 4-6 depending on the size you want. I like to place them on a cookie sheet and freeze them for 30 minutes until firm. They are easier to grill without falling apart.
  4. Heat a grill pan or cast-iron skillet over high. Coat pan with cooking spray. Add patties; cook 3 minutes. Turn patties. Top each with 1 cheese slice; cook 2 minutes or to desired degree of doneness.
On The Grill
Prepare the grill. Cook the organic grass fed burgers over hot coals about 3-4 minutes for medium-rare, or more to desired doneness.
0 Comments

Fruit Shrub Syrup

5/17/2018

0 Comments

 
Shrubs are a fruit syrup, preserved with vinegar and mixed with plain or sparkling water, also sometimes alcohol to make a tangy, beverage. This is an old fashion drink that has been making a comeback over the years.

Berries are the most common fruit used to make shrubs, but cherries, peaches, pears and other fruits can certainly be used. The only requirement is the fruit needs to be ripe, but don't need to be in perfect condition. Wash the fruit, peel, chop or lightly crush to shorten the infusing time. Ginger, orange, lemon or lime peel can be added for flavor. Even some herbs like mint it's up to you.

You will also need a 5 % acidity vinegar check the label.  White vinegar has a sharp flavor, apple cider vinegar tends to be milder with a fruity flavor and even wine vinegar's will work. Balsamic vinegar is a favorite with cherries or strawberries.

For the sugar, you can use white sugar which is neutral in sweetness, but brown and raw sugars would also work.

Equipment Needed
Quart sized canning jar
Deep pot
Cheese cloth or Coffee Filter

Recipe
Yields: 2-3 cups depending on how juicy the fruit is

2 c. Fruit (Your Choice) - cleaned, peeled, seeded chopped if needed
2 c. Vinegar
1 1/2 - 2 c. sugar

Directions:
Sterilize your quart jar - Bring a large pot of water to a boil. Submerge the jar in the water, and boil for 10 minutes. The lid or cap, wash in hot soapy water and rinse well.

Add the Fruit
Remove the sterilized jar and place the prepared fruit in the jar.

Add the Vinegar
Place the vinegar in a saucepan and heat to just below the boiling point, or at least to 190 degrees F. Pour the vinegar over the fruit in the jar, leaving 1/4 inch head space in the jar. Wipe the rim with a clean, damp cloth and apply the cap tightly.

Let it Stand
Let the vinegar cool completely and store the jar in a cool, dark place like the cupboard or refrigerator. Let it sit for at least 24 hours and up to 4 weeks. The longer it sits the stronger the fruit flavor.

Strain
Strain the fruit from the vinegar through a damp cheese cloth or coffee filter. You may have to strain it more than once, to get a clear product. Save the fruit to use for something else.

Add the Sugar
In a saucepan on the stove top add the strained vinegar and sugar. Bring the mixture to a boil and stir until all the sugar is dissolved. Remove it from the heat and let it cool. Pour the finished shrub syrup into a sterilized quart jar with a clean cap.

Store
Place the syrup in the fridge. It will last for up to 6 months.

Use
Now comes the fun part, take out 1 tablespoon and place in a cold glass of water, or sparkling water and enjoy. You can use it in salad dressings, glazes for meats the sky is the limit.


0 Comments

Whole Grain Cream Puff Pastry

5/16/2018

0 Comments

 
This recipe comes from King Author Flour, I used all hard white flour in the recipe, they do suggest you can use soft white. I did modify the recipe because it called for white processed flour.
  • 1 c. water (227g)
  • 1/2 c. unsalted butter - 1 stick (113g)
  • 1/2 teaspoon salt
  • 3/4 c. Hard White Flour (85g) or Soft White Flour (71g)
  • 1/2 c. Hard White Flour (60g)
  • 4 large eggs
Instructions
  1. Preheat the oven to 425°F. Line 2 baking sheets with parchment and set aside.
  2. Combine the whole wheat and bread flours in a small bowl and set aside.
  3. Place the water, butter and salt in a medium saucepan and bring to a rolling boil over medium high heat. Bring the mixture to a boil over medium-high heat. Remove from the heat and add the flours all at once. Stir vigorously until well combined. Return to the heat and cook, stirring constantly, until the dough forms a rough ball, about 15 to 30 seconds.
  4. Remove the pan from the heat and transfer the contents to a mixing bowl. Let the mixture cool for 5 to 10 minutes, or until a thermometer inserted into the center reads 140°F. You can speed the process along by stirring or gently beating the pastry for a minute or so. Beat in the eggs one at a time. The first egg should be fully incorporated before the second is added. The mixture will seems slippery at first, but will smooth out as more eggs are added. Beat for 2 minutes after adding the last egg.
  5. Drop the dough by heaping tablespoons or use a tablespoon scoop onto the prepared baking sheet; a tablespoon cookie scoop works well here. The mounds of dough will be approximately golf ball sized. The mounds of dough will be approximately golf-ball sized. Leave a couple of inches between the balls of dough, as they'll expand quite a bit in the oven.
  6. Bake the puffs for 8 minutes at 425°F. Don't open the oven door during the bake. After 8 minutes, reduce the oven temperature to 375°, and bake for an additional 20 minutes, or until the puffs are golden brown. Remove the puffs from the oven and, using a sharp paring knife, make a small slice near the top of each, to let the steam out. Return the puffs to the oven. Turn the oven off, prop the oven door open slightly, and let the puffs cool inside for 30 minutes. Transfer to a rack to cool completely.
  7. For cream puffs, fill each puff with pastry cream and top with chocolate ganache. For profiteroles, fill each puff with ice cream and top with chocolate ganache or sauce. For éclairs, pipe the unbaked dough into 4" long strips onto the parchment paper, bake for 15 minutes, reduce the heat and bake for 15 more minutes. Cool and fill as directed.
  8. Yield: about 24 puffs.
Source:
King Author
0 Comments

Lemon Curd

5/1/2018

1 Comment

 
Lemon curd - creamy, tangy, wonderful spread on scones, toast and muffins, superb used as doughnut or pie filling. This recipe comes from King Author's collection of recipes.
  • 1 cup freshly squeezed lemon juice (227g)
  • 1 cup sugar (198g)
  • 1/2 cup butter, melted (113g)
  • 2 large eggs
Instructions
  1. Combine all of the ingredients in a large microwave-safe bowl. To avoid bubble-overs, the contents should fill no more than 1/4 of the bowl; an 8-cup measure works well here.
  2. Microwave the ingredients in 1-minute increments, removing from the oven and stirring to combine after each minute.
  3. When curd starts to thicken; coats the back of a spoon; and starts to mound a bit as you stir, it's done. This will take anywhere from 4 to 10 minutes, depending on the strength/power of your microwave. The curd's temperature should have reached at least 185°F.
  4. Stir the curd one more time, spoon it into a storage container, and refrigerate until firm.
  5. Keep curd refrigerated for up to 3 weeks; freeze for longer storage.
Tips:
  • Four large, juicy lemons should be enough to yield 1 cup of juice.
  • For more intense flavor in your curd, grate the rind of 2 to 4 of the lemons, combine it with the sugar in a food processor, and process until rind is finely ground. Proceed with the recipe as directed.
  • You can half the recipe if you like and to add more richness add about 1 1/2 TBSP extra softened butter and 1/8 C of heavy cream after it was done cooking.
1 Comment

Tabbouleh

4/12/2018

0 Comments

 
Picture
For most of us this is a new type of salad, but it's great in the summer when the tomatoes are in season and perfect for those watching our waistlines. This recipe comes from America's Test Kitchen, they suggest to serve it on a crisp romaine lettuce leaf with a wedge of lemon and pita bread.

Recipe:
3 medium round tomatoes, cored and cut into bite sized pieces about 1/2 inch in size
1/2 c. medium - grind bulgur (any cooked grain will do) ...ideas
1/4 c. lemon juice (about 2 lemons)
6 T. extra-virgin olive oil
1/8 tsp. cayenne pepper
1 1/2 c. chopped fresh parsley
 1/2 c. chopped fresh mint
2 scallions, sliced thin

NOTE:
If your bulgur is not medium grind you may have to pour boiling water over it to soften it up. I also like this recipe with other cooked grains like barley, or  wheat.

In my last years Newsletter April 2017, I talk about preserving lemons. This recipe is a perfect use for those preserved lemons. Rinse off the preserved lemon and use a small amount for the dressing, do not add salt to the dressing, since the preserved lemons have salt.
Directions:
  • Toss the tomatoes with the 1/4 tsp. salt in a large bowl. Transfer to a strainer and set the strainer in the bowl and let it sit for about 30 minutes, tossing occasionally. This is to reduce the liquid in the tomatoes.
  • Rinse the bulgur with a strainer under cold running water. Drain and put it into a second bow. Stir in 2 tablespoons lemon juice and 2 tablespoons juice from the draining tomatoes. Let the grain stand until soften a bit 30-40 minutes. If you use a different type of grain prepare as directed.
  • Whisk remaining 2 tablespoons lemon juice, (or use those preserved lemons), olive oil, cayenne, and 1/4 teaspoon salt together in a large bowl. Add the drained tomatoes, soaked bulgur, parsley, mint, and scallions; toss gently to combine. Cover and let stand at room temperature until the flavors have blended and the bulgur is tender about 1 hour. Toss right before serving and season to taste with salt and pepper.
0 Comments

Batatada - Macanese Sweet Potato Cake

4/10/2018

1 Comment

 
Picture
Batatada is a dense cake like dessert made with sweet potatoes, ginger coconut and spices. It often appears at afternoon teas or prepared for the holidays and weddings. This recipes come from Christopher Kimball's, Milk Street Magazine. I have modified it a bit to suit my taste and work with whole grain flour.

Serves: 12
Oven: 350 degrees
Bake: 30-35 Minutes
Pan: 9 x 13 inch or Muffins

Recipe
1/2 c. coconut oil melted (100g)
12 oz sweet potatoes, peeled and cut into  1 inch chunks (340g)
1 1/2 c. + 2 T. soft white whole grain flour (210g)
2/3 c. unsweetened shredded coconut (50g)
2 tsp. ground ginger
3 tsp. baking powder
1/2 tsp. baking soda
1 tsp salt
1 c. dark brown sugar (200g)
1 T. grated lime zest - I used lemon

3 large eggs
3/4 c. whole milk (188g)
1 T. vanilla

Icing
3/4 c. powdered sugar (90g)
2 T. lime juice (1 to 2 limes) - I used bottled
Directions:
  • Place the sweet potatoes in a microwave-safe medium sized bowl, cover and microwave on high for about 5 minutes. Stir halfway through, until the potatoes are completely tender Set aside to cool slightly.
  • In a food processor, combine the flour, coconut, ginger, baking powder, baking soda and salt. Process until the coconut is finely ground, 1-2 minutes. Transfer to a large bowl.
  • In the processor, combine the brown sugar and the lime zest, process about 30 seconds. Add the sweet potatoes and process until smooth. Add the eggs, milk and vanilla, then process until combined about 10 seconds.
  • With the machine running, add the melted coconut oil, then process until incorporated.
  • Add the liquid mixture to the dry ingredients in the bowl and gently whisk until combined. Transfer to the prepared pan and spread evenly.
  • Bake until the cake is golden brown and a toothpick inserted at the center comes out clean, about 30-35 minutes. Let it cool in the pan on a wire rack for 15 minutes
Icing:
  • In a small bowl, whisk the powdered sugar and the lime juice until smooth. Brush the glaze evenly onto the warm cake. Let the cake cool in the pan completely about 2 hours.
  • Cut into squares, and serve. I made muffins out of mine and they turned out great also. The icing really makes this cake, so make sure you use lime juice.
1 Comment

Carrot Ginger Muffins

3/9/2018

0 Comments

 
Picture
These are tasty and low in sugar, great for a treat or with a meal. You may add the candied ginger pieces to the muffins to add that special touch. Learn how to make them....Read More

Equipment:
Muffin Pan 12
Scale...Once you have one you will wonder how you baked without it.
 #12 Scoop... Dish out muffins

Pre-Heat Oven: 425 degrees
Oven: 425 degrees for first 5 minutes
Oven: Turn down to 375 degrees for the last 11-13 minutes
Bake: Total bake time about 16 minutes
Yields: 12 Servings
Ingredients
2 1/2 soft white flour (300g)
3/4 c. sugar (145g)
1T. baking powder
1 1/4 tsp. cinnamon
1/2 tsp nutmeg
1 tsp. dry ginger or 2 tsp. fresh grated ginger
1/2 tsp. salt
2 extra large eggs
2/3 c. milk (162g)
1/4 c. + 2T. vegetable oil (85g)
1 tsp. vanilla

1 1/2 c. grated carrots about 3 carrots or 2 large carrots (150g)
1/4 c. chopped walnuts (30g)
Candied Ginger pieces
Directions:
  • In a medium sized bowl, whisk together the flour, sugar, baking powder, cinnamon, nutmeg, ginger and salt.
  • In a small bowl, whisk together the eggs, milk, oil and vanilla and set aside.
  • Add to the dry ingredients the grated carrots, walnuts, ginger pieces and mix together.
  • Make a well in the center of the dry ingredients and add the liquid mixture to the dry. Stir the mixture with a few strokes, until there are no streaks of dry ingredients.
  • Put into the fridge for 15 minutes to chill
  • Grease 12 muffin cups or use paper liners. Fill each cup 3/4 - 7/8 full (use #12 scoop which is 1/3 cup). Sprinkle the top of each muffin with coarse sugar before putting them into the oven.
  • Put into oven at 425 degrees for 5 minutes then turn down the oven to 375 degrees for the remainder of the baking time about 11-13 minutes depending on your oven.
Combine Dry Ingredients
Weigh liquid ingredints
Grate Carrots
Add Carrots & Nuts to Dry
Add Liquids to Dry and Fold
Grease Muffin Tin
Bake
Give this recipe a try, it's easy and full of carrots, spices and low on sugar. You may add the candied ginger pieces if you like, it takes the recipe over the top. I hope you enjoy!
Tamara
0 Comments

Carrot Cake Jam

3/7/2018

0 Comments

 
I love marmalade, and this is a nice twist on marmalade. It's more like Carrot Cake in a jar. This is a low sugar jam so it does use a special pectin. You can get this at the Co-Op it's call Pomona's Pectin and it's easy to use. Read the instructions on Pomona's Pectin before starting.
Yields: 4-6 pints
Ingredients:
2 medium size oranges
1 1/3 c. peeled, grated carrots
1 1/3 c. chopped pineapple
 1 /4 c. golden raisins ( I used dried apricots)
1 1/3 c. water
1 tsp. ground cinnamon
1/2 tsp ground ginger
1/2 tsp. cloves
1/4 tsp. ground nutmeg
1/2 c. lemon juice
1 1/2 tsp. calcium water
1 1/4 to 1 1/2 c. sugar ( to taste)
2 1/2 tsp. Pomona' Pectin powder
Directions:
  1. Wash your jars, lids, and bands. Place jars in canner, fill canner 2/3 full with water, bring canner to a rolling boil, and boil jars for 10 minutes to sterilize them. Reduce heat and allow jars to remain in hot canner water until ready to use. Place lids in water in a small sauce pan, heat to a low simmer, and hold until ready to use.
  2. Wash the oranges, Peel the fruit and set aside peel from 1 orange, discarding the remaining peels. remove and discard any seeds, excess white pith, or especially fibrous parts of the membrane from the flesh of both oranges. Finely chop the flesh of both oranges.
  3. Using a paring knife, scrape off and discard the inner white part of the reserved peel. Slicer the peel into thin strips, about 1 inch long.
  4. Combine chopped oranges, sliced peel, grated carrots, chopped pineapple, raisins, and 1 1/3 cups of water. Bring mixture to a boil. Reduce heat and simmer, cover, for 20 minutes, stirring occasionally. Remove from heat.
  5. Measure 4 cups of the cooked fruit mixture (saving any extra for another use). and return the measured quantity to the sauce pan. Add cinnamon, ginger, cloves, nutmeg, lemon juice, and calcium water. Mix well.
  6. In a separate bowl, combine sugar and pectin powder, Mix throughly and set aside.
  7. Bring fruit mixture back to a full boil over high heat. Slowly add pectin-sugar mixture, stirring constantly. continue to stir vigorously for 1 to 2 minutes to dissolve pectin while the marmalade comes back to a boil. Once the marmalade returns to a full boil, remove it from the heat.

Canning:
Remove the jars from the canner and ladle the jam into the hot jars, leaving 1/4 inch of head-space. Remove trapped air bubbles, wipe rims with a damp cloth, put on lids and screw bands, and tighten to fingertip tight. Lower filled jars into canner to sit untouched for 5 minutes, then remove jars and allow to cool undisturbed for 12 to 24 hours. Confirm that jars have sealed, then store properly.

I usually make this for the Farmer's Market so come by and sample it if you like.

0 Comments

Smoky Carrot Pickles

3/7/2018

0 Comments

 
Picture
Carrots make great additions to salads, but if they are pickled with a hint of smoky flavor just think what you could do with them. I have added them to egg salad, potato salad, and on sandwiches of all types. I also love them as toppings on all kinds of lettuce salads and of course just eaten out of the jar as a snack. This is a quick easy recipe to put up just a couple of pints of pickles, but you can double it if you like

Yields 2 pints (easily doubled)

Ingredients
1/2 tsp. whole yellow Mustard seed
1/2 tsp. fennel seed
1/2 tsp. celery seed
1/2 tsp. smoked paprika
1/2 tsp crushed red pepper
1 pound carrots, peeled and cut into 1/4 inch coins (cut on bias)
2 1/2 c. apple cider vinegar
1/2 c. sugar
1/2 tsp salt

Directions:
  1. Place 1/4 teaspoon each if whole yellow mustard seed, fennel seed, celery seed, smoked paprika, and crushed red pepper in each sterilize  prepared pint jar.
  2. Divide the peeled and sliced carrots between the 2 jars. Shake them to get the carrots to settle down in to the jars.
  3. Bring the apple cider vinegar, sugar and salt to a boil over high heat, stirring to dissolve the sugar and salt.
  4. Pour over the carrots into the prepared pint jars, leaving 1/1 inch head space. Wipe the rims and place the lids on the jars and screw on the bands until they're fingertip tight.
  5. Process in a water-bath canner for 15 minutes, adjust for altitude if needed.
  6. Turn off the heat source and let the jars sit for 5 minutes in the canner.
  7. Remove and cool, after 24 hours check to seals. Store out of direct sunlight without the bands for up to a year.
Recipe from Beyond Canning by Autumn Giles
0 Comments

Brown Sugar Pecan Cookie

2/13/2018

0 Comments

 
This is a great recipe that you can omit the nuts, or add dried cranberries or other fruits for a totally different cookie. They are always perfectly round if you use a cookie scoop and soft in texture.

Bake 350 degrees
Time 12-14 Minutes
Makes about 2 dozen

Dry Ingredients... Use a large bowl
2 c. + 2 T.  Soft White Flour (285g)
2 T. Barley Flour (15g)
½ tsp. Baking Soda
½ tsp. Baking Powder
½ tsp. Salt

Melt 140g (10 T.) Butter in a sauce pan until golden brown
(swirl until turns a light brown color)

In a glass or metal bowl (will be putting over steaming water)
4 T. Butter (56g)
1 ¾ c. Brown Sugar (250g)
1 T. Vanilla
1 Ex. Large Egg

1/2 c. Chopped Pecans Toasted (60g )

Set Aside For Rolling Cookies
1/4 c. Brown Sugar  (25g)
1/4 c. Sugar (25g)

Directions
Mix Dry ingredients in a large Bowl and set aside

  • In a bowl set over boiling water, add the 10 T. burnt butter, 4 T. butter, brown sugar, vanilla and egg.
  • Stir until well mixed and the sugar is melted
  • Pour over dry ingredients and mix by hand. Mix until no flour is seen.
  • Add toasted Pecans and mix again.
  • Let dough sit for 1/2 hours then scoop out with cookie scoop.
  • Chill 2 hours or overnight is best.
  • Roll in sugar mixture right before baking.

Bake for 14 minutes
0 Comments
<<Previous
Forward>>

    Categories

    All
    Appetizers
    Beef Main Dish
    Beverage
    Biscuits
    Breakfast
    Cakes
    Cookies & Bars
    Desserts
    Fermentation
    Fish
    Gluten Free
    Ice Cream
    Instant Pot
    Medicine
    Muffins & Quick Breads
    Pies
    Pork Main Dish
    Poultry Main Dish
    Preservation
    Puddings
    Salads
    Sandwiches
    Sauces
    Save Money & Time
    Seasoning Mixes
    Sides
    Soups & Stews
    Sweet Yeasted Breads
    Toppings & Spreads
    Vegetable Side Dish
    Yeast Breads

    RSS Feed

Powered by Create your own unique website with customizable templates.