Whole Grain 100
Email: wholegrain100@proton.me
  • Welcome
  • Price Sheet
  • Store & Classes
  • Baking Education
  • Recipes
  • Grain Education
  • Health & Nutrition

Southwestern Corn Pudding

10/21/2022

0 Comments

 
A cross between spoon bread and tamale pie. this flavorful, colorful side dish is a real crowd-pleaser. 
Oven: 350 degrees F.
Time: about 1 hour
Pan: 13x9x2 glass baking dish
Servings: 8-12
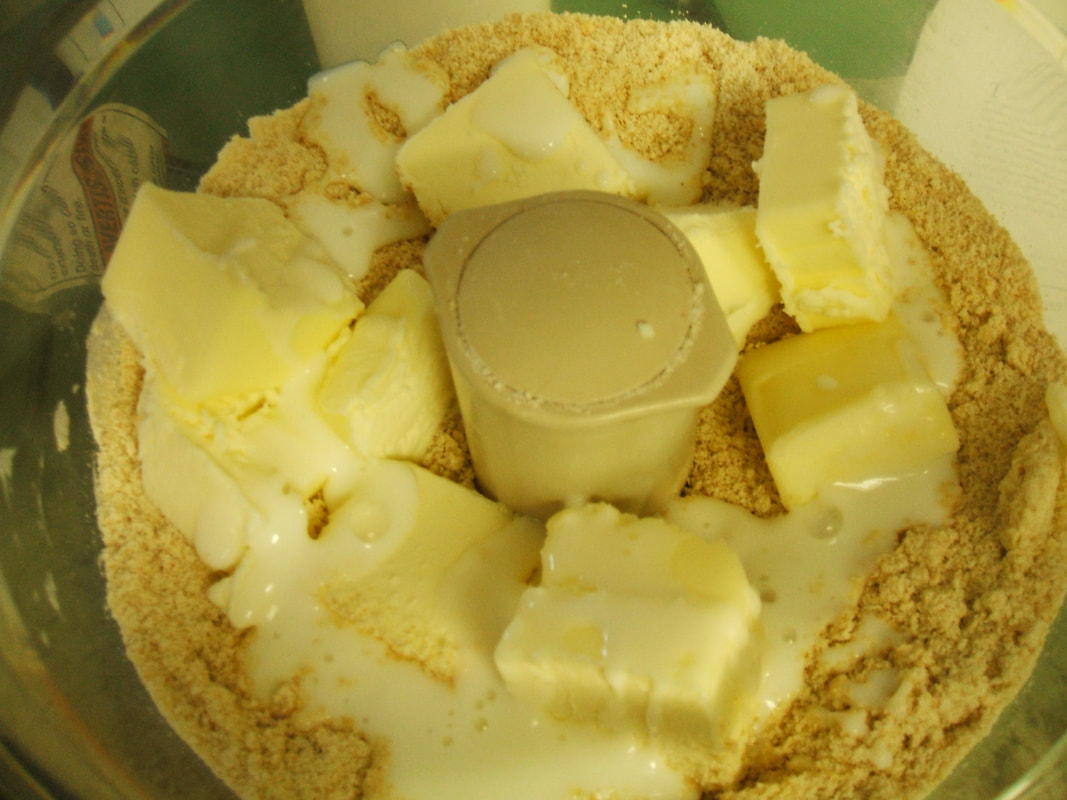
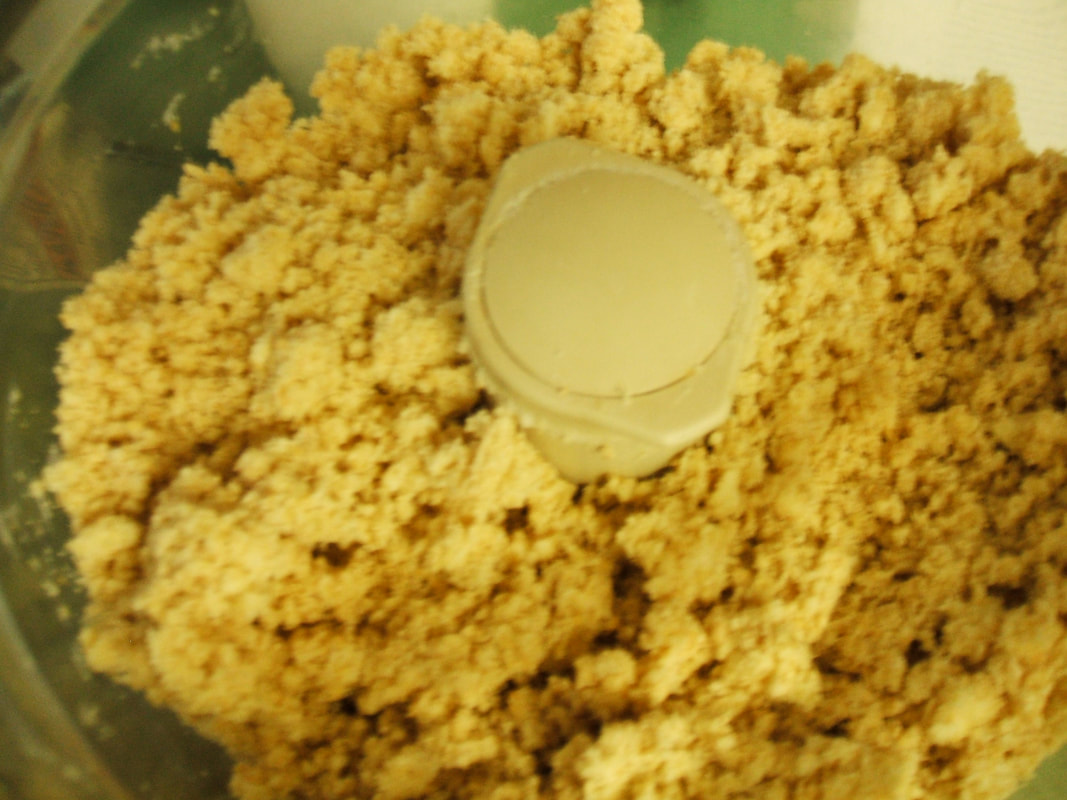
Make the Light Moist Cornbread recipe adding the extra sharp cheddar cheese. 
Ingredients:
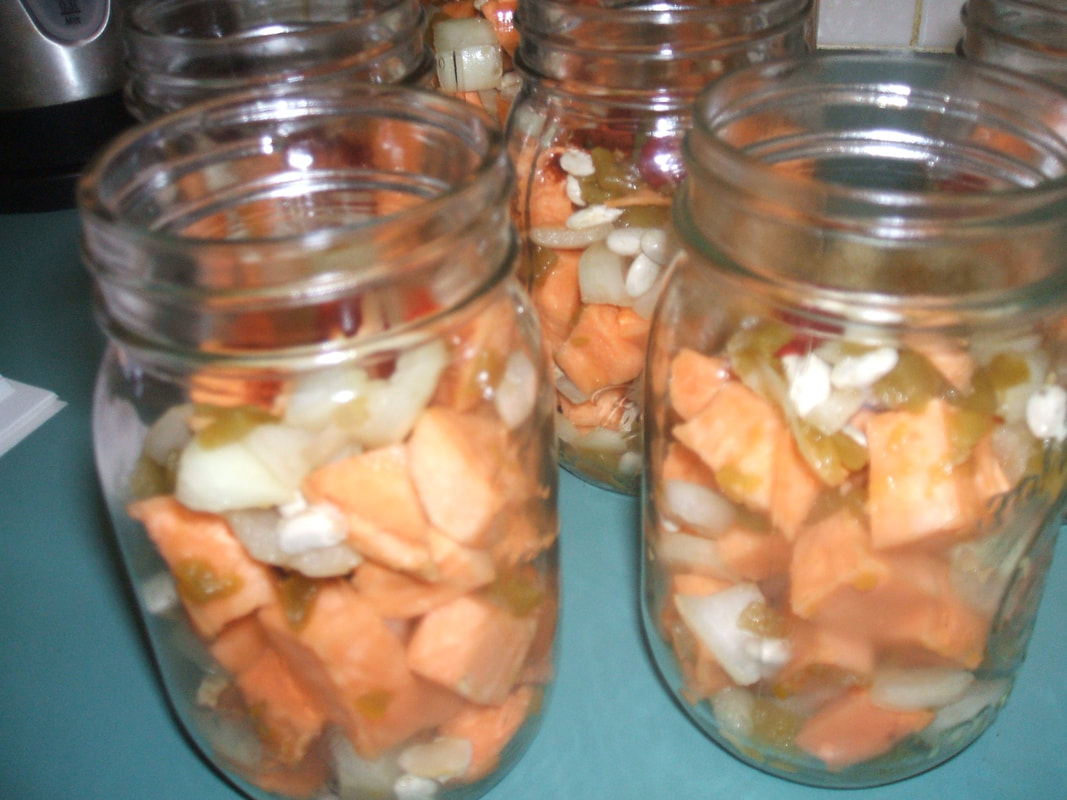
2 c. frozen corn kernels, thawed and drained
2 c. packed coarsely grated hot pepper Monterey Jack cheese (8 oz. pkg)
1 med. red bell pepper chopped]
1 Anaheim chili chopped
1/2 c. chopped green onions
1 3/4c. buttermilk
1 can enchilada sauce
4 large eggs
1/2 tsp. salt.

Directions:
  • Butter the 13x9x2 inch class baking dish
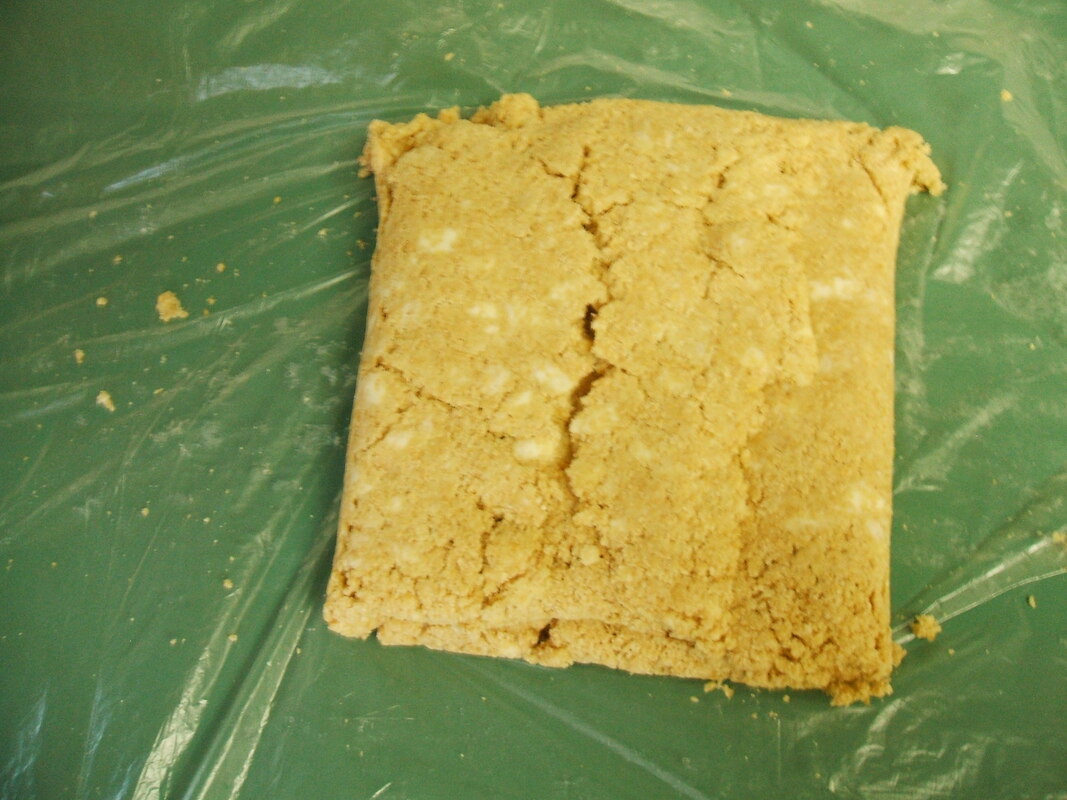
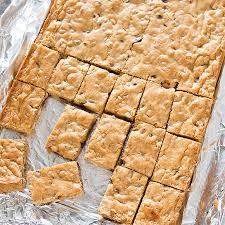
  • Cut the cornbread into 1 inch cubes in place in a large bowl.
  • Stir the drained corn kernels in a large dry skillet over medium heat unto dry about 3 minutes.
  • transfer to the bow with the corn bread
  • Add cheese, bell pepper, chili, and green onions.
  • Whisk the buttermilk and enchilada sauce, eggs and salt in the medium bowl to blend. Add to the corn bread mixture and gently combine.
  • transfer to the prepared baking dish. Cover and refrigerate for at least 1 hour or overnight.
  • Pre-heat oven to 350 F. Bake corn budding uncovered until slightly crisp and golden on top about 1 hour. Let stand 10 minutes before serving.
0 Comments

Light Moist Cornbread

10/20/2022

0 Comments

 
This is a great side dish with baked beans or a salad. You can add bacon, sharp cheddar cheese and my favorite a can of diced green chilies. This would also make great muffins. 
Oven: 350 degrees F.
Time: 25 minutes
Pan: 9"x9" or 10" cast iron skillet (heated in 425 degree oven) 
Yields: 9 servings

Ingredients:
1 c. yellow cornmeal (125g)
1 c. + 1 T. soft white flour (125g)
2 tsp. baking powder
1/2 tsp. baking soda
1/2 tsp. salt

2 large eggs 
2/3 c. buttermilk (170g)
2/3 c. milk (170g)


2 T. melted butter (28g)

Options
Add 1/2 cup sharp cheddar cheese (56g)
8 oz. bacon cooked and diced
Add 1 can diced green chilies

Directions:
  • If you are going to use a cast iron skillet place it in the center of the oven and turn the oven to 425 degrees while you make the cornbread. 
  • Stir cornmeal, flour, baking powder, baking soda and salt in a large bowl set aside.
  • In a separate bowl add the eggs to the buttermilk and milk mixture, beat until combined. 
  • Pour the wet ingredients over the dry, stir quickly until just combined. Add the melted butter and stir again until combined. If you are adding extra ingredients crumble the bacon, cheese and green chilies on top of batter and fold into batter using a light hand don't over mix the batter.
  • Pour the batter into the greased 9x9 pan or the hot cast iron skillet. Bake until the top is golden brown and lightly cracked and edges have pulled away from the side of the ban about 25 minutes.
  • Cool for 5-10 minutes before cutting into squares or wedges and serve warm.
0 Comments

Spicy Moroccan Sweet Potato Soup

9/21/2022

0 Comments

 
This is a wonderful soup with a bit of spice and a hint of sweetness from the sweet potatoes. You can make it in the instant pot or the stove but I like to can it so I have several pints in the pantry for quick meals.
​INGREDIENTS (6 servings)
  • 2 lbs sweet potato
  • 1 cup diced onion (white or yellow)
  • 2 cloves garlic
  • 15.5 oz canned chickpeas  or canned navy beans (drained and rinsed)
  • 1 can green chilies
  • 1 TBSP extra virgin olive oil
  • 4 cups low-sodium vegetable broth or chicken broth
  • 2 TBSP harissa paste ( I used garlic chili paste) adjust to your tastes
  • 2 tsp ground cumin
  • 1 tsp salt
  • 1/2 tsp black pepper
  • fresh cilantro leaves for topping

OPTIONAL EXRAS
  • crushed red pepper flakes
  • ground cinnamon
  • lime wedges
INSTANT POT INSTRUCTIONS 
  • Peel and cut sweet potatoes into 1-inch pieces. Dice onion and mince garlic. Drain and rinse chickpeas and set all your veggies aside separately.
  • Switch Instant Pot to SAUTE function and add a little cooking oil to the inner pot. Once hot, sauté onions until slightly tender, adding garlic at the very end and mixing well. 
  • Turn OFF Instant Pot and add vegetable broth. Mix well or scrape to deglaze the pot and make sure no browned bits of onion are left stuck to the bottom.
  • Add sweet potato cubes, chickpeas, harissa paste, cumin, salt, and pepper.
  • Lock lid with valve in the sealing position. Set to 3 minutes HIGH pressure. Soup may take 15-18 minutes to come to pressure before starting 3 min cook time. When the IP beeps, allow to naturally depressurize for 5 minutes then quick release the remaining pressure by flipping valve to venting position.
  • Allow a spoonful or so to cool and give it a taste! Adjust spice level to taste (I added extra harissa and red pepper flakes) and add any additional seasoning desired.
  • Spoon into bowls and garnish with fresh cilantro and lime wedges that can be squeezed into the soup for a burst of citrus flavor! A little cinnamon, Greek yogurt, or coconut milk also make tasty additions to this soup.  Enjoy!

INSTRUCTIONS FOR PRESSURE CANNING
This is what you put into each pint jar or double if you are using quart jars. I put the ingredients for each jar in a bowl mix then put into the jar. The jars are room temperature and ingredients are not cooked. 

Recipe for 1 pint jar:
135g chopped 3/4 inch pieces of sweet potatoes
35g chopped onions
12g dry great northern beans
23g green chilies (can has 198g)
  • The jars will be almost full (look at the picture below)
  • Add 1/8 -1/4 tsp garlic chili paste to each jar on top of ingredient

  • Make as many jars as you like adding the exact same ingredients.
  • Heat chicken stock and top all of the jars to 1 1/4 inch head space
  • Place in pressure canner and heat the jars
  • Once the jars are hot remove one at a time, wipe the rims with warm vinegar and place the lid and ring on. Put back into the canner. Repeat on each jar.
  • Pressure can 1 hour 15 minutes

When I open the jars to serve I used my stick hand blender and give the soup a few blends to cream the potatoes. It may be thick, adjust the taste with extra salt, chili or what ever you like. Add a bit of Greek yogurt, or coconut milk if you need to thin it down. 
0 Comments

Pumpkin Pie Using Canned Butternut Squash

8/21/2022

0 Comments

 
I had canned butternut squash last year that I needed to use.  This recipe is using 2 quarts of canned butternut squash. The recipe is easy and will give you a wonderful deep dish 10 pie. The texture is very silky with a hint of spices. 
Bake: 40-50 minutes
Oven: 375 degrees for 10 minutes
           275 degrees for the 30-40 minutes until set.
Pie: 10 inch deep dish pie plate
Recipe: 
2 quart jars of butternut squash or pumpkin ( well drained)
1 can sweetened condensed milk (14 oz)
3 large eggs

1/2 tsp salt
1 tsp. vanilla
1/2 tsp cinnamon
2 tsp grated fresh ginger
1/4 tsp. nutmeg
Note:
1/2 tsp. guar gum (optional) ...thickener just in case you didn't cook the butternut squash down enough.

Directions:
  • The key to this pie is to drain the liquid from the quart jars and cook the squash for 10 minutes or so.  Cook over medium heat on the stove top stirring so it will not burn. Heat until the liquid is gone and the mixture is thick.
  • Use an inversion blender or food processor to blend the squash until smooth. 
  • Cool a bit and add the sweetened condensed milk and blend.
  • Add the 3 eggs and spices to the mixture and blend.
  • Pour into the prepared whole grain pie crust. I did not blind bake the crust and it turns out fine.
  • Heat the oven to 375 degrees and place the pie on a baking sheet in the lower 1/3 of the oven. (Bake for 10 minutes)
  • Lower the oven to 275 degrees for the reminder of the baking (30-40 minutes)
  • Check to see if the center is set by giving the baking sheet a small shake. The center of the pie should be moving very little and not shiny. You can also stick a knife in the center to see if it comes out clean.
  • Remove and cool. It's best to let it sit overnight in the fridge before cutting not only will the texture be perfect but the flavor will be better.
0 Comments

Fruit Jam Bars

7/23/2022

0 Comments

 
This recipe you can use any 1/2 pint jar of jam you have on hand. It's a good way to get rid of old jams you have in your pantry. I can lots of jam with a low sugar pectin called Pomona's Universal Pectin. It's easy to use and very reliable. 
Oven: 350 degrees
Time:
35 minutes
Pan:
9x13 inch

Ingredients:

1 1/2 cup + 2 T unsalted butter (198g)
3 T brown sugar (45g)
3 T sugar (45g)
2 T. Honey (40g)

1 1/2 c. rolled oats (150g)
1 c. soft white flour (120g)
1 c. oat flour (120g)  use oat groats & mill or grind rolled oats in your blender
1 1/2 tsp. baking powder
1/2 tsp. salt
1 tsp. vanilla
1 tsp. ground cinnamon

1 half pint of any jam
1 tsp. lemon juice

Instructions:
  • Preheat the oven to 350 degrees
  • Line a 9x 13 inch baking pan with parchment paper.
  • Cream the softened butter, sugars and honey.
  • Add the rolled oats, soft white flour, oat flour, baking powder, salt, vanilla and cinnamon. (use different spices to complement your jam)
  • Press 2/3 of the dough into the bottom of the prepared pan and reserve the remaining 1/3 (about 200g) for the topping.
  • Stir together the jam and lemon juice. Spread the mixture evenly over the bottom curst.
  • Crumble the remaining 1/3 (about 200g) of the dough over the jam filling. I added a 1/4 cup of rolled oats also on top to fill in better. 
  • Bake the jam bars until golden brown around the edges, about 35 minutes. Let the pastry cool completely in the pan on the rack before cutting into bars. 
  • Enjoy they are not too sweet and have a tender crumb. Freeze the extra for later. ​
0 Comments

Herb and Apple Stuffing

10/28/2021

0 Comments

 
This recipe comes from Ina Garten on Food Network. It makes 8-10 servings and is great as leftovers. You could use vegetable stock instead of chicken stock for those in your family that are vegans. I usually bake the stuffing in a casserole dish in the oven instead of stuffing the bird, but I put both options in the directions. This is also great with ham or as a side with pork, the apples are a nice addition with the meat.

Ingredients:
  • 16 cups of inch bread cubes (what ever you like)
  • 1/2 of a stick of butter (56g)
  • 2 cups diced yellow onions (2 large onions)
  • 2 cups diced celery (3 large stalks)
  • 2 Granny Smith apples (unpeeled cored and diced)
  • 2 T. fresh parsley or (1 T. dried)
  • 1 1/2 tsp fresh finely chopped rosemary (1/2 tsp. chopped dried rosemary)
  • 2 tsp. salt
  • 1/2 tsp. pepper
  • 1 cup chicken stock
  • 1/2 cup sliced blanched almonds optional

Directions:
  1. Preheat oven to 300 degrees F.
  2. Put the bread cubes on a 13 by 18 by 1-inch baking sheet and bake them in the oven for 7 minutes. Until dry and golden 
  3. In a large saute pan, melt the butter and add the onion, celery, apples, parsley, rosemary, salt, and pepper. Saute for 10 minutes, until the mixture is soft.
  4. Combine the bread cubes and cooked vegetables in a large bowl and add the chicken stock, and almonds, if desired.
  5. Place the stuffing into the main cavity of the turkey and into the neck of the bird. I cook a 12-pound turkey for 2 1/2 hours at 350 degrees F in a preheated oven. Make sure the stuffing in the cavity is secured by wrapping the legs tightly with string.
  6. I baked in a casserole dish I used more stock (about 2 1/2 - 3 cups in total). I kept adding half a cup at time until bread crumbs were soft but not mushy. Bake at 350. I cover it with foil for the first 30 mins to hold in the heat to avoid a mushy middle, then take the foil off and do another 10 mins to crisp up the top. 

0 Comments

Whole Grain Pie Crust

4/25/2021

0 Comments

 
This pie crust recipe is easy to make and easy to handle the perfect crust. The best part is it's made with 100% whole grains. I use soft white berries and oat berries for the flour in the crust. You can use a different mixture but it needs to be low in gluten so no hard wheat berries. The reason I chose these 2 berries is the soft white is pastry flour and the oats have no gluten and give a nice taste.

Equipment:
Pie Pan: 9 inch or 10 inch
Scale...Once you have one you will wonder how you baked without it.
Food Processor ... Not required but makes the job easier.
Instant Read thermometer

Oven: 375 degrees (Blind Bake Crust)
Bake: 10-15 minutes (Blind Bake Crust)
Yields: 8 Servings

9 inch Pie Single Crust Recipe:
​2/3 c. soft white flour (76 g)
1/3 c. oat flour (37 g)
2 T. sugar (25 g)
1/4 tsp salt
2 T. unsalted butter chilled (28 g)
2 T. lard or shortening chilled (26 g)
2 T. cold buttermilk (31 g)

10 inch Single Pie Crust Recipe:
1 c. soft white flour (110 g)
1/2 c. oat flour (55 g)
3 T. sugar ((37 g)
1/2 tsp. salt
3 T. unsalted butter chilled (48 g)
3 T. lard or shortening chilled (34 gg)
1/4 c. cold buttermilk (61 g)

Crust Instructions:
With a Food Processor or by hand
  • Mix together flour, sugar, and salt thoroughly.
  • Cut or pulse the butter into dry mix until the size of tiny peas. Then add lard or shortening and cut or pulse into the dry mix until the peas size pieces.
  • Add some of the buttermilk and pulse, do not over mix, add the remaining buttermilk, press into a ball, and then flatten into a rounded disk. 
  • Roll the dough into a strip and fold over into thirds. Repeat this process 3 times until the dough comes together.
  • Then put into the refrigerate for 30 minutes.
  • Remove the dough from the refrigerator. Roll the dough between two pieces of parchment paper or plastic. And place over the pie pan and press into shape.
  • Blind Bake the Crust....More Information
0 Comments

Thai Hot Pepper Spice Mix

3/24/2021

0 Comments

 
This is a really good mix, I use it in chili, soups, scrambled eggs, fajitas anything that needs a little heat. It's not that hot but has a nice complex flavor. 

Combine:
10 tsp. paprika
2 tsp. ground coriander
2 tsp. ground cumin
2 tsp. ground ginger
2 tsp. onion power or granular
1/2 tsp. cayenne pepper or to taste (I usually do 1 tsp.)

Store in a small jar, in a cupboard away from heat. I go through this spice combination so fast I make a double batch.


0 Comments

Chicken Pot Pie

3/11/2021

0 Comments

 
This is an easy way to make the filling for chicken pot pies. I use about 2 large skinless chicken breasts to make 8 - 10 small individual pies. I have a 3 quart Instant Pot and use this recipe but cut down on the chicken to about half. It is plenty of meat. I also omit the cream, it's great without the extra calories.
Ingredients
  • 4 chicken breasts or  6 chicken thighs
  • 2 tablespoons (28g) unsalted butter or olive oil
  • 1 (230g) large onion , sliced
  • 3 cloves (16g) garlic , minced
  •  2 (0.3g) bay leaves
  • ¼ teaspoon (0.4g) dried thyme
  • 3 ribs (120g) celery , diced
  • 3 (300g) medium carrots , diced
  • 2 cups (500ml) unsalted chicken stock
  • Optional: 1 tablespoon (15ml) fish sauce  Don't omit it adds a lot
  • 1 potato, or more (317g) bite-size cubes
  • ½ cup - 1 cup (60g - 120g) frozen green peas
  • ¼ cup - ⅓ cup (31g - 41g) flour (11/2 - 1 tsp. guar gum)
  • ½ cup (125ml) heavy cream (I omit to cut calories)
  • Kosher salt & ground black pepper
Instructions 
  • Brown Chicken and saute onions and veggies in cast iron skillet. Add in minced garlic cloves, 2 bay leaves, ¼ tsp (0.4g) dried thyme, 120g diced celery, and 300g diced carrots, then saute for another minute.
  • De-glaze Instant Pot: Pour in 1 cup (250ml) unsalted chicken stock, then de-glaze by scrubbing all the flavorful brown bits off the bottom with a wooden spoon. Give it a quick mix.
  • Pressure Cook Chicken Pot Pie Filling: Add in 1 tbsp (15ml) fish sauce and another cup (250ml) of unsalted chicken stock, then give it a quick mix. Drain water from the potato cubes. Add in potato cubes and layer the browned chicken.
    With Venting Knob in Venting Position, close the lid, then turn Venting Knob to Sealing Position. Pressure Cook at
    Boneless Chicken Breast: High Pressure for 3 minutes, then Natural Release 10 min
    Bone-in Chicken Breast: High Pressure for 4 minutes, then Natural Release for 10 minutes
    Boneless Chicken Thighs: High Pressure for 4 minutes, then Natural Release for 10 minutes
    Bone-in Chicken Thighs: High Pressure for 5 minutes, then Natural Release for 10 minutes
  • Shred Chicken: And thicken chicken filling - I use guar gum
This freezes very will so you can make chicken pot pies in no time for a quick meal.
0 Comments

Red and Green Pizza Garlicky Blend

2/19/2021

0 Comments

 
I buy larger quantities of dry spices and mix my own seasoning mixes. This works well for me because I can limit the number of spices that I buy and then make specific mixes that I use. I control the amount of salt in fact none of my mixes have salt in them so I add salt at the end in the dish as needed.

I recommend a nice little book "Herb Mixtures & Spicy Blends" by Maggie Oster. You can get it on line, it's a good book of mixes that I'm sure will help you in your everyday meals. This recipe comes from this  book and I always have a small jar in the panty and use it daily.

Red & Green Pizza Garlicky Blend
Yield: 1/3 cup
  • 2 T. dried oregano
  • 1 T. dried basil
  • 1/2 T. fennel seeds (I don't crush)
  • 1/2 T. dried thyme
  • 1 tsp. garlic granules ( I reduce to 1/2 tsp.)
  • 1 T. cayenne Pepper flakes (I reduced to 1/2 T. )
Combine all ingredients and store in an airtight jar away from heat and light.

Uses:
Anything that needs a jolt of spice, like spaghetti, pizza, soups, omelets....
0 Comments

Kamut Pilaf With Roasted Butternut Squash

2/18/2021

0 Comments

 
This recipe serves 10 as a side dish, but you can cut it in half.  Can be served at room temperature or warm slightly as a side dish. You can change the roasted vegetables if you like and alter the seasonings. The directions for roasting the vegetables are in the oven, but I used the air fryer and it worked  great. 

Day 1:
The day before rinse the berries under cold running water. Then soak the  one cup kamut berries overnight add enough water to cover them by 2 inches.

Day 2:
Instant Pot: 
  • Combine 1 cup soaked kamut with 2 1/2 cups water or veggie broth.
  • Bring to high pressure, and cook for 12 minutes.
  • Let the pressure come down naturally, drain off any leftover liquid and set aside.

Recipe:
1 cup kamut berries - soak overnight
1 head cauliflower, trimmed and broken into small florets (1 1/2 #)
1 small butternut squash, peeled seeded & cut into 3/4 inch cubes (1 1/2 #)
1/4 c. plus 3 T. olive oil
2 small red onions sliced
4 shallots or onions, sliced
1 tsp. brown mustard seeds
3/4 tsp. curry powder
Pinch cayenne pepper
2 T. sherry or wine vinegar
 Juice of one lemon
1/2 c. packed fresh flat-leaf parsley leaves
1/2 c. silvered almonds, toasted

Directions:
  1. Preheat oven to 400 degrees (or use your Air Fryer)
  2. Place the cauliflower and squash on two separate rimmed baking sheets; drizzle each with 2 tablespoons olive oil and toss to coat. Season with salt and pepper. Transfer to oven and roast until golden and slightly crisp, about 15 minutes for cauliflower and 30 minutes for squash.
  3. Heat the remaining 3 tablespoons olive in a large saucepan over medium-low heat. Add onions and shallots. Season with salt and pepper. Cook, stirring occasionally, until soft and golden, but not browned about 15 minutes.
  4. Increase heat to medium-high and add mustard seeds, curry powder, cumin, and cayenne pepper. continue cooking until fragrant, about 1 minute. Add sherry vinegar, stirring from the bottom of the pan to de-glaze and cook 2 minutes more. 
  5. Remove from heat and add to bowl with the kamut berries along with the lemon juice, stir to combine. Add the cauliflower and squash, toss to combine. Just before serving, add the parsley leaves and almonds. Toss to combine. Season with salt and pepper.
  6. Serve warm or at room temperature.
0 Comments

Pear Crisp With Cinnamon Bourbon Sauce

9/28/2020

0 Comments

 
A classic fall dessert that is easy to make and a perfect way to use extra pears or apples. This recipe has a crunchy topping made with oats and a wonderful bourbon sauce.

Oven: 350 degrees
Pan: 9x9x2
Bake: 35 - 40 minutes

Recipe:
2 pounds pears – (6-7 cups) best varieties are Bosc or Anjou
Zest of 1 small lemon
3/4 c. packed brown sugar (150 grams or 5 1/3 ounces)
1/2 c. soft white flour (70 grams or about 2 1/2 ounces)
1/2 c. regular or thick oats not the instant ones (45 grams or 1 1/2 oz)
1/4 tsp. salt
3/4 tsp. cinnamon
3/4 tsp. nutmeg
1/3 c. unsalted butter, cold (75 grams, about 2 2/3 ounces or 5 tablespoons)

Directions:
  • Grease your pan, then peel and slice the pears distribute them evenly into the pan and sprinkle the zest of the lemon over the slices.
  • In bowl of your mixer, combine the brown sugar, flour, oats, salt, cinnamon and nutmeg. Mix until combined
  • Cut up the butter into pieces and add to the mixture, mix until all the dry ingredients are moistened.
  • Spread evenly on top of the sliced pears in the pan.
  • Bake at 350 degrees or until the pears are tender. If it gets too brown cover with foil until done.

Bourbon Sauce
While the crisp is cooking make the sauce
3/4 cup granulated sugar (150 grams or 5 1/3 ounces)
2 tablespoons cornstarch
1/8 teaspoon salt
1 cup + 2 tablespoon water
2 egg yolks, whisked
1/4 cup Bourbon
1 tablespoon butter
2 tablespoons lemon juice
2 tablespoons heavy cream
1 teaspoon cinnamon

Directions:
  • On the stove in a medium sauce pan, whisk together the sugar, cornstarch and salt.
  • Add the water and whisk until it is combined. Heat on medium until it simmers and thickens. Remove from the heat.
  • In a small bowl whisk the 2 egg yolks, and add about half of the cornstarch mixture. This is called tempering the eggs.
  • Add the egg mixture back into the pan on the stove and stir until it thickens. Add the remaining ingredients and stir gently. Cool to lukewarm.
  • Serve on top of the warm pear crisp.

This sauce can be made ahead of time and stored in the fridge.
0 Comments

Pear Scones With Caramel Icing

9/27/2020

0 Comments


Pears are a wonderful fall fruit that is not utilized as often as it should be. There pear scones are tender, freeze very well, and make a great breakfast treat or for tea in the afternoon.

Oven: 425 degree F.
Bake: 12-15 minutes
Pan: Sheet Pan
Yields: 12 scones

Recipe:
2 1/2 c. soft white flour  - pastry flour (325g)
1/3 c. brown sugar (73g)
1 T. baking powder
1 tsp. cinnamon
1/2 tsp. ginger
1/4 tsp. cloves
1/2 tsp. salt
6T. cold butter, diced (84g)

2 c. pears peeled and copped fine about 2 small pears

1/2 c. milk (120g)
1 egg large

Icing
1/4 c. brown sugar (50g)
2T. butter (28g0
1 T. milk (15g)
1/2 c. powder sugar (60g)
1 tsp. vanilla extract

Directions:
  • Combine the flour, brown sugar, baking powder, cinnamon and salt in a bowl. Cut the butter into the flour mixture using your mixer, food processor or by hand.
  • Peel, core and dice the pears. It will take about 1 large pear or 2 small pears. Add the pears to the flour mixture.
  • Combine the milk, large egg, and beat lightly and stir into the flour mixture. Don't over beat the batter, it will be in the dry side.
  • Using #12 muffin scoop or 1/3 cup, scoop the scones onto a baking sheet leaving about 2 inches between them. Press down slightly so they are flat on the top. Bake
  • While the scones are baking make the icing. Heat the brown sugar and butter until melted. Stir in the milk and bring to a boil. Remove from the heat and stir in the powder sugar and vanilla.
  • Drizzle over the cooled scones, serve warm or at room temperature.
0 Comments

Lemon Basil Shortbread Cookies

7/27/2020

0 Comments

 
These are melt in your mouth good. The lemon comes out for a hint of flavor and the basil gives the cookie a pretty appearance. I also make them with lemon verbena instead of the basil.

Yields: 24 cookies
Bake: 15-20 minutes
Oven: 350 degrees

Ingredients:
227g butter (1 c.)
85g (1/4 c.) honey

3T. sliced fresh basil leaves or 3T. sliced fresh lemon verbena leaves
1T. lemon zest

177g oat flour (7/8 c.)
200g soft white flour (1 3/4 c.)
1/2 tsp. salt

Course sugar for topping

Directions:
  • Cream the softened  butter very well, and add the honey and beat again
  • Add the fresh basil or lemon verbena leaves and  lemon , along with the oat flour into the food processor and puls until the herbs are very finely chopped.
  • Add the soft white flour, salt and pulse again until mixed.
  • Add the butter and honey mixture and pulse until a moist clump forms int he food processor.
  • Chill the dough 2 plus hours.
  • Measure level tablespoonfuls of dough and rolls between your palms to form balls. Place on a baking sheet, spacing 2 inches apart.
  • Lightly dust the bottom of a flat measuring cup with powdered sugar to prevent sticking and press down on the cookies into 2 inch rounds.
  • Sprinkle tops of cookies with course sugar, Bake until the edges are slightly brown 15-20 minutes. Let them cool on the ban before your transfer them to a wire rack.

0 Comments

Easy Batter Fruit Cobbler

4/19/2020

0 Comments

 
This is easy to throw together as you sit down for dinner and it cooks while you eat. Have your ice cream ready for your dessert once it comes out of the oven.
Bake Time: 50-60 minutes
Bake Temperature: 50-60 minutes
Pan: 8 inch square or a 9 inch round cake pan

Ingredients:
6 T. butter
3/4c. flour (136g soft white flour) any lower gluten grain will work
1/2 c. sugar (100g) (use more or less you decide)
1 tsp. baking powder
1/4 tsp. salt
3/4 c. milk (183g)
1 tsp. vanilla
2-3 c. fruit fresh or frozen berries

Directions:
  1. Adjust oven rack to upper-middle position, and heat oven to 350 degrees.
  2. Put butter in an 8-inch square or 9-inch round pan; set in oven to melt. When butter has melted, remove pan from oven.
  3. Whisk flour, 1/2 cup of sugar, baking powder and salt in small bowl. Add milk; whisk to form a smooth batter. Pour batter into pan right over the melted butter do not mix in.  Then scatter fruit over batter. Sprinkle with remaining 1 Tb. of sugar.
  4. Bake until batter browns and fruit bubbles, 50 to 60 minutes. Serve warm or at room temperature with a dollop of whipped cream or a small scoop of vanilla ice cream, if desired.
Other options:
If you don't have any fresh or frozen fruit a large 29oz can of peaches works perfect. Drain the peaches and save the juice. Use the juice instead of the milk in the recipe. You can reduce the sugar in the recipe if you use canned fruit.

Add spices, like cinnamon, nutmeg, cardamon use your favorite depending on the fruit you added.

Instead of just melting the butter in the pan, brown it to bring out more flavor.

One last note, if you're using berries, especially raspberries, add an additional 1T of flour to the batter, which will help it not to be quite so "wet".

0 Comments

Creamy Chocolate Frosting

1/16/2020

0 Comments

 
Chocolate Icing
The frosting can be made up to 24 hours in advance and refrigerated in an
an airtight container. If needed warm it up a few seconds in the microwave and whisk until the desired consistency.

Yields: about 2 1/4 cups

Ingredients:
1/3 c. sugar (66g)
2 large egg whites
12 T. unsalted butter cut into pieces and softened (170g)
6 oz bittersweet chocolate, melted and cooled
1/2 tsp. vanilla

Directions:
  • In a bowl melt the chocolate and set aside.
  • Combine the sugar, egg whites and salt in a bowl. You will need to heat this so I used a bowl that fit over one on my pans that I filled with a couple inches of water on the stove.
  • Have the water simmering below, and whisk the mixture until it registers 150 degrees. It will take about 3 minutes.
  • Remove from the heat and beat with your mixer using the whisk attachment for 1-2 minutes until it's the consistency of shaving cream and is slightly cool.
  • Add the butter, one piece at a time and beat until smooth and creamy.
  • Once all the butter is added, add the cooled melted chocolate and vanilla. Increase the mixer speed to medium-high and beat until light and fluffy. Scraping the sides as needed.
  • If the frosting seems too soft, place into the fridge to firm it up. You can re-whip it once it has gotten firmer.
Frost The Cupcakes
Mount 2-3 Tablespoon of the frosting on the center of each cupcake
0 Comments

Perfect Chocolate Cupcakes

10/28/2019

0 Comments

 
This is an old stand by recipe from Hershey's Chocolate. These chocolate cupcakes are moist and decadent. I have never found any better recipe and I have tried many. The recipe calls for boiled water but I prefer to use hot coffee I think it adds to the depth of the chocolate flavor. The icing for the cupcakes is a bit different to make the results are light, creamy and not sweet. I think a perfect topping to these little gems.
Oven: 350 degrees
Time: 22-25 minutes
Yields: 36 regular cupcakes
Pan: Line with paper or foil bake cups 2 1/2 inch diameter
Ingredients:
2 c. sugar (400g)
1 3/4 c. All purpose flour or milled whole grain soft white  (220g)
3/4 c. Hersey's coco powder or the Hersey's Special Dark coco powder (65g)
1 1/2 tsp. baking powder
1 1/2 tsp baking soda
1 tsp. salt

2 large eggs
1 c. milk (242g)
1/2 c. vegetable oil (112g)
2 tsp. vanilla

1 c. boiling water or coffee
Directions:
  • In your mixing bowl add all the dry ingredients; sugar, flour, coco, baking powder and soda along with the salt - blend together.
  • Add the eggs, milk, oil, and vanilla and beat on medium speed for 2 minute, the batter will be very thin.
  • Finally stir in the boiling water or coffee
  • Fill the muffin cups half full it makes 36 cupcakes
Bake and cool completely before icing
Chocolate Icing
The frosting can be made up to 24 hours in advance and refrigerated in an
an airtight container. If needed warm it up a few seconds in the microwave and whisk until the desired consistency.

Yields: about 2 1/4 cups

Ingredients:
1/3 c. sugar (66g)
2 large egg whites
12 T. unsalted butter cut into pieces and softened (170g)
6 oz bittersweet chocolate, melted and cooled
1/2 tsp. vanilla

Directions:
  • In a bowl melt the chocolate and set aside.
  • Combine the sugar, egg whites and salt in a bowl. You will need to heat this so I used a bowl that fit over one on my pans that I filled with a couple inches of water on the stove.
  • Have the water simmering below, and whisk the mixture until it registers 150 degrees. It will take about 3 minutes.
  • Remove from the heat and beat with your mixer using the whisk attachment for 1-2 minutes until it's the consistency of shaving cream and is slightly cool.
  • Add the butter, one piece at a time and beat until smooth and creamy.
  • Once all the butter is added, add the cooled melted chocolate and vanilla. Increase the mixer speed to medium-high and beat until light and fluffy. Scraping the sides as needed.
  • If the frosting seems too soft, place into the fridge to firm it up. You can re-whip it once it has gotten firmer.
Frost The Cupcakes
Mount 2-3 Tablespoon of the frosting on the center of each cupcake.
0 Comments

Pumpkin Pie Latte

10/11/2019

0 Comments

 
This is a comforting drink you can make with or without caffeine and to fit everyone's tastes. You can mix it with coffee to make a wonderful Pumpkin Spice Latte. If you want to use almond milk it will also work for those that are dairy-free.

Ingredients For A Single Serving
  • 1 cup whole milk, heated until very warm (whole, 2%, 1% skim)
          Or (mix milk with half coffee for a Latte)
  • 1/4 cup canned pumpkin puree
  • 1 tablespoon sugar (to taste)
  • 1/2 teaspoon pumpkin pie spice (to taste)
  • 2 teaspoon pure vanilla extract
  • Pinch of salt
  • Whipped cream, optional
  • Cinnamon, optional topping
Instructions
  1. Place all ingredients in blender. Remove center cap from the lid of the blender and use a folded kitchen towel to loosely hold the cap over the hole in a manner that steam can escape. Turn on the blender to low and then increase it to high. Blend ingredients until frothy. Transfer mixture to a mug, top with whipped cream, if desired, and sprinkle with additional pumpkin pie spice or cinnamon.
Note:
I wouldn't recommend making more than 2 serving at a time in the blender, as the mixture will rise up when you first turn on the blender.
0 Comments

Congo Bars

9/8/2019

0 Comments

 
Picture
Congo Bars are a variation of the Blondie bar with the addition of coconut and white chocolate chips. These are chewy, not too sweet perfect for taking in your lunch or a good snack.


Pan: 13 x 9 inch pan lined with foil
Oven: 350 degrees
Bake: 22-25 minutes

Ingredients:
1 1/2 c.+ 1T Soft White Flour (204g)
1 tsp. baking powder
1/2 tsp. salt

1 1/2 c. brown sugar (150g)
12 T. (1 1/2 sticks) unsalted butter (170g) melted and cooled
2 large eggs
1 1/2 tsp. vanilla extract

1 c. pecans, toasted and chopped coarse (113g)
1 1/2 c. unsweetened shredded coconut toasted
1/2 c. semisweet chocolate chips (157g)
1/2 c. white chocolate chips (157g)

Directions:
  • Toast the coconut on a baking sheet in the oven at 350 degrees until light golden in color 4-5 minutes.
  • Toast the chopped pecans
  • Adjust the oven rack to the middle position and preheat the oven to 350 degrees
  • Line the baking pan with 2 pieces of foil, one the length of the pan plus some overhang and the other the width with overhand on the sides. This will also you to life the squares out of the pan to cool and cut. Grease the foil with vegetable oil.
  • In a bowl add the flour, salt, baking powder in a bowl mix and set aside
  • Whisk the brown sugar, and the melted butter together in a medium bowl until combined. Add the eggs and vanilla to the mix.
  • Fold the dry ingredients into the wet mixture and mix until just combined. Do not over mix.
  • Fold the toasted coconut  and pecans and chocolates into the mix.
  • Place the batter into the prepared pan and smooth out the top with a spatula.
  • Bake until the top is shiny and cracked and feels firm to the touch about 22-25 minutes. Transfer the pan to a wire rack and cool completely. Loosen the edges and lift out using the foil. Cut into 2-1 1/2 inch squares.


0 Comments

Pear-Walnut Upside-Down Cake

8/15/2019

0 Comments

 
Picture
I have to admit I love upside down cakes, they are loaded with fruit and you don't have to ice them. This recipe is based on a recipe from America's Test Kitchen. I have modified it to suit my tastes and to work better with 100% whole grains. Fall is the perfect time for pears and this cake really shows them off.

Oven: 300 degrees
Bake: 70 - 75 minutes
Pan: 9 inch round cake pan (best if light in color) Lined with parchment paper

Ingredients:
Topping
4 T. unsalted butter, melted (57g)
1/2 c. brown sugar (100g)
2 tsp. cornstarch
1/8 tsp. salt
3 ripe but firm Bosc pears  about 1.5 pounds (680g)

Cake
1 c. walnuts, toasted
1/2 c. Soft White Berries - Pastry Flour (75g)
1/2 tsp. salt
1/4 tsp. baking powder
1/8 tsp. baking soda
1/2 tsp. cinnamon
1/2 tsp. ginger
1/4 tsp. cloves

3 large eggs
1 c. sugar (200g)
4 T. unsalted butter, melted  (57g)
1/4 c. vegetable oil (56g)
1 tsp. vanilla

Directions:
Toppings
  • Grease the 9 inch round cake pan and line the bottom with parchment paper. Pour the melted butter over the bottom of the pan and swirl to evenly coat. Combine the sugar, cornstarch and salt in a small bowl and sprinkle evenly over the melted butter.
  • Peel, half, and core the pears. Set aside 1 pear half and reserve for another use. Cut the remaining 5 pears halves into 4 wedges each. Arrange the pears in a circular pattern around the cake pan with tapered ends pointing inward. Arrange the two smallest pear wedges in the center.
Cake
  • Pulse the walnuts, flour, salt, spices, baking powder and baking soda in a food processor until the walnuts are finely ground. This will take about 8-10 pulses. Transfer this mixture to  a small bowl.
  • Process the eggs, vanilla and sugar in the now empty food processor until very pale yellow, about 2 minutes. With the food processor running add the melted butter and oil in a steady stream until incorporated.
  • Add the walnut mixture and pulse to combine about 4-5 pulses. Pour batter evenly over the pears. Some pear may be showing through, that is OK the batter will bake up over the pears.
  • Bake until the center of the cake is set and bounces back when gently pressed and a toothpick inserted in the center comes out clean, about 70 minutes. You may need to rotate the cake half way through the baking process to cook evenly.
  • Let the cake cool in the pan for 15 minutes. Then run a knife around the sides of the pan and invert the cake onto a wire rich. Remove the parchment paper and let the cake cool completely about 2 hours
0 Comments

French Apple Cake

8/14/2019

0 Comments

 
Picture
This is a classic French dessert. It has a custardy, apple base with a cake like topping. The choice of apples is Granny Smith but any apple or a combination would work. Read the directions all the way thru before you start because there are 2 layers to the cake and the ingredients (flour, egg, and sugar) are divided.

Bake: About 70 minutes
Oven: 325 degrees
Pan: 9 inch spring form

Ingredients:
  • 1 1/2 pounds Granny Smith apples, peeled, cored and cut into 8 wedges, and sliced 1/8 inch thick crosswise. (about 3 large apples)
  • 1 T. Calvados or Apple Brandy or White Rum
  • 1 tsp. lemon juice
  • 1 c. + 2 T. Soft White (berries) pastry flour (135g) +(15g) divided
  • 1 c. sugar (200g) + 1T use as topping
  • 2 1/2 tsp. baking powder
  • 1/2 salt
  • 1 large egg + 2 egg yolks divided
  • 3/4 c. vegetable oil (168g)
  • 1 c. milk (244g)
  • 1 tsp. vanilla extract
  • Confectioner's sugar

Directions:
  • Prepare pan, grease 9 inch spring form pan. Place prepared pan on rimmed baking sheet lined with aluminum foil.
  • Place apple slices in the microwave safe pie plate, cover and microwave until apples are pliable and slightly translucent, about 3 minutes. toss apple slices the Calvados and lemon juice and let cool for 15 minutes.
  • Whisk 1 cup flour (135g), 1 cup sugar (200g), baking powder, and salt together in a bowl.
  • Whisk whole egg (NO YOLKS), oil, milk, and vanilla together in a second bowl until smooth. Add dry ingredients to the wet ingredients and whisk until just combined. Transfer 1 cup of this  batter to separate bowl and set aside.
  • Add egg yolks to remaining batter which you took the 1 cup from whisk to combine. Using spatula, gently fold in cooled apples. Transfer batter to prepared pan; using offset spatula, spread batter evenly to pan edges, gently pressing on apples to create even, compact layer and smooth surface.
  • Whisk remaining 2 T flour (15g) into 1 cup reserved batter. Pour over batter in pan and spread batter evenly to pan edges and smooth surface. Sprinkle remaining 1 tablespoon sugar over cake.
  • Bake until center of the cake is set, toothpick is in inserted in the center comes out clean, and the top is golden brown, about 1 1/4 hours. Transfer pan to rack and let cool for 5 minutes. Run a knife around the sides of the pan and let cool completely, 2-3 hours. Dust lightly with confectioner's sugar, cut into wedges and serve.
0 Comments

Brioche

6/15/2019

0 Comments

 
Picture
Brioche is a rich buttery bread that can be used for many things like French toast, bread pudding or even pastry tarts. I use this recipe when I make my individual tarts. The dough is easy to handle, rolls thin but will hold up when removed from the pastry form. The result is a perfect tart, with a buttery crust. Then you  fill it with the lemon curd and you can't go wrong.

This recipe is from Peter Reinhart's Whole Grain Breads. The recipe is an indirect dough which means it needs 2 days to make.

 Day 1
Soaker:
1 3/4 c. hard white or red flour (227g) - I use hard white it's lighter in color
1/2 tsp. salt (4g)
1/2 c. whole milk, scalded & cooled (113g)
1 c. butter (unsalted, melted)

Directions
  • Mix all of the ingredients together until the flour is incorporated and forms a ball
  • Cover and place in the refrigerator overnight or up to 3 days. Leave it in the fridge until you are ready to use because the butter must be cold.

Biga:
1 3/4c. hard white or red flour (227g) - I use hard white it's lighter in color
1/4 tsp. instant yeast (1g)
4 large eggs beaten (184g)

Directions
  • Mix all of the ingredients together to form a ball. Knead for about 2 minutes until all of the ingredients are mixed. The dough will be very sticky.
  • Let the dough rest for 5 minutes then knead it again for about 1 minute until it becomes smoother but still a little sticky.
  • Cover and refrigerate overnight or up to 3 days
  • Leave the biga in the fridge until you are ready to use, cold is better.

Day 2
Final Additions in a small bowl
1 c. hard white or red flour (128g) - I use hard white flour
5/8 tsp. salt (5g)
2 1/4 tsp. instant yeast (7g)
3 T. sugar (42g)
Mix together

Directions
  • Remove the soaker and biga from the fridge.
  • Lay the soaker on the counter and flatten into a disk
  • Flatten the biga into a disk and lay on top of the soaker
  • Cut thru both and put them into your mixer - as you are doing this add the final additions to the mixer.  Continue until all of the cut up dough is added to the bowl along with the final additions.
  • Mix on low for about 4 minutes until they form together and become a soft dough.

There is no bulk proof needed shape as you desire. I use the dough to make the crust for my individual tarts. This recipe will make about 18 small tarts. So you can cut it in half if you wish. I roll the dough out to a 6 inch round and place into small individual pie pans.

Cover and let raise for 2 - 4 hours at room temperature. (depending on temperature of the room)
Put the Lemon Curd filling into each tart using a #24 scoop (1/3 c.)

Bake 15 -18 minutes
Pre heat oven to 375 degrees F.
Bake: 5 minutes at 375 degrees F.
Bake: 10 minutes at 350 degrees F.
0 Comments

Cream Filling (using white beans)

6/15/2019

0 Comments

 
I know it sounds strange making a cream filling out of beans but this honestly is one of the best recipes for a stable cream filling and you will never know it has beans in it. You can use this in donuts, any pastry that is filled with a cream filling. Not only is this stable but it is healthy, the beans provide protein and the ricotta cheese is low in fat.

Cream Filling  (top favorite recipe of mine)
Ingredients
  • 1 (15 oz) can drained white navy beans (any white bean will work) 
  •   or (250 g) of  beans if you cook them yourself.
  • 1/4 c.sugar (50 g)
  • 1 Ricotta cheese 15 oz.
  • 3 T  powdered sugar (23 g)
  • 1 tsp vanilla

Directions
In your food processor put the drained beans and sugar, pulse until all the beans form a paste. Add the ricotta cheese and pulse again until well mixed. Add the powdered sugar (more if you need it sweeter) and the vanilla. Again pulse until well blended. Mixture freezes well you will have plenty left for next time. This is a great cream filling you will never know it has beans in it....very healthy.

0 Comments

Instant Pot Millet Pilaf

5/31/2019

0 Comments

 
Picture
Looking for a nice side dish or maybe a light lunch this is the perfect dish. Here in Arkansas lettuce does not grow well in the garden so I have to get creative for my lunches. Making up a batch of Millet as a base for lots of fresh vegetables or even dried fruit and nuts like this recipe is a nice change from a salad.


Cook Time: 20 minutes
Servings: 4

Ingredients:
  • 1 cup millet
  • 1 3/4 cup water
  • 1/4 cup dried apricots (about 8) roughly chopped
  • 1/4 cup shelled pistachios roughly chopped
  • 1 lemon zest and juice
  • 1 1/2 Tablespoons olive oil
  • 1/2 cup fresh parsley chopped
  • salt and pepper to taste

Instructions:
  • Place the millet and water in the Instant Pot and close the lid. Using the pressure cooker function on high, set the timer for 10 minutes.
  • Allow the pressure to release naturally.
  • Once the pressure has released, remove the lid. Add the remaining ingredients to the cooked millet. Stir everything together to combine. Taste and adjust the seasonings, as needed. Enjoy!
Notes
Don't forget to zest the lemon before squeezing the juice. If you don't have an Instant Pot or other pressure cooker, prepare the millet in a medium pot according to the package directions. Then follow the rest of the recipe and add in the remaining ingredients.

Recipe By:
Author Amy Katz

0 Comments

Pumpkin Spiced Millet Porridge

5/31/2019

0 Comments

 
Instead of the same old oatmeal this is a nutritious and wonderful lighter change for breakfast. It could even be used as a dessert served with whipped cream or ice cream on top. You could also use your instant pot for this recipe if you like.

Yields: 2 Servings (double if you like and save for another morning)

Instant Pot Directions:
  • Put all of the ingredients except the maple syrup and the pecans into your instant pot and close the lid.
  • Using the pressure cooker function on high, set the timer for 10 minutes.
  • Once cooked allow the pressure to release naturally.
  • After cooled enough to open your pot check to make sure you like the consistency and adjust using the saute button if you need to thicken it a bit.
  • Dish out and add your maple syrup and pecan on top
  • Enjoy

Recipe:
  • 1/2 cup uncooked millet
  • 1 1/3 cups water
  • 1/3 cup pumpkin puree
  • 1/2–1 teaspoon cinnamon
  • 1/4 teaspoon ginger
  • 1/4 teaspoon nutmeg
  • pinch clove
  • maple syrup, to taste
  • toasted pecans, to top
 
Stove Top Directions:
  1. Combine millet, water, pumpkin, and spices together in a sauce pan. Stir and bring to a boil the cover and reduce down to a simmer. Let cook for 20-30 minutes until millet is cooked and tender. Stir and check occasionally while cooking, adding extra water as needed. It’s all about the kind of texture and consistency you want.
  2. When almost done, add a bit of maple syrup and taste. Start on the low end (a teaspoon or two) and continue until you’ve reached a desired sweetness.
  3. Remove from heat and serve with toasted walnuts (and a bit of heavy cream if you like!)
Recipe by
Erin Alderson at Tasty Recipes
0 Comments
<<Previous

    Categories

    All
    Appetizers
    Beef Main Dish
    Beverage
    Biscuits
    Breakfast
    Cakes
    Cookies & Bars
    Desserts
    Fermentation
    Fish
    Gluten Free
    Ice Cream
    Instant Pot
    Medicine
    Muffins & Quick Breads
    Pies
    Pork Main Dish
    Poultry Main Dish
    Preservation
    Puddings
    Salads
    Sandwiches
    Sauces
    Save Money & Time
    Seasoning Mixes
    Sides
    Soups & Stews
    Sweet Yeasted Breads
    Toppings & Spreads
    Vegetable Side Dish
    Yeast Breads

    RSS Feed

Powered by Create your own unique website with customizable templates.