Whole Grain 100
Email: wholegrain100@proton.me
  • Welcome
  • Price Sheet
  • Store & Classes
  • Baking Education
  • Recipes
  • Grain Education
  • Health & Nutrition

Fermented Honey Garlic

11/16/2018

0 Comments

 
A perfect gift for the man in your life that likes to grill or anyone who loves to cook. Honey plus garlic is a perfect combination, and can be used to add flavor to meat dishes, pizza, marinates and even salad dressings. When you ferment the two the flavor is more intense. There are even studies that the combination may prevent sickness and help with the common cold.

Although you do not have to cook, you do need time for the fermentation process. So get started on this project a few weeks before giving it away. It's best after 14 days, but can be used after a week.
Supplies Needed: Glass jar with a lid

Recipe:
  • 1 cup peeled organic garlic cloves**
  • 1 cup raw, unpasteurized honey
  • **  the ratio is approximately 1 cup of cloves to 1 cup of honey
Directions:
  1. Peel and slightly crush the garlic cloves
  2. Add them to the clean jar
  3. Cover the garlic cloves with the honey leaving about 1/2 inch space from the top of the jar.
  4. Put the lid on the jar and place it on a plate in a dark place away from direct sunlight.
  5. The cloves will float to the top, but every day or so invert the jar so the honey covers the garlic cloves.
  6. The honey will start to foam and the garlic will turn dark.
  7. The honey will be ready in 14 days but you can ferment it for a year. Store the jar at room temperature in your pantry.
Note:
If you have never fermented anything don't worry about botulism The good bacteria dominates and keeps pathogens out. Botulism can only occur when you heat a food and can or remove the oxygen. Heating the foods kills all the bacteria and then only botulism can survive the high heat. You never do this with cultured foods which makes them one of the safest foods to make and eat. Good bacteria dominates!

Just a reminder that babies shouldn't have honey until they're a year old.
0 Comments

Smoky Carrot Pickles

3/7/2018

0 Comments

 
Picture
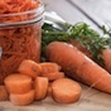
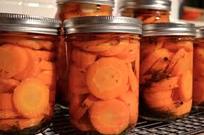
Carrots make great additions to salads, but if they are pickled with a hint of smoky flavor just think what you could do with them. I have added them to egg salad, potato salad, and on sandwiches of all types. I also love them as toppings on all kinds of lettuce salads and of course just eaten out of the jar as a snack. This is a quick easy recipe to put up just a couple of pints of pickles, but you can double it if you like

Yields 2 pints (easily doubled)

Ingredients
1/2 tsp. whole yellow Mustard seed
1/2 tsp. fennel seed
1/2 tsp. celery seed
1/2 tsp. smoked paprika
1/2 tsp crushed red pepper
1 pound carrots, peeled and cut into 1/4 inch coins (cut on bias)
2 1/2 c. apple cider vinegar
1/2 c. sugar
1/2 tsp salt

Directions:
  1. Place 1/4 teaspoon each if whole yellow mustard seed, fennel seed, celery seed, smoked paprika, and crushed red pepper in each sterilize  prepared pint jar.
  2. Divide the peeled and sliced carrots between the 2 jars. Shake them to get the carrots to settle down in to the jars.
  3. Bring the apple cider vinegar, sugar and salt to a boil over high heat, stirring to dissolve the sugar and salt.
  4. Pour over the carrots into the prepared pint jars, leaving 1/1 inch head space. Wipe the rims and place the lids on the jars and screw on the bands until they're fingertip tight.
  5. Process in a water-bath canner for 15 minutes, adjust for altitude if needed.
  6. Turn off the heat source and let the jars sit for 5 minutes in the canner.
  7. Remove and cool, after 24 hours check to seals. Store out of direct sunlight without the bands for up to a year.
Recipe from Beyond Canning by Autumn Giles
0 Comments

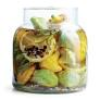
Pickled Baby Patty Pan Squash

6/25/2016

0 Comments

 
Picture
Squash is in season, and this is the time to take advantage of all the varieties at the peak of freshness. This recipe comes from HGL Farmers, they are at the Farmer's Market in Baxter County on Saturdays and Wednesdays across the street from the health food store. They have the best produce in the area! Join the Co-Op and get a great value on spices check out the Co-Op ...prices

Ingredients
1 1/2 c. white vinegar (357 g)
1 1/2 c. water (356 g)
1/3 c. sliced shallots
1 T. kosher salt
1 T. sugar
1 T. black peppercorns
1 tsp. white peppercorns
1 tsp. coriander seeds
1 tsp. mustard seeds
1/2 tsp. crushed red pepper
3 garlic cloves, crushed
1 bay leaf

2 1/2 c. baby patty pan squash , divided
4 tarragon sprigs
4 green onions (green Parts only), halved lengthwise
1 lemon wedge

Directions
  • Combine the liquids with the first 12 ingredients in a medium saucepan.
  • Bring to a boil, stirring until sugar dissolves
  • Place half the squash (1 1/4 c.) in a 1-quart canning jar
  • Add the tarragon, onions and lemon
  • Add the remaining squash to the jar
  • Top with the hot vinegar herb mixture.
  • Cover and seal
  • Refrigerate 2 days

0 Comments

Kefir Ranch Dressing

9/30/2015

0 Comments

 
Kefir, is wonderful and if you make it fresh like we do you are always looking for ways to use if. This recipe comes from Nourished Kitchens which is a great web site for all things healthy.
Ingredients

  • 1 cup mayonnaise, preferably homemade (recipe)
  • 1/2 cup milk kefir or buttermilk
  • 3 tablespoons extra virgin olive oil
  • 2 teaspoons onion powder
  • 1 teaspoon garlic powder
  • 1 teaspoon finely ground sea salt
  • 2 teaspoons dried chives
  • 1/2 teaspoon dried parsley
  • 1/4 teaspoon dried dill
  • 1/4 teaspoon finely ground black pepper
Instructions
  1. Spoon the mayonnaise into a mixing bowl, and then whisk in the kefir or buttermilk and olive oil. When the oil and kefir are completely integrated into the mayonnaise, whisk in the onion and garlic powders, salt, herbs and dried parsley. Taste it, and adjust seasoning as necessary to suit your preferences.
0 Comments

Bread and Butter Pickles

8/16/2015

0 Comments

 
This is an easy recipe with good results. I don't do much canning but it's nice to put away a few jars of pickles for the season. This recipe comes from Cooking Light, August 2014.

Time: about 40 minutes
Quantity: 6 (1 pint jars)

Ingredients:
8 cups water
1/2 cup pickling salt
1 1/2 cups thinly vertically sliced yellow onion
5 pounds pickling cucumbers , cut onto 1/4 inch thick slices
4 1/2 cups white vinegar
3 cups sugar
2 1/2 T. mustard seeds
1 1/2 tsp. celery seeds
1 1/2 tsp. turmeric

Directions:
  1. Combine 8 cups water and salt in a large container, stirring with a whisk. Add onion and cucumber. Let stand at room temperature for 3 hours. Drain and rinse with cold water, then drain.
  2. Combine vinegar and remaining ingredients in a large pan or Dutch oven. Bring to a boil, and add the cucumber mixture and return just to a boil.
  3. Using a slotted spoon, divide the hot cucumber mixture among 6 one pint hot sterilized jars. Divide hot vinegar mixture among jars, filling to 1/2 inch from the top. remove any air bubbles and whip the jar rims. cover with metal lids; screw on bands.
  4. Process in boiling-water bath for 15 minutes. Remove jars from the water bath. Cool completely and check for proper seal. For best flavor, allow 2 week before eating. Store in a cool, dark place for up to one year.
0 Comments

Fermented Spicy Carrot Sticks

3/24/2015

0 Comments

 
Picture
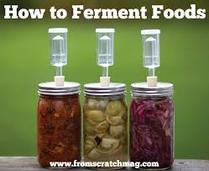
Now I am new at this fermenting vegetables, but this is an easy recipe and very tasty. The southwestern flavor gives the carrots a kick. If you want something different to snack on with very little calories these are perfect. I love them added to my salad or instead of chips with my sandwich for lunch.
This recipe comes from
www.culturesforhealth.com

Ingredients:
  • 1-1½ pounds carrots
  • 1 quart water
  • 1 tablespoon sea salt (I used 1/2 the amount)
  • 3 garlic cloves, peeled
  • Two handfuls of fresh cilantro leaves
  • ½ teaspoon cumin seeds
  • (I reduced the amount of salt by half and added 1/4 cup of whey)

Directions:
  1. Make a brine by dissolving salt in 1 quart water. Set aside.
  2. Cut carrots into sticks that will fit into a quart jar.
  3. Place garlic cloves, cumin seeds, and a handful of cilantro in the bottom of the jar. Fill the jar with carrots sticks, fitting them in tightly and leaving 1½-2 inches headspace. Add another handful of cilantro.
  4. Pour the brine over the carrot sticks and cilantro, leaving 1 inch of headspace. Use a fermentation weight, or something to keep the vegetables under the liquid (a cabbage leaf works good). Cover the jar with a tight lid, airlock lid, or coffee filter secured with a rubber band.
  5. Culture at room temperature (60-70°F is preferred) until desired flavor and texture are achieved. If using a tight lid, burp daily to release excess pressure. Mine took about 3 days I started to see bubbles. Then I tasted them and decided to put into the fridge, to slow down the fermentation process.
  6. Once the carrots are finished, put a tight lid on the jar and move to cold storage. The flavor will continue to develop as it ages.


Makes 1 quart.


0 Comments

Fermented Onions

1/10/2015

1 Comment

 
Picture
Recipe is from a book Mastering Fermentation. These onions are outstanding on a sandwich, pita, salad, even pizza. You could make a paste out of them and use as a spread on just about anything or fill raviolis.


ONION MARMALADE
1.5 lbs of sweet onion yellow or a combination or red and yellow
1 T sea salt (I used half)
1/2 c. apple cider vinegar (unrefined)
2 T. balsamic vinegar
1 T. brown sugar
1 tsp. anchovy past (optional) ..did not have but would be really good in it
1/8 tsp. pepper
2 tsp. fresh thyme leaves (used dried)
1/4 c. fermenting agent (whey)

Directions:
1. Oven 350 degrees, slice onions and place on a greased cookie sheet
bake until soft about 20 minutes....may have to turn a few times to get even baking...remove from oven and cool.

2. Place onions in a large bowl an squish with your hands to release some moisture and add the salt.

3. Pour vinegar, sugar and herb mixture over onions

4. Put into a wide mouth jar push down to get onions below liquid. Add a bit of water to cover the onions if needed. If you have an air lock for your jar, used it but, it's not necessary. Just cover the jar with a coffee filter and leave on the counter overnight. Then put a lid on the jar and stick it into the fridge and let it sit for a week.

Use within 2 months, which should not be a problem they are good on anything.


1 Comment

Pickled Blueberries

11/17/2014

0 Comments

 
Picture

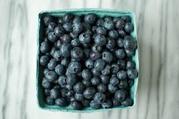
This is wonderful over waffles with whipping cream or serve with goat cheese as an appetizer.


Recipe makes (6) 8oz jars

Instructions:
(3) 3 inch cinnamon sticks
1 tsp. whole cloves
1 tsp whole all spice berries
1 1/2 c. red wine vinegar (358 g)
2 quarts fresh blueberries washed and picked (1185 g)
1 c. white sugar (200 g)
1 c. brown sugar (200 g)

Directions:
Wash and pick over 2 quarts of blueberries

Place  the cinnamon sticks, whole cloves and whole spice berries on to an 8 inch square cheese cloth. Wrap the cloth around the spices and tie it with some string to secure the spices inside the cloth. Place the bagged spices into a large pan and add the red wine vinegar.  Bring the spices and vinegar to a simmer over medium heat and cook for 5 minutes.

Stir the blue berries into the vinegar and cook until they are heated through, about 5 minutes. As the berries heat gently shake the pot so not to damage the berries. Do not stir them.

Remove the pan from the heat and cover and let stand for 8-12 hours. When ready to process, sterilize the jars and lids according to the manufactures instructions using a water bath method.

Strain the berries with a strainer set over a bowl to catch all the liquid. Place the berries into the hot sterilized jars. Return the strained liquid to a sauce pan over high heat and add the 1 cup brown sugar and 1 cup white sugar. Cook the liquid until thickened about 4 minutes.

Ladle the hot liquid over the berries in the jars leaving 1/2 inch of head space in each jar. Whip the rims of the jars clean. Top with the sterilized lids and process the jars for 15 minutes. Remove when done and cool.

0 Comments

    Categories

    All
    Appetizers
    Beef Main Dish
    Beverage
    Biscuits
    Breakfast
    Cakes
    Cookies & Bars
    Desserts
    Fermentation
    Fish
    Gluten Free
    Ice Cream
    Instant Pot
    Medicine
    Muffins & Quick Breads
    Pies
    Pork Main Dish
    Poultry Main Dish
    Preservation
    Puddings
    Salads
    Sandwiches
    Sauces
    Save Money & Time
    Seasoning Mixes
    Sides
    Soups & Stews
    Sweet Yeasted Breads
    Toppings & Spreads
    Vegetable Side Dish
    Yeast Breads

    RSS Feed

Powered by Create your own unique website with customizable templates.