Whole Grain 100
Email: wholegrain100@proton.me
  • Welcome
  • Price Sheet
  • Store & Classes
  • Baking Education
  • Recipes
  • Grain Education
  • Health & Nutrition

Converting A Cookie Recipe To 100% Whole Grain

10/23/2020

0 Comments

 
Classic Chocolate Chip Cookies
This recipe comes from America's text Kitchen

This is the original Recipe
1 3/4 c. all purpose flour (219g)
1/2 tsp. baking soda
14 tablespoons unsalted butter (198g)
3/4 cup dark brown sugar (150g)
1/2 cup sugar (100g)
1tsp. salt
2 tsp. vanilla extract
1 large egg
1 large egg yolk
7.5 oz semisweet chocolate chips (212g)
3/4 cup chopped pecans (82g)

Steps:
1. Convert the recipe to grams
2. Try the original recipe to see how it works with your flour selection.
3. I am very picky on appearance of my cookies since I sell them, not only must they be very good they must be perfectly round, slightly chewing and consistent batch after batch. So, after making them according to the recipe they were, tasty but they spread too much and were thin and crispy, not round or pretty at all.
4. I use soft white 100% milled flour for my cookies most of the time. I find you need to add extra flour about 1-2 tablespoons per cup in the recipe. So with this recipe I ended up with 270g of soft white flour, (2 1/4 cups). I also, like the outside of the cookie to have a crisp texture and soft in the middle. To do this I added 15g (2 T) barley flour. Barley flour has no gluten but does add a crispness to the cookie. I then added 18g soy (3 T) soy give the cookie a melt in your mouth texture.
5. Since whole grain flour is heavier it sometimes needs more lift, and I wanted a slightly puffy cookie. Baking soda is activated when the cookie is baked while baking powder is activated by moisture and then by heat. The recipe did not call for baking powder so I kept baking soda and added 3/4 tsp baking powder to the recipe to give it more lift.
6. When I baked the original recipe it had too much butter (fat) and spread. Whole grain flour has the germ which is oil so many time you can reduce the fat in recipe. I kept the butter the same but omitted the egg yolk in the recipe, this reduced the fat and made it easier to make since it now was just one large egg.
7. I kept the sugars the same, but you should view sugar as a liquid when baking and many times you can reduce the sugar. My goal is not to be low sugar but the best chocolate chip cookie made with 100% whole grain flour.
8. I decided it needed more vanilla so increased the vanilla to 1 1/2 tablespoons. I also added 1/4 teaspoon espresso coffee to enhance the chocolate chips.
9. My last change was in the size of the chocolate chips, the small mini chips gave the cookie a more uniform appearance. I omitted the nuts altogether because of many customers with nut allergies.  After batches and tastings this is a very good chocolate chip recipe that is fool proof. It produces a perfectly round slightly chewing cookie with a more adult taste.

Perfect Chocolate Chip Cookies
Bake: 14 minutes
Yields: About 2 dozen
Oven: 350 degrees
Here is my recipe and instructions:

Mix all dry ingredients in a bowl and set aside
270g Soft White Flour (2 1/4 c.)
15g Barley Flour (2 T.)
18g Soy Flour (3 T.)
1 tsp. Salt
1/2 tsp. salt
1/2 tsp. Baking Soda
3/4 tsp. Baking Powder

Melt on Stove in Pan
140g (10 T.) Melted unsalted butter until brown

In a bowl you can use as a double boiler over the pan
56g (4 T.)  unsalted butter
150g Brown Sugar (3/4 c.)
100g Sugar (1/2 c.)
1 1/2 T. Vanilla
1/4 tsp. espresso Coffee
1 Extra Lg. Egg

150g mini chocolate chips

Directions:
  • On the stove melt the 140g of butter until slightly brown
  • Put all the dry ingredients into a bowl and mix well with a whisk
  • In a separate bowl, add the butter, sugars, vanilla and coffee. Add the brown butter to this and place it over boiling water to heat. (double boiler). Stir until   the butter is melted and sugars are combined. Then add the egg and mix will.
  • Pour this mixture over the dry mixture and combine until all of the flour is incorporated. Place in the fridge to cool before adding the chocolate chips. Once cooled add the chocolate chips and scoop out on to a cookie sheet.
  • Place in the fridge for 30 minutes or overnight.
  • Place 8 on the silpat on the baking sheet
  • Bake for 14 minutes at 350 degrees
  • Remove from oven and leave on baking sheet 2 minutes to firm up
  • Place on cooling rack
0 Comments

DIY Orange Extract

2/19/2019

0 Comments

 
Making your own baking extracts is easy and very inexpensive. Once you do this you will never buy those expensive extracts from those high priced specialty baking companies. Many of you have tried making your own vanilla but, there is a whole world of extracts that will enhance your baked items you can make yourself. These extracts make the perfect gifts for the bakers in your life.

One of the most used extract in my kitchen besides vanilla, is orange extract. It goes well with chocolate and many berries. You can use it in pancakes, muffins, cakes, the list goes on.

Items Needed:
  • Small glass jar with a lid
  • Zester or a vegetable peeler
  • Vodka  good quality about 1/2 a cup
  • 3-5 oranges depending on size

Directions:
  • Using a zester, zest the orange thoroughly avoid removing the white part of the peel with the zester. If you don't have a zester, use a vegetable peeler or a small sharp knife to carefully remove the orange part of the peel.
  • Measure 1/2 cup vodka and 1/2 cup water into a glass jar and add the orange zest. Make sure the zest is completely submerged in the liquid.
  • Screw the lid on the jar and gently shake to mix the contents.
  • Seal tightly then store in a cool dark place for 8–10 weeks, shaking the bottle occasionally to fully extract the orange essence.
  • Place cheesecloth or a coffee filter over another jar and pour the extract through it to strain out the zest.
  • Store the orange extract for up to a year in a sealed jar.

Think of all the other extracts that you can make using the same technique. There is lemon, mint, cinnamon just to name a few, so start giving your baked items that extra special touch with homemade extracts.
0 Comments

Italian Oven Dried Tomatoes

8/20/2018

0 Comments

 
Every year I grow  two types of tomatoes, plum tomatoes for drying and regular tomatos for canning and eating fresh. I plant one of each, that is plenty of tomatoes, usually I can not keep up with the harvesting.

Drying tomatoes is easy and I use them in breads, soups, salads, and any recipe that needs a bit of color and punch of taste. I have a dehydrator, and all I do is slice them and put them into the dehydrator out on the porch. Once they are dry I put them jars for safe keeping.

I came across this recipe and it's a good one, especially if you don't have a dehydrator and want to put up a few tomatoes for the season. I use this recipe if I am going to put the tomatoes with herbs and olive oil.

READY IN: 55 mins
YIELD: 4 half pints
Ingredients
  • Ripe Italian tomatoes, (Roma) sliced open - enough to cover a cookie sheet
  • 2 tablespoons extra virgin olive oil - extra needed too top off jars
  • 2 tablespoons dried Italian herb seasoning (such as basil, oregano or rosemary)
  • 2 tablespoons balsamic vinegar
  • 2 teaspoons fresh lemon juice
  • 1 teaspoon salt
  • fresh ground pepper

Directions
  1. Heat oven to 225°.
  2. Combine tomatoes, 2 T. olive oil, herbs, vinegar, lemon juice, salt and pepper to taste in a mixing bowl.
  3. Arrange tomatoes in rows on a cookie sheet- with parchment paper
  4. Bake 1 hr.
  5. Cool to room temperature, about 15 min.
  6. Place in 4 half-pint canning jars - you may have extra
  7. Add extra olive oil to cover tomatoes in each jar.
  8. Tightly cover jars.
  9. Refrigerate.
  10. **Note: Olive oil will solidify in the refrigerator, but this won't affect the tomatoes. The oil will re-liquefy at room temperature.
0 Comments

How To Build A Great Burger

6/15/2018

0 Comments

 
Now this is not an exact science, and everyone has an opinion on the subject but there is a reason for each layer. The idea is to have the stronger flavored ingredients separated from the mild flavored ones. Like the pickles not near the lettuce. The reasoning is you will be able to experience each ingredient better. If you are using cheese it's the glue and is always on top of the meat. This is the basic idea so put what ever you want on the burger and enjoy!

Steps
  • The obvious place to start is with the bottom bun. I prefer it toasted because I like the texture but my husband likes his just warmed. Spread the condiments ketchup and mustard on the bun, but hold off on the Mayo to use on the top bun.
  • Now place your pickles, on the bun bottom bun. The pickles will go under the meat so their stronger flavor will not overpower the more mild vegetables like the lettuce and tomatoes which are added latter.
  • Place the meat on the pickles, if you are adding cheese have the cheese melted on top of the meat. Bacon can also be added at this time on top of the cheese if you like. The cheese is like glue to hold the other ingredients.
  • The melted cheese will hold the tomato in place on top of the meat. Finish it off with the lettuce and onion on top.
  • The final step is the Mayo on the underside of the top bun.
Picture
Sources
https://www.thekitchn.com/how-to-build-a-better-burger-85684
https://www.purewow.com/food/how-to-assemble-a-burger
0 Comments

Candied Ginger

3/11/2018

0 Comments

 
This is a very nice tip that will take your baked items to the next level. There are times you need just an extra punch of flavor to make your muffin or cake special. This is a recipe to make candied ginger out of dry ginger, you can break the sugar pieces into small pieces and add them to the baked goods. Another option is make larger pieces and use as a decoration on top of the cake or muffin for drama.
Recipe:
This recipe makes enough for 2 recipes of muffins, or one cake.
3 T. sugar (40g)
1 tsp. butter (4g)
2 tsp. corn syrup (14g)
1/2 T. dry ginger

Directions:
  • Mix together in a small sauce pan.
  • Over medium heat cook until it bubbles - cook 2 minutes
  • Swirl or stir so it does not burn
  • Pour onto wax paper, spreading it so it's thin. I usually take another piece of paper an place on top. Then with a rolling pen, roll it out until thin.
  • Let it cool
  • Beak into pieces and add to your baked items
0 Comments

Preserving Lemons

3/4/2017

2 Comments

 
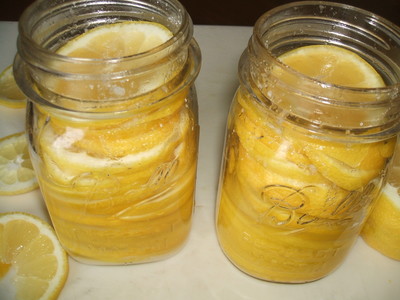
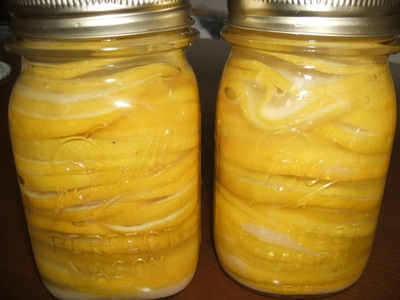
If you love the flavor of lemons you need to learn how to preserve them. It will only take you about 15 minutes to put up a couple of jars and they will last a year in your pantry.  I bought a 2 pound bag on sale this week and it made 2 pints of preserved lemons. Now I will always have lemons on hand for beverages or baked items, like muffins, pies and cakes. Also think pasta, pizza, roasted chicken .... I could go on.

Lemon Dressing Recipe
1 tsp. chopped preserved lemon rind
1 T. olive oil
2 T. wine vinegar ( any type will work)
Touch of honey to taste
1 T. water
1/4 tsp guar gum for thickening to give it a bit of body

This is enough for one large plate of greens. You can vary the amount of ingredients as you like. It has a pleasant lemon taste just enough to dress the salad.
How to Preserve Lemons
Ingredients:
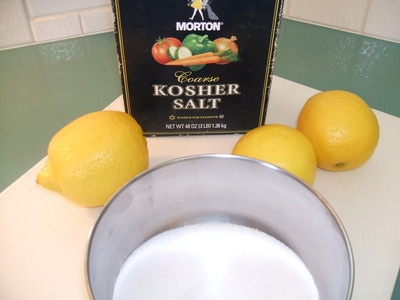
2 lbs. of lemons (6 large lemons...used about 5 plus)
1/2 c. Kosher Salt  (1/2 c. Kosher salt is not the same as 1/2 c. table salt)
1/2 c. Sugar

Equipment:
2 pint canning jars or 1 quart
Clean and sterilize your jars (put thru a hot dishwasher or boil for 2 minutes)

Directions:
  • Start by washing your lemons with warm water, make sure the peels are clean because you will be eating them. Organic lemons are preferred.
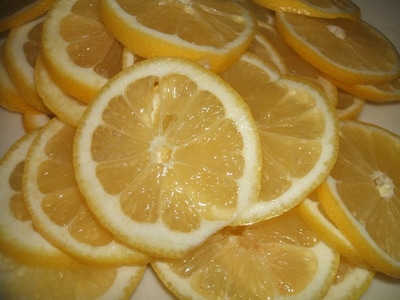
  • Slice the lemons thinly 1/8 - 1/4 inch thick
  • Remove the seeds from the slices
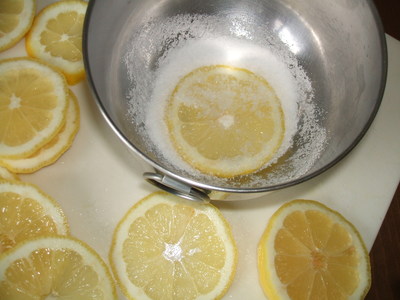
  • Mix the kosher salt and sugar in a bowl
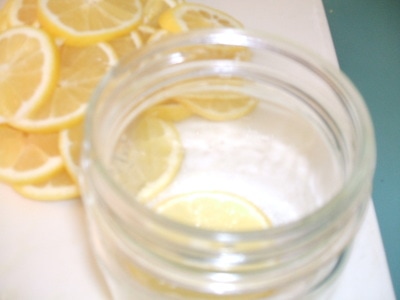
  • Sprinkle the bottom of the jar with the sugar/salt mixture
  • Dip each lemon slice into the sugar/salt mixture and put into the jar
  • Lay each slice on top of each other and press down. Fill the whole jar
  • Press down the lemons as you are filling the jar. The sugar/salt mixture will pull the liquid out of the lemons and fill the jar. If there is not enough liquid to cover the sliced lemons, squeeze some fresh lemon juice on top. The lemons need to be under the liquid.
  • Leave on the counter 3 days, check to make sure lemons are submerged. Top off as needed.
  • This can go into the pantry, it will keep for up to a year. I'm sure you will use it before then. You may also keep the jars in the fridge.
Comments
  1. There are many recipes and techniques to preserving lemons. Most do not cut the lemons into slices. While this is a bit easier when making them, it's nice to have them already sliced when using them. Also, most recipes use only salt in the recipe, I found that to be fine for savory dishes but, for a more universal recipe that you can use in sweet baked items and savory dishes, I prefer the salt/sugar combination.
  2. Some of the recipes added herbs to the mixture like a sprig or rosemary or a couple of sprigs of thyme and  even a hot dried pepper to the curing lemons. Other additions noted were a cinnamon stick, whole cloves, whole cardamon seeds even a pinch of turmeric.
  3. One suggestion that I found helpful was to take the preserved lemons, (liquid and all) and chop it up with a food processor. This will give you a paste that you can use when cooking. I did this with one on my jars and it's easier when I use it for my tea in the morning. You only need about 1/4 tsp. of the lemon paste per cup to get a nice lemon flavor. I am very sensitive to salt, but what I have found is the lemon flavor is so strong that you use very little of the paste and there is not salt taste.
  4. When using the sliced lemons remove the membrane and use only the peel. Wash the peel to remove some of the salt. You will notice the lemon peel is almost creamy in texture. Chop it up and add to the dish. Taste as you go so you will know how much to add.
I hope you enjoy!
Tamara
2 Comments

Pie Crust....Foolproof Technique

11/25/2016

0 Comments

 
Pie crusts are always a touchy subject and many of you are afraid to tackle making one from scratch. I saw this recipe and method and decided to gave it a try. The dough was easy and fool proof, but I found it a bit tough. Also the amount of butter in the recipe was double what I was use to using in my crust recipe.

Great ideas always come to me in the middle of the night, like this one. I awoke thinking I should use my regular pie crust recipe and modify if by adding the tangzhong technique. This technique is a Japanese technique that I am familiar with in my bread baking. There is science that backs up why this technique keeps the gluten from over developing, which ensures a tender finished product.

The tangzhong technique uses boiling water which is added to the flour or in this case cornstarch to become a paste.  In this recipe the boiling water is added to cornstarch to form a gel. This gel is then added to the flour in the recipe which retards the development of gluten in the crust, which keeps it tender.

This recipe is easy to handle, it rolls out easily and holds together better than most crust recipes. I find it's not quite as flaky as an all wheat crust, but if you need a crust that is a bit more sturdy because you are doing lattice work or something fancy this is an excellent option.

9 inch Pie Crust Recipe:
Tangzhong
  • 3 T. water
  • 2 tsp. cornstarch
In a glass bowl or glass measuring cup, whisk together the water and cornstarch. Microwave for 10 seconds, then stir and microwave for another 5 seconds or so. The mixture will turn into a gel. Cool completely in the refrigerator.
  • 1/4 c. + 3T. soft white flour (76 g)
  • 1/4 c. + 2 T. oat flour (37 g)
  • (or if you don't have whole grain flour use 1 + 2 T. cup all purpose flour)
  • 2 tsp. sugar (or spices if you are doing a savory crust)
  • 1/4 tsp salt
  • 2 T. unsalted butter chilled (28 g)
  • 2 T. lard or shortening chilled (26 g) or (28 g butter)
  • 2 T. cold buttermilk (31 g) or sour cream or yogurt (28 g)

Crust Instructions:
Mix by hand it's easy and less dishes.
Mix together flour, sugar, and salt thoroughly. Cut the butter and lard into the dry mixture until the size of peas. Add the buttermilk and cornstarch mixture together and mix, then add it to the flour mixture. Mix with your hands or a spoon, do not over mix. Press into a ball, and then flatten into a rounded disk.  Refrigerate for 30 minutes, or up to 48 hours. You may also freeze the dough at this point to use at a later date.

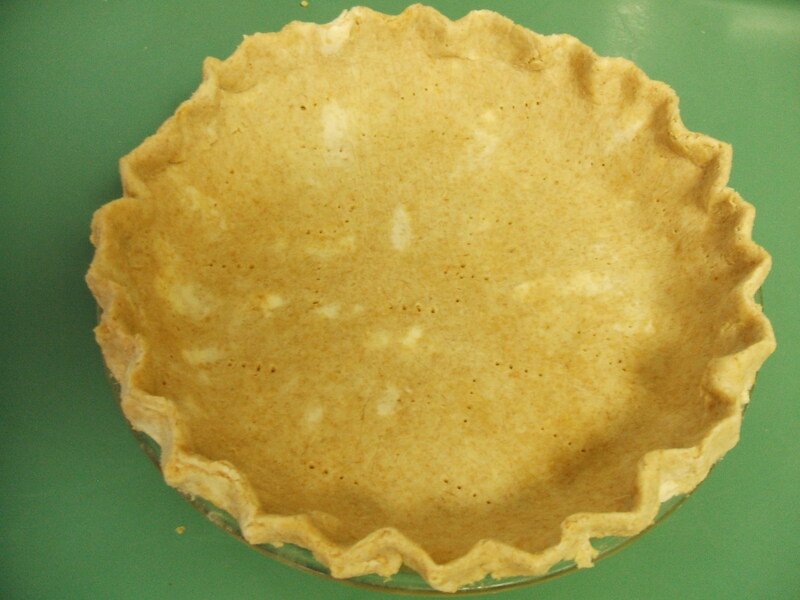
Remove the dough from the refrigerator. Roll the dough between two pieces of wax paper or plastic. And place over the pie pan and press into shape.

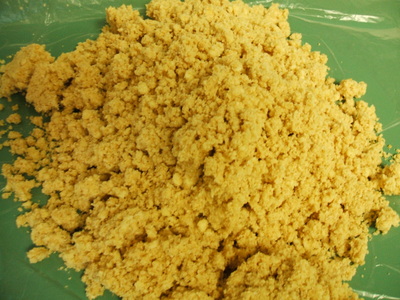
Dough After Mixing
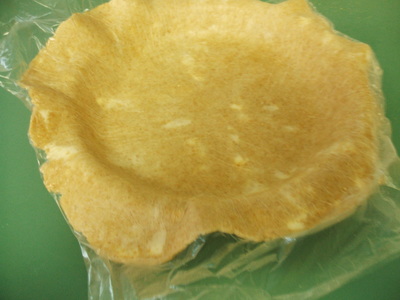
Rolled out and lay over pie plate. Peel off the plastic.
Crimp edges, you will see streaks of butter.
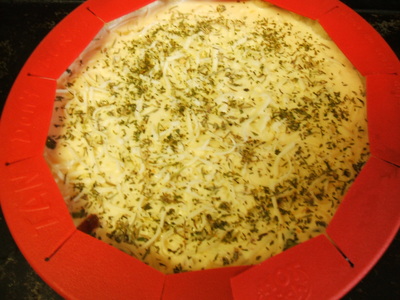
Quiche
Put in bottom 1/3 of oven on a cookie sheet. Pie crust shield
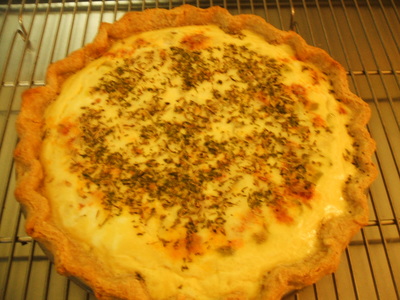
Out of oven!
To Blind Bake if Needed:
Blind baking means to bake the crust without any filling. This is done with pies that the filling is not baked or sometimes to prevent the crust from becoming soggy. Your pie recipe will indicate if you need to blind bake your crust.

Lay plastic wrap or wax paper on the counter Roll out the dough into a 12 inch circle on the paper.

Flip the dough over and lay the crust over the pie pan, pressing it into the bottom and up the sides. Peel away the plastic or wax paper from the dough. Leave about 1/2 inch overhang all the way around the pie plate. Cut off the extra where it is longer. Tuck the 1/2 inch over hang of dough under and crimp the dough with your fingers.

Place in the freezer for 15 minutes, before you put it into the pre-heated 375 degree oven.

Remove from the freezer and line the chilled crust with foil and fill the pie pan with pie weights. I use beans, that are only used for blind baking. You can use them over and over. Bake until the edges are light golden brown about 25 minutes. Remove the foil and weights, bake until the bottom of the crust just begins to color another 5-7 minutes.

Remove from the oven and cool for 1 hour before filling. You can bake the crust a couple of days ahead of time if needed.

Inspired by a recipe from 177milkstreet.com


0 Comments

Give The Gift of Better Health By Adding Spice

11/24/2016

0 Comments

 
The holiday season is just around the corner and every year like all of you it's difficult to buy for some folks. If you have someone on your list that enjoys cooking I will share some ideas that I have enjoyed this year.

Books
Now I am not a book person I rarely have time to read but if the book is geared towards improving my ability in the kitchen, you have my attention.

The one book I got last year that I have used the most is Herb Mixtures & Spicy Blends By Maggie Oster. It sells for $11.93 at Amazon so not an expensive gift.

Description
Create handmade mixtures of your favorite herbs and spices that add a delicious new zing to your favorite dishes. Maggie Oster presents more than 100 recipes compiled from herb shops and farms across America that showcase a wide variety of techniques for getting the most of out of your seasoning. Learn how to make Cajun, Thai, and Indian blends for seafood, game, poultry, and beef. Discover the delicious secrets of tasty homemade salad dressings and herb butters. Spice up your life and enjoy the flavor!

The reason I love this book is I have struggled with adding herbs and spices to my dishes. This book has given me more confidence to spice up what ever I am making. The recipes are easy and you can make up a batch of herb blends to keep in the cupboard. I store mine in small 1/2 pint canning jars which works will for me. It has saved me time and money, along with improved my cooking ability.

Spices are expensive and most people don't use a lot of them for that reason. The Co-Op offers bulk pricing on many of the herbs and spices that you will need for the recipes in the book. Check out their web site Country Life Natural Foods. They deliver to this area every other month, so if you are interested in joining the Co-Op click here and add your information so you will be on my list. I will send out a reminder when the next order is due with instructions on what to do.

Great Spice Gift
Dry Chimichurri Rub
In Argentina, this mix of herbs and spices is combined with oil and vinegar and used as a sauce for grilled meats, but I use it on any thing just like Americans do ketchup.

Recipe (makes 3/4 cup)
  • 3 T. dried oregano leaves
  • 3 T. dried basil leaves
  • 2 T. dried parsley flakes
  • 2 T. dried thyme leaves
  • 2 T. coarse salt (omit if you like)
  • 1 T. ground black pepper
  • 1 T. dried savory leaves (or marjoram leaves)
  • 1 T. smoked paprika
  • 2 tsp. garlic powder
  • 1 to 2 tsp. dried crush red pepper

Whisk all ingredients in a medium bowl, store in an air tight container in a dark cupboard. To make a marinade use 1/4 c. rub with 1/2 c. olive oil and 3 T. red wine vinegar.

Uses
You can rub the dry rub all over a tri-tip roast before roasting or sprinkle over fish fillets before pan searing. Sprinkle on vegetables before roasting in the oven. Use the dry mixture with a little buttermilk, or yogurt for a salad dressing.

If you make up the marinade, it will keep in the fridge for a long time but can be used on anything you want to kick up. I like it on my eggs in the morning. As a salad dressing, or over pasta to add flavor.

Put the dry mix into some pretty containers with the recipe and uses for a perfect gift.
0 Comments

Homemade Natural Food Coloring

11/22/2016

0 Comments

 
Picture
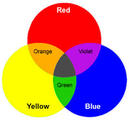
These days you are seeing many of the chefs switching from using artificial dyes to a more natural option. Below are recipes using natural ingredients  for the 3 primary colors; yellow, blue and red. Now you can mix these primary colors to get greens, purples and oranges. The natural dyes tend to be more forgiving when mixing with your ingredients.

Yellow:
Turmeric Yellow Food Dye
Bring 4 tsp. ground turmeric, 1/3 c. sugar, and 2 cups of water to a boil in a small saucepan over medium low heat. Reduce the liquid by about half, it will take about 30 minutes. Let the dye cool before using. This makes about 1 cup.

Blue:
Cabbage Blue Food Dye
Bring 1/2 small head of red cabbage chopped coarsely, and 3 c. of water to a simmer in a medium saucepan. Cook until the cabbage is soft and the liquid is reduced to about a third (1 cup). This will take about 30 minutes.

After reducing, remove the cabbage and add 1/2 c. sugar to the cabbage liquid and simmer until very deep purple. reduce down to about 1 cup. Let the dye cool, then stir in 1/2 tsp. baking powder. This makes about 1 cup.

Red:
Beet Red Food Dye
Bring 3 Medium red beets, peeled and quartered. and 3 cups of water to a simmer. Cook the beets until they have lost their vibrant red color and the liquid is reduced by about a third, it will take about 30 minutes.

Remove the beets and add 1/2 c. sugar to the beet liquid and simmer. Reduce again to about one cup, it will take about 15 minutes. Let the dye cool before using, it will make about 1 cup.

How to use:
Mix the primary colors to get the secondary colors, the sky is the limit. These
dyes are perfect for tinting frosting that you can use on cakes, cookies even hard boiled eggs. They are safe for everyone since they are all natural.

If you have extra freeze the dye in ice cube trays, remove once frozen, and store in the freezer. That way if you need a small amount for a future project you will have it ready.

Source:
Bon Appetit
December 2016, Juno Demelo, recipes by Julia Everist


0 Comments

Why You Should Convert Your Recipes to Grams

9/14/2016

0 Comments

 
Picture
Now I know most of you use cups, and tablespoons for measuring tools when baking. There are many advantages to converting your favorite recipes to grams, the most important is LESS DISHES TO WASH.


Now I hope that got your attention, who likes to do dishes. There are some very practical reasons to convert your recipes. The main reason is the ability to adjust the size of the recipe with ease. Let me give you a real life example, I saw this muffin recipe that I thought would be good. I had all the ingredients and the recipe said it made 12 muffins.

I followed the instructions and they came out pretty good but, the recipe only made 10 muffins. Now I want to adjust the recipe up to make a full dozen. This is easy if your recipe is in grams. Having all the ingredients in grams allows you to increase the recipe by 10-12% depending on how full you fill your muffin cups.

This is a link to a page that has many items in grams but at the bottom of the page is a link to a web site that I use to convert my recipes. The site is easy to use and has most baking items. Now if the item you are looking for is not on the site just Google it "what is a cup of buttermilk in grams" you will find the answer.  Link

When you are increasing your recipe increase the flour, sugar, butter, liquids all of the main ingredients. Eggs are always an issue, use an extra large instead of a large. I usually leave the leavening agents and extracts the same, unless I am increasing it a lot.

Now make the recipe again and specifically note the height of the muffins, do you need to increase the leavening agents? If so add 1/4 tsp more of the baking powder or soda. Taste the level of the spices and extracts do you need to increase them or are they just fine. Adjust them if you need to.

It may take another trial until you get the perfect recipe but, you will then have something that you can consistently relay on coming out perfectly every time you bake it. The best part is, there's less dishes to clean up!

Happy Baking!
Tamara

0 Comments
<<Previous

    Baking Education

    Cooking Tips & Shortcuts

    Archives

    October 2020
    February 2019
    August 2018
    June 2018
    March 2018
    March 2017
    November 2016
    September 2016
    July 2016
    May 2016
    April 2016
    March 2016
    February 2016
    January 2016
    December 2015
    November 2015
    October 2015
    September 2015
    August 2015
    July 2015
    June 2015
    May 2015
    April 2015
    March 2015
    January 2015

    Categories

    All
    Baking Tips
    Candy
    Converting Recipes
    Equipment
    Food Coloring
    Gifts
    Gluten Free Tips
    Herbs & Spices
    Ice Cream Tips
    Leavening Agents
    Meats & Eggs
    Oils
    Pie Tips
    Pie Tips
    Preserving Food
    Thickening Agents
    Tips On Produce

    RSS Feed

Powered by Create your own unique website with customizable templates.