Whole Grain 100
Email: wholegrain100@proton.me
  • Welcome
  • Price Sheet
  • Store & Classes
  • Baking Education
  • Recipes
  • Grain Education
  • Health & Nutrition

Pie Crust....Foolproof Technique

11/25/2016

0 Comments

 
Pie crusts are always a touchy subject and many of you are afraid to tackle making one from scratch. I saw this recipe and method and decided to gave it a try. The dough was easy and fool proof, but I found it a bit tough. Also the amount of butter in the recipe was double what I was use to using in my crust recipe.

Great ideas always come to me in the middle of the night, like this one. I awoke thinking I should use my regular pie crust recipe and modify if by adding the tangzhong technique. This technique is a Japanese technique that I am familiar with in my bread baking. There is science that backs up why this technique keeps the gluten from over developing, which ensures a tender finished product.

The tangzhong technique uses boiling water which is added to the flour or in this case cornstarch to become a paste.  In this recipe the boiling water is added to cornstarch to form a gel. This gel is then added to the flour in the recipe which retards the development of gluten in the crust, which keeps it tender.

This recipe is easy to handle, it rolls out easily and holds together better than most crust recipes. I find it's not quite as flaky as an all wheat crust, but if you need a crust that is a bit more sturdy because you are doing lattice work or something fancy this is an excellent option.

9 inch Pie Crust Recipe:
Tangzhong
  • 3 T. water
  • 2 tsp. cornstarch
In a glass bowl or glass measuring cup, whisk together the water and cornstarch. Microwave for 10 seconds, then stir and microwave for another 5 seconds or so. The mixture will turn into a gel. Cool completely in the refrigerator.
  • 1/4 c. + 3T. soft white flour (76 g)
  • 1/4 c. + 2 T. oat flour (37 g)
  • (or if you don't have whole grain flour use 1 + 2 T. cup all purpose flour)
  • 2 tsp. sugar (or spices if you are doing a savory crust)
  • 1/4 tsp salt
  • 2 T. unsalted butter chilled (28 g)
  • 2 T. lard or shortening chilled (26 g) or (28 g butter)
  • 2 T. cold buttermilk (31 g) or sour cream or yogurt (28 g)

Crust Instructions:
Mix by hand it's easy and less dishes.
Mix together flour, sugar, and salt thoroughly. Cut the butter and lard into the dry mixture until the size of peas. Add the buttermilk and cornstarch mixture together and mix, then add it to the flour mixture. Mix with your hands or a spoon, do not over mix. Press into a ball, and then flatten into a rounded disk.  Refrigerate for 30 minutes, or up to 48 hours. You may also freeze the dough at this point to use at a later date.

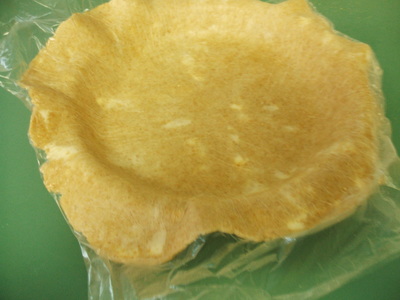
Remove the dough from the refrigerator. Roll the dough between two pieces of wax paper or plastic. And place over the pie pan and press into shape.

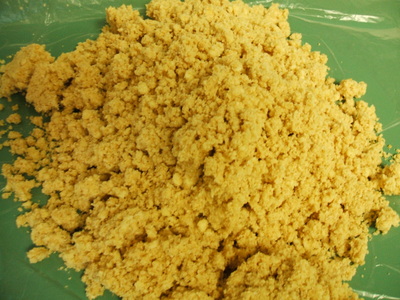
Dough After Mixing
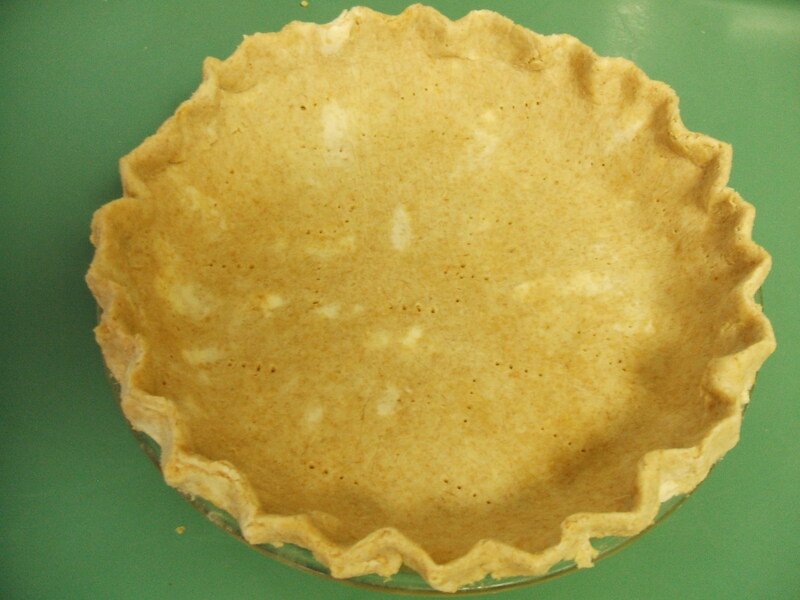
Rolled out and lay over pie plate. Peel off the plastic.
Crimp edges, you will see streaks of butter.
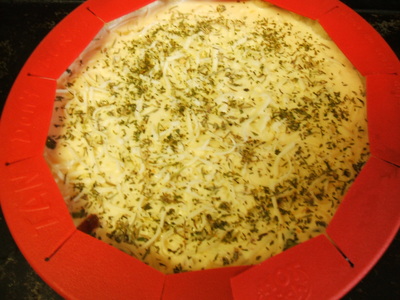
Quiche
Put in bottom 1/3 of oven on a cookie sheet. Pie crust shield
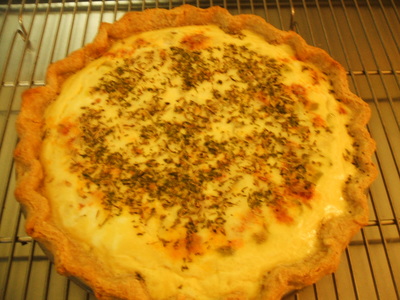
Out of oven!
To Blind Bake if Needed:
Blind baking means to bake the crust without any filling. This is done with pies that the filling is not baked or sometimes to prevent the crust from becoming soggy. Your pie recipe will indicate if you need to blind bake your crust.

Lay plastic wrap or wax paper on the counter Roll out the dough into a 12 inch circle on the paper.

Flip the dough over and lay the crust over the pie pan, pressing it into the bottom and up the sides. Peel away the plastic or wax paper from the dough. Leave about 1/2 inch overhang all the way around the pie plate. Cut off the extra where it is longer. Tuck the 1/2 inch over hang of dough under and crimp the dough with your fingers.

Place in the freezer for 15 minutes, before you put it into the pre-heated 375 degree oven.

Remove from the freezer and line the chilled crust with foil and fill the pie pan with pie weights. I use beans, that are only used for blind baking. You can use them over and over. Bake until the edges are light golden brown about 25 minutes. Remove the foil and weights, bake until the bottom of the crust just begins to color another 5-7 minutes.

Remove from the oven and cool for 1 hour before filling. You can bake the crust a couple of days ahead of time if needed.

Inspired by a recipe from 177milkstreet.com

0 Comments

Give The Gift of Better Health By Adding Spice

11/24/2016

0 Comments

 
The holiday season is just around the corner and every year like all of you it's difficult to buy for some folks. If you have someone on your list that enjoys cooking I will share some ideas that I have enjoyed this year.

Books
Now I am not a book person I rarely have time to read but if the book is geared towards improving my ability in the kitchen, you have my attention.

The one book I got last year that I have used the most is Herb Mixtures & Spicy Blends By Maggie Oster. It sells for $11.93 at Amazon so not an expensive gift.

Description
Create handmade mixtures of your favorite herbs and spices that add a delicious new zing to your favorite dishes. Maggie Oster presents more than 100 recipes compiled from herb shops and farms across America that showcase a wide variety of techniques for getting the most of out of your seasoning. Learn how to make Cajun, Thai, and Indian blends for seafood, game, poultry, and beef. Discover the delicious secrets of tasty homemade salad dressings and herb butters. Spice up your life and enjoy the flavor!

The reason I love this book is I have struggled with adding herbs and spices to my dishes. This book has given me more confidence to spice up what ever I am making. The recipes are easy and you can make up a batch of herb blends to keep in the cupboard. I store mine in small 1/2 pint canning jars which works will for me. It has saved me time and money, along with improved my cooking ability.

Spices are expensive and most people don't use a lot of them for that reason. The Co-Op offers bulk pricing on many of the herbs and spices that you will need for the recipes in the book. Check out their web site Country Life Natural Foods. They deliver to this area every other month, so if you are interested in joining the Co-Op click here and add your information so you will be on my list. I will send out a reminder when the next order is due with instructions on what to do.

Great Spice Gift
Dry Chimichurri Rub
In Argentina, this mix of herbs and spices is combined with oil and vinegar and used as a sauce for grilled meats, but I use it on any thing just like Americans do ketchup.

Recipe (makes 3/4 cup)
  • 3 T. dried oregano leaves
  • 3 T. dried basil leaves
  • 2 T. dried parsley flakes
  • 2 T. dried thyme leaves
  • 2 T. coarse salt (omit if you like)
  • 1 T. ground black pepper
  • 1 T. dried savory leaves (or marjoram leaves)
  • 1 T. smoked paprika
  • 2 tsp. garlic powder
  • 1 to 2 tsp. dried crush red pepper

Whisk all ingredients in a medium bowl, store in an air tight container in a dark cupboard. To make a marinade use 1/4 c. rub with 1/2 c. olive oil and 3 T. red wine vinegar.

Uses
You can rub the dry rub all over a tri-tip roast before roasting or sprinkle over fish fillets before pan searing. Sprinkle on vegetables before roasting in the oven. Use the dry mixture with a little buttermilk, or yogurt for a salad dressing.

If you make up the marinade, it will keep in the fridge for a long time but can be used on anything you want to kick up. I like it on my eggs in the morning. As a salad dressing, or over pasta to add flavor.

Put the dry mix into some pretty containers with the recipe and uses for a perfect gift.
0 Comments

Homemade Natural Food Coloring

11/22/2016

0 Comments

 
Picture
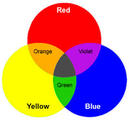
These days you are seeing many of the chefs switching from using artificial dyes to a more natural option. Below are recipes using natural ingredients  for the 3 primary colors; yellow, blue and red. Now you can mix these primary colors to get greens, purples and oranges. The natural dyes tend to be more forgiving when mixing with your ingredients.

Yellow:
Turmeric Yellow Food Dye
Bring 4 tsp. ground turmeric, 1/3 c. sugar, and 2 cups of water to a boil in a small saucepan over medium low heat. Reduce the liquid by about half, it will take about 30 minutes. Let the dye cool before using. This makes about 1 cup.

Blue:
Cabbage Blue Food Dye
Bring 1/2 small head of red cabbage chopped coarsely, and 3 c. of water to a simmer in a medium saucepan. Cook until the cabbage is soft and the liquid is reduced to about a third (1 cup). This will take about 30 minutes.

After reducing, remove the cabbage and add 1/2 c. sugar to the cabbage liquid and simmer until very deep purple. reduce down to about 1 cup. Let the dye cool, then stir in 1/2 tsp. baking powder. This makes about 1 cup.

Red:
Beet Red Food Dye
Bring 3 Medium red beets, peeled and quartered. and 3 cups of water to a simmer. Cook the beets until they have lost their vibrant red color and the liquid is reduced by about a third, it will take about 30 minutes.

Remove the beets and add 1/2 c. sugar to the beet liquid and simmer. Reduce again to about one cup, it will take about 15 minutes. Let the dye cool before using, it will make about 1 cup.

How to use:
Mix the primary colors to get the secondary colors, the sky is the limit. These
dyes are perfect for tinting frosting that you can use on cakes, cookies even hard boiled eggs. They are safe for everyone since they are all natural.

If you have extra freeze the dye in ice cube trays, remove once frozen, and store in the freezer. That way if you need a small amount for a future project you will have it ready.

Source:
Bon Appetit
December 2016, Juno Demelo, recipes by Julia Everist


0 Comments

    Baking Education

    Cooking Tips & Shortcuts

    Archives

    October 2020
    February 2019
    August 2018
    June 2018
    March 2018
    March 2017
    November 2016
    September 2016
    July 2016
    May 2016
    April 2016
    March 2016
    February 2016
    January 2016
    December 2015
    November 2015
    October 2015
    September 2015
    August 2015
    July 2015
    June 2015
    May 2015
    April 2015
    March 2015
    January 2015

    Categories

    All
    Baking Tips
    Candy
    Converting Recipes
    Equipment
    Food Coloring
    Gifts
    Gluten Free Tips
    Herbs & Spices
    Ice Cream Tips
    Leavening Agents
    Meats & Eggs
    Oils
    Pie Tips
    Pie Tips
    Preserving Food
    Thickening Agents
    Tips On Produce

    RSS Feed

Powered by Create your own unique website with customizable templates.