Whole Grain 100
Email: wholegrain100@proton.me
  • Welcome
  • Price Sheet
  • Store & Classes
  • Baking Education
  • Recipes
  • Grain Education
  • Health & Nutrition

Italian Oven Dried Tomatoes

8/20/2018

0 Comments

 
Every year I grow  two types of tomatoes, plum tomatoes for drying and regular tomatos for canning and eating fresh. I plant one of each, that is plenty of tomatoes, usually I can not keep up with the harvesting.

Drying tomatoes is easy and I use them in breads, soups, salads, and any recipe that needs a bit of color and punch of taste. I have a dehydrator, and all I do is slice them and put them into the dehydrator out on the porch. Once they are dry I put them jars for safe keeping.

I came across this recipe and it's a good one, especially if you don't have a dehydrator and want to put up a few tomatoes for the season. I use this recipe if I am going to put the tomatoes with herbs and olive oil.

READY IN: 55 mins
YIELD: 4 half pints
Ingredients
  • Ripe Italian tomatoes, (Roma) sliced open - enough to cover a cookie sheet
  • 2 tablespoons extra virgin olive oil - extra needed too top off jars
  • 2 tablespoons dried Italian herb seasoning (such as basil, oregano or rosemary)
  • 2 tablespoons balsamic vinegar
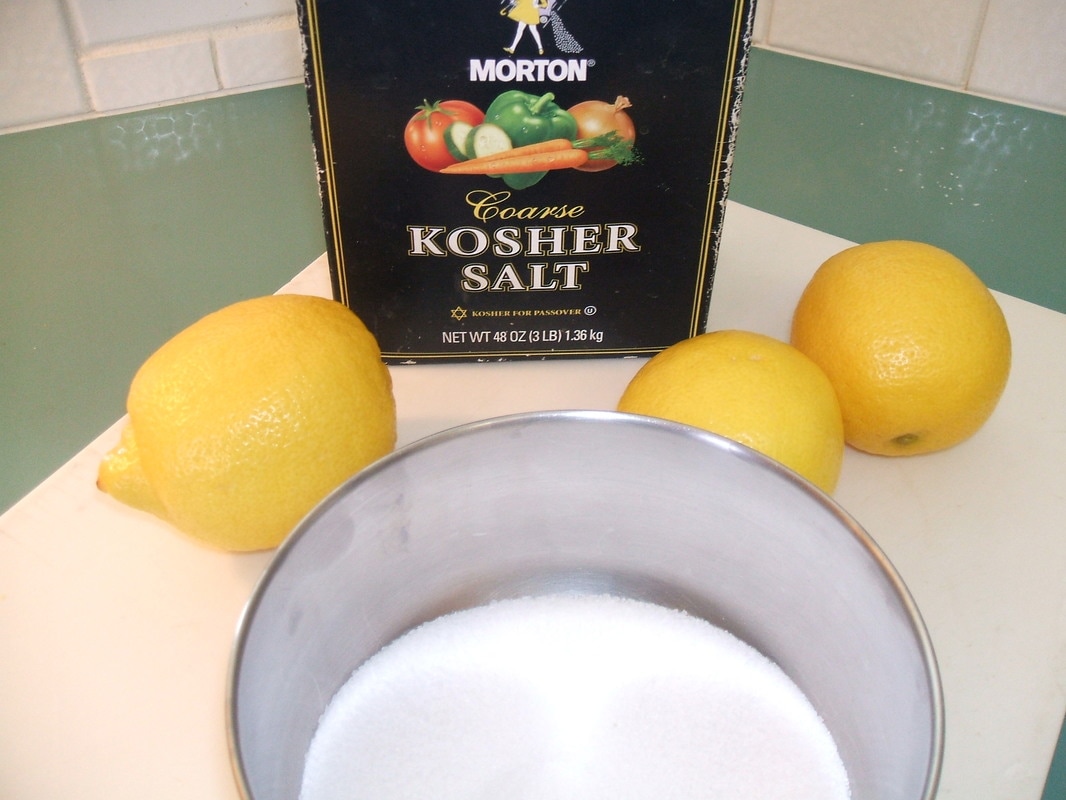
  • 2 teaspoons fresh lemon juice
  • 1 teaspoon salt
  • fresh ground pepper

Directions
  1. Heat oven to 225°.
  2. Combine tomatoes, 2 T. olive oil, herbs, vinegar, lemon juice, salt and pepper to taste in a mixing bowl.
  3. Arrange tomatoes in rows on a cookie sheet- with parchment paper
  4. Bake 1 hr.
  5. Cool to room temperature, about 15 min.
  6. Place in 4 half-pint canning jars - you may have extra
  7. Add extra olive oil to cover tomatoes in each jar.
  8. Tightly cover jars.
  9. Refrigerate.
  10. **Note: Olive oil will solidify in the refrigerator, but this won't affect the tomatoes. The oil will re-liquefy at room temperature.
0 Comments

Preserving Lemons

3/4/2017

2 Comments

 
If you love the flavor of lemons you need to learn how to preserve them. It will only take you about 15 minutes to put up a couple of jars and they will last a year in your pantry.  I bought a 2 pound bag on sale this week and it made 2 pints of preserved lemons. Now I will always have lemons on hand for beverages or baked items, like muffins, pies and cakes. Also think pasta, pizza, roasted chicken .... I could go on.

Lemon Dressing Recipe
1 tsp. chopped preserved lemon rind
1 T. olive oil
2 T. wine vinegar ( any type will work)
Touch of honey to taste
1 T. water
1/4 tsp guar gum for thickening to give it a bit of body

This is enough for one large plate of greens. You can vary the amount of ingredients as you like. It has a pleasant lemon taste just enough to dress the salad.
How to Preserve Lemons
Ingredients:
2 lbs. of lemons (6 large lemons...used about 5 plus)
1/2 c. Kosher Salt  (1/2 c. Kosher salt is not the same as 1/2 c. table salt)
1/2 c. Sugar

Equipment:
2 pint canning jars or 1 quart
Clean and sterilize your jars (put thru a hot dishwasher or boil for 2 minutes)

Directions:
  • Start by washing your lemons with warm water, make sure the peels are clean because you will be eating them. Organic lemons are preferred.
  • Slice the lemons thinly 1/8 - 1/4 inch thick
  • Remove the seeds from the slices
  • Mix the kosher salt and sugar in a bowl
  • Sprinkle the bottom of the jar with the sugar/salt mixture
  • Dip each lemon slice into the sugar/salt mixture and put into the jar
  • Lay each slice on top of each other and press down. Fill the whole jar
  • Press down the lemons as you are filling the jar. The sugar/salt mixture will pull the liquid out of the lemons and fill the jar. If there is not enough liquid to cover the sliced lemons, squeeze some fresh lemon juice on top. The lemons need to be under the liquid.
  • Leave on the counter 3 days, check to make sure lemons are submerged. Top off as needed.
  • This can go into the pantry, it will keep for up to a year. I'm sure you will use it before then. You may also keep the jars in the fridge.
Comments
  1. There are many recipes and techniques to preserving lemons. Most do not cut the lemons into slices. While this is a bit easier when making them, it's nice to have them already sliced when using them. Also, most recipes use only salt in the recipe, I found that to be fine for savory dishes but, for a more universal recipe that you can use in sweet baked items and savory dishes, I prefer the salt/sugar combination.
  2. Some of the recipes added herbs to the mixture like a sprig or rosemary or a couple of sprigs of thyme and  even a hot dried pepper to the curing lemons. Other additions noted were a cinnamon stick, whole cloves, whole cardamon seeds even a pinch of turmeric.
  3. One suggestion that I found helpful was to take the preserved lemons, (liquid and all) and chop it up with a food processor. This will give you a paste that you can use when cooking. I did this with one on my jars and it's easier when I use it for my tea in the morning. You only need about 1/4 tsp. of the lemon paste per cup to get a nice lemon flavor. I am very sensitive to salt, but what I have found is the lemon flavor is so strong that you use very little of the paste and there is not salt taste.
  4. When using the sliced lemons remove the membrane and use only the peel. Wash the peel to remove some of the salt. You will notice the lemon peel is almost creamy in texture. Chop it up and add to the dish. Taste as you go so you will know how much to add.
I hope you enjoy!
Tamara
2 Comments

Pectin, Pomona's Universal

7/10/2016

0 Comments

 
Picture
Probably many of you are great at canning but for me it's a new experience. This year I thought I would put up some preserves using low or no sugar.  I thought something more on the healthy side would be a good option. I'm not a fan of any artificial sweeteners so the sweetening needs to be natural, like honey or fruit juice


After doing research on the low sugar options I have come across a product Pomona's Universal Pectin specifically made for low sugar canning. This type pectin makes thick jam and jelly with rich, full flavor undiluted by large amounts of added sugar. Ordinary fruit pectins require your jam or jelly to be 55-85% sugar to set firmly.

This product is available at the Co-Op.... Price

Pomona's Universal Pectin™ Description
  • Our sugar free, preservative free, low-methoxyl citrus pectin is specially formulated for making low sugar jam & jelly.
  • Sweeten jam & jelly to your taste with low amounts of any sweetener: sugar, honey, agave, maple syrup, frozen juice concentrate, stevia, xylitol, Sucanat, concentrated fruit sweetener, or Splenda and other artificial sweeteners.
  • Each 1 oz box makes 2 to 4 batches (about 5 – 8 oz jars per batch). Recipes can be doubled or tripled. Each box contains pectin powder, calcium powder, directions, and recipes.
  • Keeps indefinitely.
  • Kosher manufactured.
  • Vegan. Gluten Free. Non-GMO.
  • Celebrating 35 years of low-sweetener jam and jelly.

Now you're free to make cooked jam & jelly and freezer jam the way you like it - sweetened to your taste with honey, sugar, artificial sweetener, fruit juice concentrate or any other sweetener.

0 Comments

How to Freeze Just About Anything

2/16/2016

0 Comments

 
Not everyone has the time to can or dry their food to preserve it. Freezing is simple and straightforward any one can do it. These tips come from Jenny McCoy a pastry chef instructor a the Institute of Culinary Education in New York.
General Rules
1. Never freeze in glass jars unless you know they’re freezer-safe. Glass that hasn’t been tempered is pron to shattering. This is important if you're freezing a liquid because it expands as it freezes. Instead use tupperware or freezer bags instead.

2. Keep a big bag for stock scraps. Whenever you have a few kale stems or carrot bits left over, toss them in there. Then make stock once it’s full.
3. Never,  use hot water to defrost. It's best to defrost the item in the refrigerator which sometimes means a bit of planning ahead.

4. Consider your temperatures. Always think food safety, don't leave your food on the counter to thaw or to cool down after cooking. This rule applies to even meatless dishes.  Food in the refrigerator should be stored at 40 degrees  Fahrenheit or 0 degrees Fahrenheit in the freezer. Use a  thermometer to make sure your appliance is working properly. 

5. Recommended freezer lifespans on the FDA website.

How to Freeze Fruit
Chop your fruit into slices treat with an acid to prevent browning it needed. For berries leave whole, do not wash unless dirty. Lay your fruit on a cookie sheet and freeze. Once frozen place into a freezer bag.

Bananas are different, you can freeze them in their skins, without wrapping them in any way. They do get super mushy after they defrost, so use them accordingly. Most fruits will last two to three months in the freezer

How to defrost:
Fruit has a high sugar content and will only take 30 minutes to defrost on the counter at room temperature. You can also use them frozen in baked items like muffins or cakes.

How to Freeze Vegetables & Herbs
Wash your vegetables and herbs, and chop them to the size you’re mostly likely to cook them in. If the vegetable you are freezing you want to retain a crisp texture then blanch it first. Blanching requires dipping the vegetable into boiling water for a minute or two. Then removing and cooling rapidly in a ice water bath. Leafy greens and soft vegetable like squash or tomatoes are just fine to put into the freezer bag raw. As always, remove as much air as you can from the bag before putting into the freezer.

Herbs are easy chop them up and place them into ice cube trays and cover them with water. Once frozen, remove from the trays and place into the freezer bags. Both vegetable and herbs are good for 2-3 months in the freezer.

How to defrost:
Cook them immediately or defrost in the fridge. Frozen herb cubes can be added directly to soups or sauces.

How to Freeze Soups, Stews, and Stocks
I freeze chicken stock weekly, for making soups. My choice is Tupperware containers. They are small enough so I can defrost one and use it in the recipe. Another option is freezer bags they are a bit thicker and can be stacked once frozen for saving space in the freezer. Once the stock is made, I allow it to cool to room temperature and put it into the refrigerator overnight. This does two things, it's easier on the freezer since it's 40 degrees before placing it into the freezer. Also, with chicken stock, it allows the fat to raise to the top of the container and I can remove it before freezing it. Now I have stock that is flavorful and good for you.

How long will it last?
For the best flavor use your soups, and stews within 2 months for best flavor. They will keep with no problem up to 6 months. Stocks are the building blocks of your foods and since you will be adding other ingredients to the finished dish they are fine to leave frozen for 3 months with out any noticeable flavor difference in the finished product.

How to defrost:
You can always defrost in the refrigerator—slow is best, because it allows for more even defrosting, and ensures that your food stays at a safe. It will take at least 2 days for my Tupperware containers to be thawed completely. But if you’re in a hurry, put your freezer bag or container  in a bowl and run cool water over it.

How to Freeze Meat, Poultry, and Fish
Bags are your friend! Ideally, you want to freeze meat in a vacuum-sealed bag. The less air and moisture lowers the risk of freezer burn. If you don’t have a vacuum sealer, simply try to remove as much air as possible from your freezer bag. Then close the bag almost all the way and with a straw suck the remaining air out before closing it.

How long will it last?
Meat and fish will keep for three to four months, and chicken for six.

How to defrost:
The refrigerator is ideal. You’ll want to get it in there a day before you plan on cooking it, or longer if you have something like a whole bird. If you don’t have that much time, run the bag under cool water.

How to Freeze Condiments and Sauces
It depends on the amount of sauce you will be using at each meal. If it's just a small amount go ahead and put it into ice cube trays. If you need more the snack sized freezer bags are handy for those sauces. This will allow you to reach into the freezer and get just the perfect amount for the planned meal. Keep in mind emulsified oil based condiments and sauces like mayo do not freeze will. It's best just to keep in the refrigerator and use as needed.

How long will it last?
Three to four months.

How to defrost:
Most of the time you are using a small amount and can add it directly into the cooking pot. Otherwise put it into the refrigerator to slowly thaw.

How to Freeze Baked Goods:
If you have small baked goods like cookies, you can just freeze them in a bag. In fact it's helpful to the diet to have the cookies frozen that way they are not just sitting there waiting to be eaten. I take out my allotted amount and keep the rest frozen. Loaves of whole gain bread freeze wonderfully. I bake the bread, let it cool, slice it and freeze it. This way you can take out a slice as you need it, and keep the loaf frozen.
How long will it last?
One to two months for smaller items like cookies and bread slices; two to three months for loaves, cakes, and unyeasted doughs.
How to defrost:
When I need toast in the morning I remove the slice from the freezer and lay it on the plate and in 5 minutes or so it's ready to be toasted and enjoyed.

Casseroles, baked pastas, and other whole dishes:
Use an aluminum pan. Even if you’re working with tempered glass, quickly moving it from freezer to oven could be enough to break your casserole dish. Once your dish is baked and cooled, wrap it in foil, then tightly again with plastic wrap. Good tip: line a baking dish with foil, bake and freeze it, then lift the frozen casserole out of the dish whole, wrap it up tightly, and store it in a freezer bag.

How long will it last?

Two to three months.

How to defrost:

In the fridge. A 13×9-inch casserole will take two days to defrost fully; something smaller will take just a day.

Tips:
Freezing large dishes like baked pastas or casseroles in smaller portions so they’re easier to heat up is a real time saver around our house. We defrost in the fridge and reheat in the oven or microwave. Dishes that freeze the best are those with a high moisture content, like bread pudding or lasagna. Potatoes and other high-starch foods can get a bit mealy after freezing and reheating.

Bon Appetit
January 21, 2016
Written by Marian Bull
0 Comments

What is Pickling Salt?

8/18/2015

2 Comments

 
The canning season is upon us and your recipe calls for pickling salt. Pickling salt, or sometimes called canning salt or preserving salt — is pure granulated salt (sodium chloride).  Pickling salt does not contain any anti-caking ingredients, which can turn the pickling liquid cloudy, or dark. Also, pickling salt has fine granules that makes it easier to dissolve in your brine. Morton and Ball are two common brands available at most grocery stores. It's usually in the salt section or next to the canning jars.

The question is do you really need pickling salt for pickling? While pickling salt is ideal, it's not the only salt that can be used. Kosher salt is a great alternative, as long as it's pure salt without any additives. Read the label carefully. (Diamond Crystal is a good brand; avoid Morton, which does contain anti-caking agents.) Pure sea salt can also be used in pickling.

Although table salt is perfectly safe to use in pickling, it is not recommended because the quality of pickles may suffer due to its additives.

Substitutes for Pickling Salt
When making substitutions for pickling salt, keep in mind that weight per volume can differ. Salts coarser than pickling salt may also take longer to dissolve. The University of Wisconsin - Cooperative Extension advises that
1 1/2 cups of flaked kosher salt equals about 1 cup of canning and pickling salt, or about 50% more kosher salt. For fermented pickles, they recommend measuring by weight: 7 3/4 ounces (220 grams) of flaked salt is equivalent to 1 cup of canning and pickling salt.

Sources
University of Wisconsin Cooperative Extension .... Great Hand out!
2 Comments

Prevent Moldy Berries

7/14/2015

0 Comments

 
Picture
The next best thing to buying your berries on sale it to be able to eat them before they start to mold. Fruits are important in your diet so keeping them fresh as long as possible should be your goal.

Next time you come from the farmers market with a bag or two of berries, you can apply a homemade solution in order to prevent them from spoiling.  The secret lies in vinegar! Vinegar can kill any mold spores or other kinds of bacteria on the surface of the berries, which  causes them to lose their freshness. Prepare a mix of 1 part white or apple cider vinegar and 10 parts water. Then dump the berries into the solution and swirl them around for a bit. After that, drain them and place in the refrigerator. This tip will extend the life of your berries about a week, when kept in the refrigerator.


0 Comments

How to Keep Your Avocados Green

5/15/2015

0 Comments

 
Avocados are expensive and you want to keep them looking fresh and green. Once you cut into your avocado the air starts to turn the avocado from vibrant green to a dark brown in color. One way to avoid this is to cut the avocados at the last minute before serving. This seems easy but when entertaining you want to do as much ahead of time to enjoy your guests.

Tip:
If you rinse or submerge the sliced avocado into cold water this prevents the exposed fruit from browning for hours. Just slice and rinse and your avocado will stay green until the guests arrive. So simple and easy, so enjoy those avocados in dips, or on salads, their good for you.

Tamara
Carl
0 Comments

Freeze Your Extra Eggs

1/21/2015

0 Comments

 
Picture
Yes you can freeze your eggs and they taste nearly the same after they have thawed. You can fry them, bake with them or add them to casseroles or other recipes.


This is a fantastic way to stock up on eggs when they are on sale, or a great idea to use them up when you have some that are about to expire.  When you see eggs on sale go ahead and buy extra.

How to Freeze Whole Eggs
You can crack the eggs into a muffin tin, plastic egg crate or even ice cube trays. You just crack the eggs and add to the container without using any kind of spray or oil. Then place the tray into the freezer and freeze until the eggs are frozen solid. Once they are frozen you can remove the eggs from the container. If they are stuck just have the container sit in some warm water for a minute and they should pop right out.  I have found the best option for me, is to freeze the eggs in the silicone cup cake pans, you can get them at Walmart pretty cheap. After you freeze the eggs, then just turn  the pan inside out and the eggs pop out. Then add them to a gallon sized freezer safe bag. You can keep them frozen for up to a year. When you are ready to use them just take out the number of eggs needed and allow to thaw at room temperature. You can use them with any recipe that requires a whole egg such as baking, breading chicken, scrambled eggs, french toast, etc.

Separating the Egg Whites
If your recipe calls for just egg whites then it's best to separate the eggs before you freeze them. You can crack your eggs and separate the whites into one silicone cup and the yolk into another. Then after they are frozen add them to separate freezer safe bags. The holidays are coming up and baking season is just around the corner, stock up on eggs when they go on sale.

0 Comments

    Baking Education

    Cooking Tips & Shortcuts

    Archives

    October 2020
    February 2019
    August 2018
    June 2018
    March 2018
    March 2017
    November 2016
    September 2016
    July 2016
    May 2016
    April 2016
    March 2016
    February 2016
    January 2016
    December 2015
    November 2015
    October 2015
    September 2015
    August 2015
    July 2015
    June 2015
    May 2015
    April 2015
    March 2015
    January 2015

    Categories

    All
    Baking Tips
    Candy
    Converting Recipes
    Equipment
    Food Coloring
    Gifts
    Gluten Free Tips
    Herbs & Spices
    Ice Cream Tips
    Leavening Agents
    Meats & Eggs
    Oils
    Pie Tips
    Pie Tips
    Preserving Food
    Thickening Agents
    Tips On Produce

    RSS Feed

Powered by Create your own unique website with customizable templates.