Whole Grain 100
Email: wholegrain100@proton.me
  • Welcome
  • Price Sheet
  • Store & Classes
  • Baking Education
  • Recipes
  • Grain Education
  • Health & Nutrition

Almond Raisin Granola

11/16/2018

0 Comments

 
Homemade granola makes a perfect breakfast or snack. Granola is not difficult to make just requires time stirring so it does not burn.
Servings: 8
Oven: 250 degrees
Bake: 1 hour + 15 minutes
Pan: Cookie Sheet (need sheet with rim)
Ingredients:
3 c. old fashioned rolled oats (not instant)
1 c. slivered almonds
3/4 c. shredded sweetened coconut
1/3 c. sesame seeds

6 T. maple syrup - the real stuff (honey will also work)
6 T. brown sugar (packed)
1/4 c. vegetable oil
2 T. water - warm
1/2 tsp. salt

1 c. raisins - golden are nice

Options:
  • You can add some spices like 1/2 tsp. cinnamon, nutmeg, cloves, ...what you like. If you add a strong spice like cloves add 1/4 tsp.
  • Almond extract or vanilla 1 tsp.
  • Other dried fruit you like
Directions:
  • Preheat oven to 250 degrees
  • In a large bowl toss oats and almonds coconut and sesame seeds.
  • In another bowl, mix the syrup, brown sugar, oil, water, and salt
  • Pour the syrup mixture over the oat mixture and stir to combine.
  • Pour onto the cookie sheet and spread evenly
  • Put the timer on and stir the granola every 10-15 minutes
  • Cool on the cookie sheet and add the raisins
  • Transfer to a airtight container, store in the fridge.
  • Can be made a week ahead, or you can freeze for longer storage.

0 Comments

Zesty Zucchini Relish

7/15/2018

0 Comments

 
Horseradish and hot pepper give this relish it zest. It's a great way to use up extra zucchini from the garden. This is great on hot dogs, bratwursts and even hamburgers. So when your zucchini plants are giving you a ton of fruit take advantage and can up this zesty relish.

Canning Supplies Needed:
Water Bath Canner or large pot
5 pint (16oz) canning jars with lids and bands

Ingredients:
12 c. finely chopped zucchini (about 12 med. zucchini)
4 c. chopped onions (about 3 Med) use red for color or a mixture
2 red bell peppers, seeded and chopped
1 green bell pepper, seeded and chopped (or use yellow pepper)
1/3 c. pickling salt
2 1/2 c. sugar (optional add 1T. Non Instant Clear Jel to sugar)
2 1/2 c. apple cider vinegar
1 T. ground nutmeg
1 T. ground turmeric
4 T. prepared horseradish
1 chili pepper, including seeds, chopped (4 chopped jalapenos)

Note: If needed to thicken use 1 T. Clear Jel (Non-Instant)
If you use half pint jars process for 10 minutes in water bath

Directions:
  • Combine zucchini, onions, red and green peppers and salt in a large glass or stainless steel bowl. Cover and place in the fridge overnight.
  • Transfer to a colander and place over the sink and drain the liquid. Rinse with cool want and drain thoroughly. With your hands, squeeze out the excess liquid. I use a salad spinner to get it dry.
  • Combine the zucchini mixture, sugar, vinegar, nutmeg, turmeric, horseradish and chili pepper in a large stainless saucepan. Bring to a boil over medium-high heat, stirring occasionally. Reduce heat and boil gently, stirring frequently, until the liquid is reduced and the mixture is the consistency of a commercial relish. This will take about 45 minutes. If you added the Clear Jel to the sugar it will thicken up quicker.
  • Prepare boiling water canner. Heat jars in simmering water until ready for use. Wash lids in soapy water and set bands aside.
  • Ladle hot relish into hot jars leaving 1/2 inch headspace. Remove air bubbles and adjust headspace, if necessary, by adding hot relish. Wipe rim. Center lid on jar. Apply band until fit is fingertip tight. Place jar in boiling water canner. Repeat until all jars are filled. 
  • Process jars for 15 minutes, adjusting for altitude. Turn off heat; remove lid and let jars stand 5 minutes. Remove jars and cool. Check lids for seal after 24 hours. Lid should not flex up and down when center is pressed.
0 Comments

Herb and Garlic Breadcrumbs or Croutons

12/25/2015

0 Comments

 
Homemade bread crumbs are pretty much a pantry staple. They can make a salad go from ho-hum to out of this world in texture and taste. Bread crumbs can be used as a topping on any thing that is soft in texture. They are perfect for bringing another layer of texture and flavor to a dish, like on macaroni and cheese. You can use this same technique if you want to do croutons instead of bread crumbs, you just will leave them in 1 inch pieces.

This recipe can be for any type of bread crumbs. When I make croutons I make a large amount. I dry the cut up pieces in the oven leaving them overnight in the oven as it cools. Once dried I freeze them with no seasoning so I can vary the flavors as needed with each dish. That way I have un- seasoned  croutons ready at a moments notice. The recipe and technique below is for one cup of bread crumbs. You can use any herbs that you want. It depends on what flavor you want your crumbs or croutons to have.

Ingredients:
This is for 1 cup of bread pieces
Old bread (any type)  cut into 1 inch pieces about 1 cup
1/4 c. olive oil
4 T. unsalted butter
4 rosemary sprigs
4 thyme sprigs
4 crushed garlic cloves

Directions:
Cut the bread into 1 inch pieces and place on a rimmed baking sheet. Place in the oven after something has finished baking and you have turned the oven off. Leave them overnight as the oven cools. You want the bread to be very dry and hard. After they are dry I usually freeze them to season later as needed.

Crumbs
  • Once the bread is dry, or remove one cup of frozen dried bread from the freezer. Place the bread into a dish towel and with a rolling pin or meat pounder smash into fine irregular crumbs. If you want even crumbs, the food process, or vita mix works perfect on frozen bread cubes.
  • Heat 1/4 c. of olive oil and 4 T. unsalted butter in a medium skillet over medium heat until the butter begins to foam.
  • Add the rosemary sprigs, thyme sprigs and crush garlic. Cook tossing until fragrant about 1 minute.
  • Add the 1 cup breadcrumbs or croutons and cook, stirring occasionally until golden brown about 4 minutes - 6 minutes.
  • Transfer to a paper towel and let drain. remove the herbs and garlic, and season with salt. Let cool
  • These freeze well in a plastic bag.
Add the crumbs or croutons to anything that needs a lift in flavor and texture.

0 Comments

How To Make Whey & Cream Cheese

1/13/2015

0 Comments

 
This recipe is from Wellness Mama
If you make kefir milk or water you already have whey to make fermented vegetables. Unfortunately not everyone makes kefir and if you want to learn how to ferment vegetables you will need whey to speed up the process. This recipe is a bonus because you will make wonderful cream cheese and have a by product of whey to use in fermenting something else.

Ingredients & Supplies
  • One 32-ounce container of full fat organic PLAIN yogurt
  • Cheesecloth or thin dish towel
  • Medium-size bowl
  • String or rubber bands
Instructions
  1. Pour the yogurt into cheesecloth or thin towel. You can pour the whole container, or just use half if you don't need much whey. Make sure the towel is thin, or it will absorb too much of the whey.
  2. Pull the ends of the towel up and secure with string or a rubber band.
  3. Tie the towel with yogurt in it to a cabinet handle above the bowl.
  4. Leave it alone overnight to drip.
  5. In the morning, if the dripping has stopped, pour the liquid in the bowl (this is the whey) into a glass jar and store in the fridge for up to six months.
  6. The "yogurt" left in the towel is actually cream cheese now. Put in its own container and use as you would store bought cream cheese.
  7. Use the whey for homemade salsas, sauerkraut, fermented veggies, onions or pickles and more.
0 Comments

Fermented Onions

1/10/2015

1 Comment

 
Picture
Recipe is from a book Mastering Fermentation. These onions are outstanding on a sandwich, pita, salad, even pizza. You could make a paste out of them and use as a spread on just about anything or fill raviolis.


ONION MARMALADE
1.5 lbs of sweet onion yellow or a combination or red and yellow
1 T sea salt (I used half)
1/2 c. apple cider vinegar (unrefined)
2 T. balsamic vinegar
1 T. brown sugar
1 tsp. anchovy past (optional) ..did not have but would be really good in it
1/8 tsp. pepper
2 tsp. fresh thyme leaves (used dried)
1/4 c. fermenting agent (whey)

Directions:
1. Oven 350 degrees, slice onions and place on a greased cookie sheet
bake until soft about 20 minutes....may have to turn a few times to get even baking...remove from oven and cool.

2. Place onions in a large bowl an squish with your hands to release some moisture and add the salt.

3. Pour vinegar, sugar and herb mixture over onions

4. Put into a wide mouth jar push down to get onions below liquid. Add a bit of water to cover the onions if needed. If you have an air lock for your jar, used it but, it's not necessary. Just cover the jar with a coffee filter and leave on the counter overnight. Then put a lid on the jar and stick it into the fridge and let it sit for a week.

Use within 2 months, which should not be a problem they are good on anything.


1 Comment

Herbed Feta Toasts

3/19/2014

0 Comments

 
Picture
A great appetizer or just a snack!
this has roasted red pepper and basil on top.


Ingredients:

8 oz. feta cheese, crumbled
1/4 c. fresh tarragon (1 T. dried)
1/4 c. fresh chives, chopped
2 T. fresh thyme
1/4 c. extra virgin olive oil
Freshly ground black pepper
6 pita bread rounds

Directions:
Combine cheese, tarragon, thyme, chives and pepper in a medium bowl. Toss the mixtures with the oil and let stand for 1 to 3 hours at room temperature.

When ready to serve, preheat the broiler.

Toast the pitas lightly in the toaster or toaster oven. Cut into quarters or sixths and top each piece with a tablespoon or more of the cheese mixture.

Place the pieces on a baking sheet and broil about 5 inches from the heat for 1 minute or until the cheese just begins to bubble.
Serve hot or warm.


Recipe from: Our Favorite Recipes Cookbook
A Collection by
Hummingbird Hideaway Resort

0 Comments

Herb Butter Recipes

1/27/2014

0 Comments

 
Picture
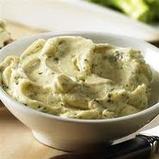
Best Made With Unsalted Butter

Making herb butter couldn't be easier, it's just butter and herbs, but what a difference in what ever you put it on or use in. Below are a few recipes from different sources that are worth trying on your summer vegetables, meats and baked goods. You may use dried or fresh herbs for the following recipes. The rule of thumb is if you use fresh herbs use twice as much if the recipe calls for dried herbs. These recipes will get your creative juices going, and  you can change any of the ingredients or add to them.

How to Store
Once you have the butters made up take a piece of plastic wrap about 8 inches long and put the soft butter centered about 1 inch from the edge of the plastic wrap. Roll the butter into a log using the plastic wrap and then twist the ends and tie. Store in the refrigerator or freeze for later use. To use, slice off a piece and twist the end closed again. Another easy method is to put the butter into a small plastic sandwich bag and flatten it out. Freeze the bag and when  you want some just break off a piece and return it to the freezer. Enjoy the summer herbs and save them for later use by making herb butter.

Green Butter
1 bunch fresh watercress
1 bunch  fresh chervil
1 bunch fresh parsley
5 salad burnet leaves
1 clove garlic
1 chopped shallot
Salt to taste
1 cup unsalted butter

Blanch the watercress, chervil, parsley and burnet in boiling water for 30 seconds. Drain and dry thoroughly, then pound in a mortar with the garlic, shallot and pinch of salt. Then beat in the butter by hand or with a food processor..
Recipe from The Complete Book of Herbs & Spices

Spice Rum Butter
1 cup unsalted butter
3/4 cup brown sugar
A pinch of grated nutmeg
A pinch of ground cinnamon
3/4 tea grated lemon peel
3 T. Rum

Cream the butter with the sugar. When it is pale and thoroughly incorporated, beat in the nutmeg, cinnamon and lemon peel. Gradually beat in the rum.

Melt over steamed puddings or spread thickly on hot toast or muffins.
Recipe from:  The Complete Book of Herbs & Spices

Herb Butter 1
1 cup unsalted butter, softened
2 t. lemon juice
4 T. minced fresh tarragon
                   or
2 T. dried and crushed
2 T. chives, finely minced
2 T. fresh parsley, finely minced

With your food processor, cream butter, add lemon juice slowly, then herbs.
For chicken, eggs, fish, steamed vegetables
Recipe From: Gifts From Your Garden


Herb Butter 2
1 cup unsalted butter, softened
4 T. minced fresh oregano
                      or
2 T. dried and crushed

2 T. minced fresh basil
                      or
1 T. dried and crushed
2 T. minced fresh chives

With your food processor, cream butter and beat in herbs until combined.
For broiled stuffed tomatoes, steaks and chops
Recipe From Gifts From Your Garden

Deluxe Steak Butter
1 Stick unsalted softened butter
1 t. lemon juice
1/4 t. garlic powder
1/4 t. cracked black pepper
1 t. shredded green onions
1 t. Paprika
1 t. dried dill weed

Blend together and use on steaks, burgers, chops
Recipe from: The Spice Islands Cookbook

0 Comments

Dairy Free Whipped Cream

1/7/2014

0 Comments

 
Picture
If you are one of those folks like me that are lactose intolerant than this might be a great option for you. I love whipped cream on my pie or on anything to be honest but, as I get older it does not agree with my digestive system. My option has always been don't eat the dairy or take a lactase pill to help my digestive system.

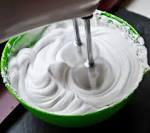
I saw this recipe in "Cook's Illustrated" and thought it would be perfect for the holiday season. The whipped cream is made with a can of coconut milk. The finished cream will have a pleasant lightly sweet coconut taste so it may not be best on or in all desert choices.

Recipe:
1  15oz. can of coconut milk (not the low-fat)
1 1/2 tsp. of sugar, ...to taste
1/2 tsp. vanilla ...to taste
pinch of salt.

Instructions

1. Place the can of coconut milk in the refrigerator and leave it there until well-chilled; I left mine in overnight.

2. Before making the whipped cream chill the bowl and beaters in the freezer for 5 minutes or so.

3. Remove the can from the fridge and turn it upside down, the reason for this is the liquid coconut milk that does not harden will now be on the top of the can.

4. Open the can and pour off the liquid into another bowl. Use this for smoothies or in a recipe like pancakes, or muffins instead of milk.You should have around 3/4 to a cup of harden coconut cream. Scoop out this firm layer of coconut cream into the chilled mixing bowl.

5. Turn your mixer or hand beaters to high speed, and whip the coconut cream for 3 to 5 minutes.

6. Whip until it becomes fluffy and light, with soft peaks then mix in sugar and vanilla.

How To  Use:

You can use this whipped cream just like regular dairy whipped cream. I like to use it in desserts & frostings, it’s amazing over a simple bowl of fruit, pancakes, or add a dollop on your oatmeal for an extra creamy treat. You can even dollop it on pecan pie, or holiday cake. It would be great in your after dinner coffee for a treat. The options are really endless!

Storing:

Have leftovers? You can easily store it in the fridge for at least a week and a half (probably longer) in a sealed container. It will firm up a bit more in the fridge. Simply scoop it into a bowl and re-whip it when you need it.

0 Comments

Ricotta Cheese Whipped Cream

1/4/2014

0 Comments

 
Picture
Counting Calories
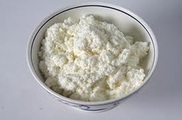
Who said you have to give up the food you love, just be creative and one way is to use Ricotta Cheese. Ricotta cheese comes in 15oz. containers has a very long shelf life and you can even freeze it. We use it as a sweetened topping on fresh fruit in the summer.
But you can also use on pizza, and even in your omelets to give it a creamy taste

Recipe: Sweet Topping
Whipping Cream may not be in your diet but another option is Ricotta Cheese.
(1) 15oz ricotta cheese
2 tsp. sugar or artificial sweetener to taste
1 tsp. vanilla
Whip with a beater until will blended.

Slice your berries and top with the sweetened Ricotta Cheese and then drizzle with Pomegranate Molasses, Balsamic Vinegar or even chocolate. You won't miss the whipped  cream!

0 Comments

Peach Or Pear Chutney

12/15/2013

0 Comments

 
Picture
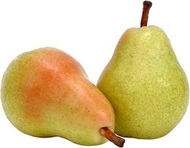
Chutney is a family of condiments  most commonly used in Indian cuisine.  There are virtually limitless numbers of chutneys that can be made from almost any combination of vegetables, fruits, herbs and spices. Chutney's are usually grouped into sweet or hot forms; both forms usually contain spices, including chili, but differ by their main flavors. Chutney's are a perfect way to use up fresh produce when it's in season. Pears are cheap and best in the fall, but this recipe can be made with peaches also.

This is a perfect way to dress up a meal, I love it over chicken, or fish. Even served over soft cheese as an appetizer during the holiday season. If you have never canned anything this is an easy recipe that would make great gifts or keep it for your family to enjoy.

Yields about 7 pints

4 quarts for finely chopped peeled, and pitted pears ( about 20 of medium size)
2 to 3 cups brown sugar
1 c. raisins
1 c. chopped onion (about 1 medium onion)
1/4 c. mustard seed
2 T. ginger
2 tsp. salt
1 clove garlic minced (optional)
1 hot red pepper finely chopped
5 cups vinegar

Combine all the ingredients in a large saucepan.
Simmer until thick., stir frequently to prevent sticking.

Ladle hot chutney into hot jars, leaving 1/4 inch of head space. With a knife remove the air bubbles . Put on the two piece vacuum caps, consisting of a lid and band making sure they are tight.
Process for 10 minutes in a boiling water bath.

Note: If you want a milder chutney, removed the seeds from the hot pepper, always remember to wear rubber gloves when working with peppers.

0 Comments

Cherry Cranberry Chutney

11/16/2013

2 Comments

 
Picture
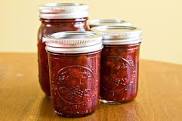
When the holiday comes around each year I start thinking of small gifts that friends and neighbors would like, that would be easy  and quick for me but taste like I worked all day in the kitchen. This is just such a recipe, it's versatile and the holiday meals wouldn't  be the same without it.

We use this as a side with our turkey at Thanksgiving, but it's also great on Waffles, Pound Cake, Ice Cream,  or as a dip poured over cream cheese served with small cookies. Double or triple the recipe and can up some for future use.

Ingredients     
Yields: 4 Cups
1/2 c. packed brown sugar (100 g)
1 c. raisins (80 g)
1 c. fresh or frozen cranberries
1/2 tsp. nutmeg
1/2 tsp. cloves
1/2 tsp. cinnamon
1/3 c. white vinegar (92 g)
1 (20 oz can) cherry pie filling
1 small orange  zested then peeled and chopped


Instructions:
Zest the orange, peel it and throw away the peel, then chop it into small pieces.

In a large heavy saucepan, combine the ingredients. Bring to a boil, stirring occasionally then reduce the heat, simmer 20 minutes or until the cranberries pop.

Cover: Refrigerate several hours to blend flavors. Store in the refrigerator of up to 3 weeks, or can up a few jars for future use.


To Use As Gifts:
Double the recipe
Ladle the hot mixture into clean hot canning jars, leaving 1/4 - inch headspace. Adjust the two piece caps.
Process for 15 minutes in a boiling - water canner.
If you have never canned here is a link to ball
with great instructions.

Decorate
Cut out a scrap of fabric and tie it over the cooled jar and you have a great gift for anyone.


2 Comments

    Categories

    All
    Appetizers
    Beef Main Dish
    Beverage
    Biscuits
    Breakfast
    Cakes
    Cookies & Bars
    Desserts
    Fermentation
    Fish
    Gluten Free
    Ice Cream
    Instant Pot
    Medicine
    Muffins & Quick Breads
    Pies
    Pork Main Dish
    Poultry Main Dish
    Preservation
    Puddings
    Salads
    Sandwiches
    Sauces
    Save Money & Time
    Seasoning Mixes
    Sides
    Soups & Stews
    Sweet Yeasted Breads
    Toppings & Spreads
    Vegetable Side Dish
    Yeast Breads

    RSS Feed

Powered by Create your own unique website with customizable templates.