Whole Grain 100
Email: wholegrain100@proton.me
  • Welcome
  • Price Sheet
  • Store & Classes
  • Baking Education
  • Recipes
  • Grain Education
  • Health & Nutrition

Types of Pre-Fermentations

7/16/2019

0 Comments

 
There are many ways to classify doughs. Breads made in one mixing cycle with no pre-fermets are classified as direct or straight doughs. Breads made with a pre-ferment are know as indirect or sponge breads. Working with whole grain pre-ferments are used to improve flavor, develop gluten, provide structure to the dough and stay fresh longer.

Bread gets its spongy consistency from fermentation—the interplay of flour, water, and yeast that begins when the water activates an enzyme contained in the flour that breaks down the starch and converts it to sugar. The yeast feeds on the sugar, growing and multiplying, and producing 2 essential by-products: alcohol and carbon dioxide. The alcohol adds flavor, while the bubbles of carbon dioxide "leaven," or raise, the dough and establish the bread's crumb or texture.

Pre-fermentation involves mixing part of the dough's flour, water, and yeast and allowing it to ferment before adding it to the rest of the dough. The use of a pre-ferment allows you to use less yeast because the pre-ferment kick-starts the fermentation process before the dough is actually mixed together.

Making a pre-ferment several hours before adding it to dough will give bread an extra depth of flavor, but if a pre-ferment is made one or even several days in advance, it will also add acidity. In small amounts, acidity extends the shelf life of bread, but in larger amounts, such as in the case of sourdough, it starts to affect the texture of bread, creating large holes in the crumb.

There are many types of pre-ferments but basically 2 categories wet or firm. Most Americans are use to a wet pre-ferment like a sour dough sponge. Europeans use more firm pre-ferments since they are easier to adapt in recipes. The pre-ferment is the same hydration (amount of liquid to flour ratio) as the final dough, which means it feels like the final dough when kneading.

Wet Pre-ferments (50% or more liquid to flour ratio)
  1. Poolish- a wet sponge, is easy to make and is best when made fresh each time you need it. It will, however, also be good for up to 3 days if stored in the refrigerator and can be frozen if you choose to do so. The flour and the water are the same weight and are mixed with a spoon.
  2. Levain- This is a French term used for a sour dough starter or a wild yeast starter. It mainly is a wet pre-ferment.
  3. Sourdough - The most common pre-ferment to home bakers in the U.S, it's usually wet. 

Firm Pre-ferment (less then 50% liquid to flour ratio)
  1. Biga- Is the Italian verson of a firm pre-ferment. A Biga has the same feeling as the finished    dough it includes a small amount of yeast and no salt. The biga is retarded overnight in the refrigerator or can be held for up to 3 days before it must be used.
  2. Pate Fermentee- The French version of a firm pre-ferment. The Pate Fermentee can be made in advance but more often it's a piece of dough from the bread baked the day before. The difference between a Biga and a Pate Fermentee is the addition of salt in the Pate Fermentee.
  3. Desem- An ancient style of sourdough developed by the Flemish a region of Belgium. Desem takes weeks to develop in a cool temperature. The flavor is more complex and less sour than a sour dough starter.
0 Comments

New Heights With 100% Whole Grain

7/16/2019

2 Comments

 
Fats and Oils are added to breads to improve flavor and provide a moist texture and rich taste. Butter, margarine, shortening, nut and vegetable oils add flavor and make the bread tender and moist. They also slow moisture loss, helping bread to stay fresh longer.

Liquid fat, like oils and melted butter that are incorporated into the bread dough before kneading will inhibit the gluten formation.  Gluten is the (protein) elastic bands that allow the bread to raise. If your recipe calls for you to add melted  butter or oil to the dough, knead the dough first to develop the gluten.  In fact, recipes that require no fat will raise higher than recipes that add fat before the gluten is developed.

You can have the best of both worlds, all the benefits of the added fat and a high loaf. How and when the fat is added to the dough is the secret. You can use this trick with any recipe, just add the fat at a different time in the mixing process.

It's hard to get a light loaf using 100% whole grain but using a method developed by the French to add the butter after the gluten has been developed really helps when making 100% whole grain breads.

What I do is develop the gluten with the mixer or by hand and the last couple of minutes of kneading, I add cold butter which has been cut up into small pieces to the dough. I poke holes with my fingers in the dough and insert a piece of cold butter into each. Then I put the dough hook back on the mixer and knead or continue kneading by hand.  At first the dough will start to fall apart but as you incorporate the cold butter the dough will pull together and the finished result is amazing.

Think of the cold butter like putting cream rinse on your long hair (gluten strands). The butter de-tangles the developed gluten strands which allows them to stretch to the fullest extent, and the bread to raise to new heights.

Next time your struggling with a recipe that for some reason never seems to raise very well try this technique. With bread making the ingredients are simple but sometimes the techniques make the difference between a brick and a high light loaf.

Happy Baking
Tamara

2 Comments

How To Make A Proofing Box

7/11/2019

2 Comments

 
I think one of the hardest things to achieve is a good place to proof your dough. Everyone's home is different in temperature and humidity so what might work for some is not the best option for others. There are so many options to proofing your dough, some folks even proof overnight in the fridge.

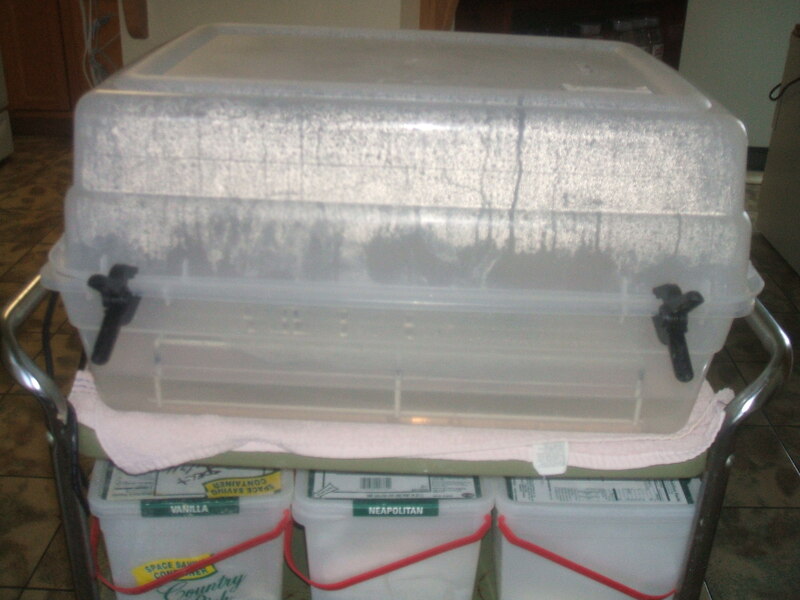
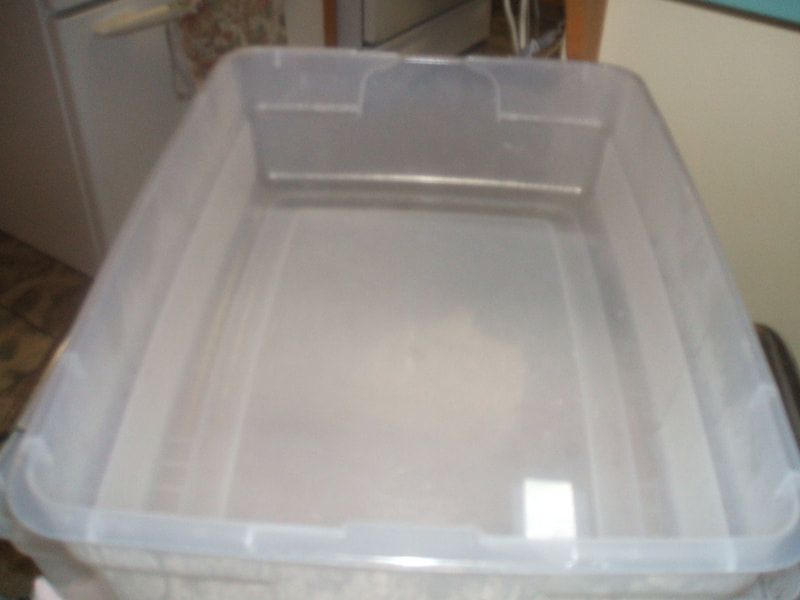
I ferment the dough in the fridge overnight but then I get it out and put the bread together in the morning. After kneading the dough I bulk proof it in my proofing box. I have tried many different proofing boxes and this one is simple to make, very inexpensive, easy to clean, and stores away until needed. In my kitchen space limitations are an issue, I keep the proofing box on a rolling cart that must fit under a shelf. So the height of the plastic tub in my circumstances was an issue. I used two plastic tubes about 6 inches in height. There was nothing available in the correct height and width that would work for my situation. 

Supplies Needed
  • 2 plastic tubs minimum of  6 inches in heights the length and width is up to you - clear plastic is best so you can see into it.
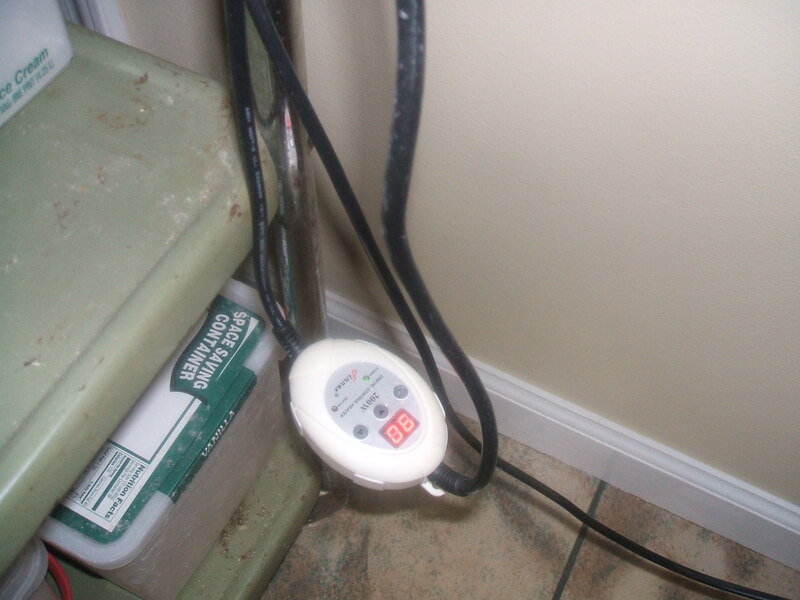
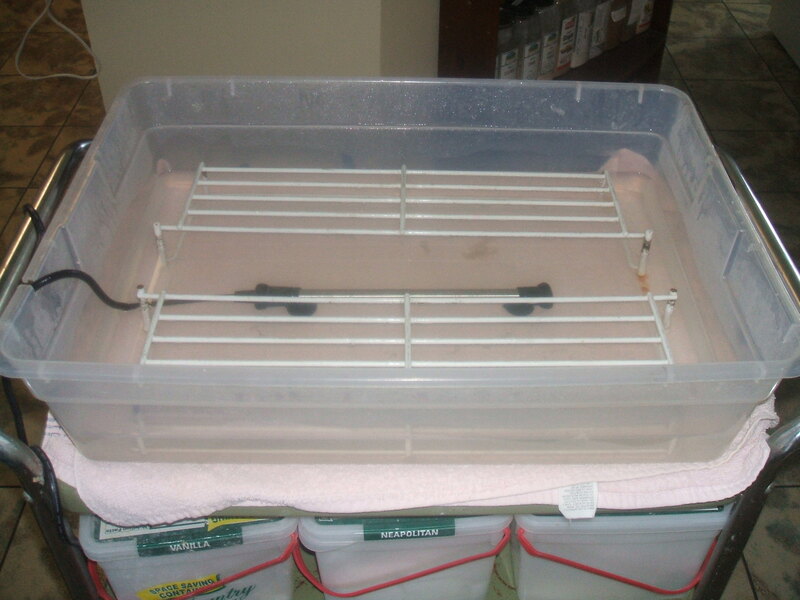
  • Fish Aquarium heater - they are under $20.00 (check temperature range on the model)
  • Clips to hold the tubs together
  • Some sort of rack to fit inside that water will not damage and hold your bowl or pans above the warm water.
I have my proofing box on a rolling cart, which makes it easier to move around. Once filled with water it can be a bit on the heavy side. When not in use my proofing box is rolled under a shelf out of the way.

According to the directions you must fill the water about 1 inch in depth above the  fish aquarium heater. The heater will hold the water at a constant temperature of 90 degrees just about perfect for bread.

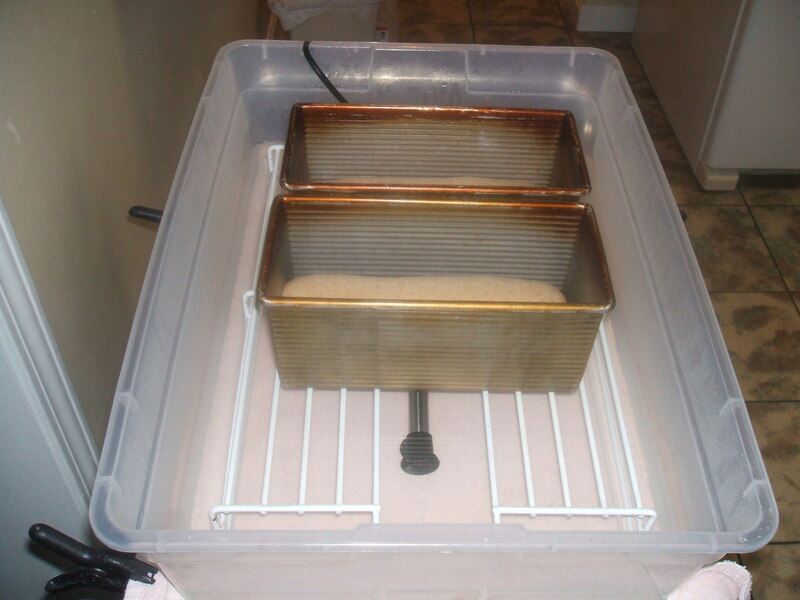
The rack is just something I found at the thrift shop and chopped it in half to fit inside the tub. Once loaded with the loaves, I put the other tub on top and clip them together. Since they are clear you can see how the bread is coming along.

Cleaning is a breeze, just drain the water and wipe down the tubs and store away. I hope this information will help you to come up with a workable solution to getting your bread to raise to new heights.
2 Comments

Developing A Windowpane

7/11/2019

0 Comments

 
 No matter what type of flour you use or style of bread you bake you need to develop the gluten enough to achieve a "windowpane". This is the most reliable method to determine when the gluten in the dough has been developed enough to give you a nice light high loaf.

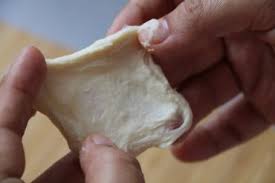
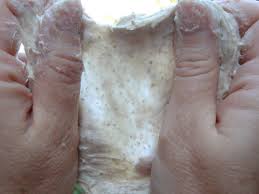
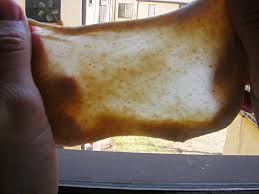
To determine if your dough is ready cut off a small piece of the dough and gently stretch and pull on the piece turning it as you are pulling. The idea is you want to see if you can pull the dough enough to form a thin translucent membrane, like a windowpane. If the dough rips right away the gluten is not developed enough and you will continue to knead the dough and try the test again.

Because of all the fiber (bran) in the dough it is more difficult to achieve the windowpane. That is why I believe an indirect method for making bread with whole grains is so much easier. The fact you let it ferment overnight allows the bran to soften and will reduce it from cutting the gluten strands when trying the achieve your windowpane.

If you are kneading your dough by hand there is little chance you will over knead it, your arms will give out first. I use a 7 quart mixer which is larger than most have at home so it does not take that long to achieve a good windowpane about 5 minutes. If your mixer is smaller it may take a few minutes longer. Put your timer on, after remove the dough and check it with your hands is it stretchy, you will get the feel of it with practice. The pictures below give you a good idea of how thin you need to stretch the dough to see light thru it.
0 Comments

    Yeast Bread
    Education


    Archives

    December 2022
    May 2022
    April 2022
    July 2020
    April 2020
    March 2020
    February 2020
    July 2019
    March 2019
    August 2018
    June 2018
    January 2017
    April 2016
    October 2015
    July 2015
    February 2015
    January 2015

    Categories

    All
    English Muffins
    Flat Breads
    Hamburger Buns
    Making Yeast Bread
    Pizza Crust
    Rolls
    Understanding Ingredients
    Yeast

    RSS Feed

Powered by Create your own unique website with customizable templates.