Whole Grain 100
Email: wholegrain100@proton.me
  • Welcome
  • Price Sheet
  • Store & Classes
  • Baking Education
  • Recipes
  • Grain Education
  • Health & Nutrition

Change The Hydration Of Your Breads

12/28/2022

0 Comments

 
Hydration, in bread baking terms, means how much water or liquid there is in a given amount of flour, or the ratio of water to flour by weight. More water means a higher hydration or wetter dough. Less water means a lower hydration or drier, stiffer dough. Hydration is figured out by the weight of the water as a percentage of the weight of the flour. Both ingredients are weighed and then the total amount of water by weight is divided by the total amount of flour by weight.

There will be times that you will need to just adjust the hydration because the dough is just too wet or dry. Instead of guessing how much to reduce or increase the liquids follow this simple formula below. First find out what is the hydration of the recipe and go from there.
Example
Pizza Recipe with no sourdough starter
260g water
303g hard white
3g yeast (heaping tsp.)
3g salt (heaping tsp.)

This recipe is at 86% 
260g water        = .858 x 100 = 86%
303g hard white 

How much extra water do you need for 90% hydration
x (water)             =.9 
303g hard white

x= .9 (303)
x= 273g water

So you will need to increase the water in this recipe to 273g to have the recipe at 90% hydration.

To check 273g water     = .90 x 100 = 90%
                303 hard white
​
Tips:
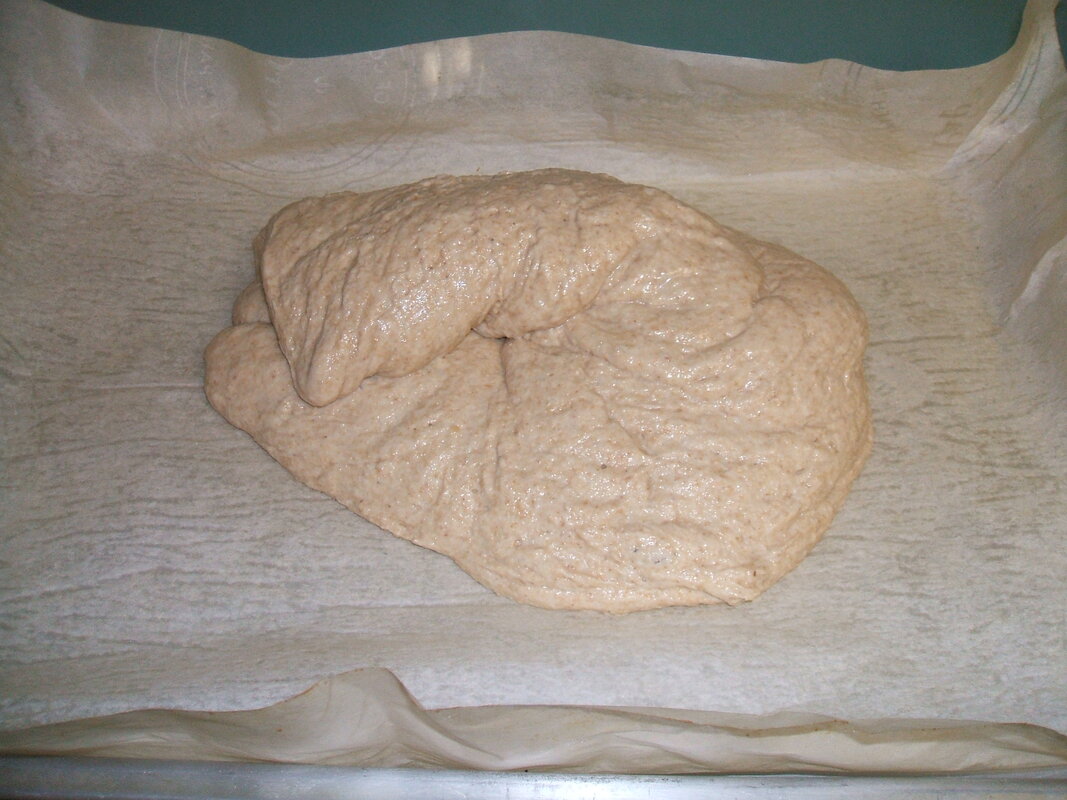
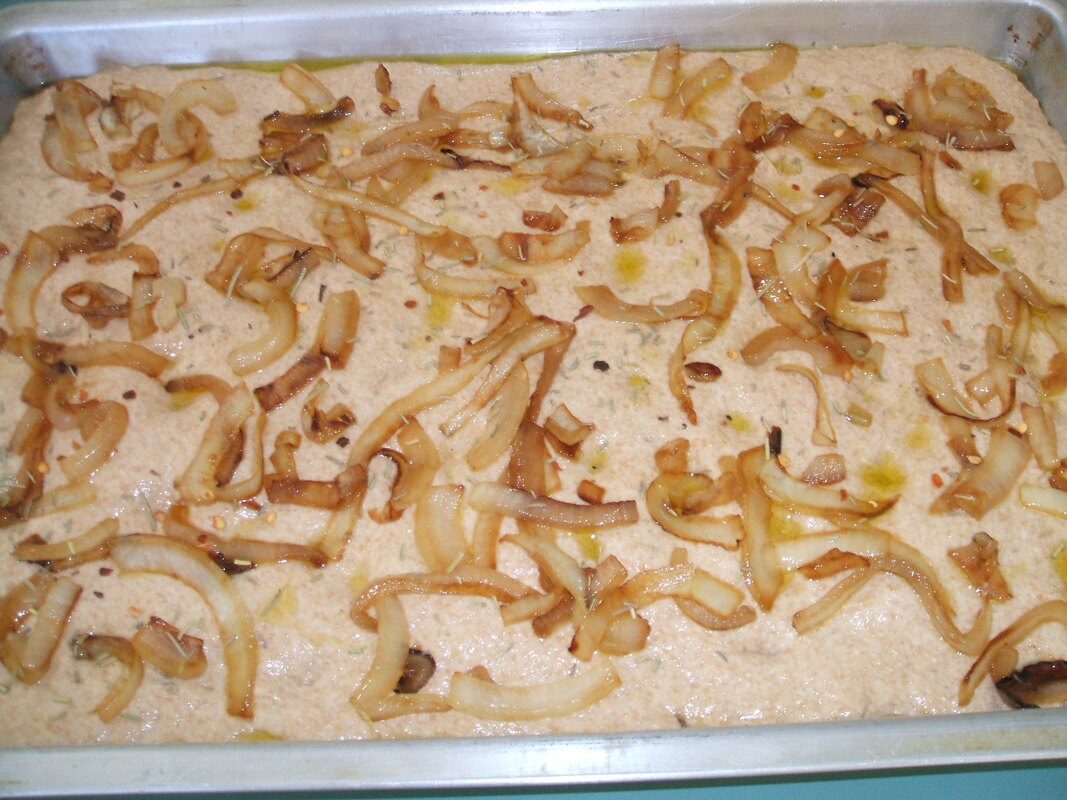
The lower hydration doughs are firmer and drier in the 50 – 64 % range of hydration.  The medium hydration doughs are stickier and wetter at around 65% to 76% hydration (loaf Breads). High hydration doughs are more like a thick batter and are extremely wet and sticky at 77% and up (Pizza dough). 

0 Comments

Changing Your Recipe To A Sourdough Recipe

12/21/2022

0 Comments

 
The hydration of the dough is a simple way of saying the ratio of water to flour. Most loaf breads are around 65-75 percent while most pizza doughs are 80-85 plus percent. 
Step 1:
You must know the hydration of your recipe along with the hydration of your starter. Most folks use a very wet starter with a hydration oat 100%. This means equal amount of water and flour by weight. You will need a scale to do this. Mine starter is at 75% so it is more dough like.

How to figure the hydration of your recipe
Basic Pizza Recipe
260g water
303g hard white or hard red wheat flour
1/4 tsp (heaping) yeast 3g
1/4 tsp. salt

260g water = .858 x 100 = 86%
303g flour  


Now this recipe is simple, it doesn't have honey, butter, and other items that may effect this number. Most of the time this flour to water ratio is good enough since the other ingredients are usually small amounts. If you have other ingredients in the recipe in larger amounts go on line and find what the hydration is of that ingredient so you can add this number to the water number when calculating. 

Step 2:
How much starter are you going to use in the recipe?
This is a personal decision you can use a portion of the recipe or 100%. There is an issue that you need to consider. First is your starter active and strong? If not it's best to add a bit of yeast and possibly gluten depending on your starter. To be honest usually my starter needs feeding when making pizza so I use a portion of it in the recipe and add a bit of yeast to help. Using a portion of the recipe with the starter allows the gluten in the new flour to counter act the possibly weak gluten in the starter.  So my decision for this recipe is 140g starter.

Lets take this same recipe and use your sourdough starter as part of the recipe. 
Sourdough Pizza Recipe
140g Starter (at 100% hydration)
190g water
233g hard white or hard red wheat flour
1/4 tsp (or omit)
1/4 tsp. salt

So if you want to use 140g of starter at 100% hydration how do you know how much flour and water is in the starter. At 100% there is equal weight of water and flour in the 140g of starter so 70g of water and 70g of flour.
From the basic recipe you reduce the water from 260g -70g = 190g. Then you reduce the flour from the basic recipe 303g - 70g =233g. Now you have the correct amount of flour and water using your starter.

My starter is at 75% hydration  x = the amt. of flour in the 140g of starter
140g = x + .75x
140g =1.75x
x = 140  = 80g flour
      1.75
So if there is 80g of flour in the 140g of starter there is 60g of water.
Using my starter the recipe would be

Sourdough Pizza Recipe
140g starter (at 75% hydration)

200g water
223g hard white or hard red wheat flour
1/4 tsp. yeast (or omit) 
1/4 tsp. salt


0 Comments

Hydration

12/16/2022

0 Comments

 
Hydration, in bread baking terms, means how much water or liquid there is in a given amount of flour. Hydration is figured out by the weight of the water as a percentage of the weight of the flour. Both ingredients are weighed and then the total amount of water by weight is divided by the total amount of flour by weight.

Most loaf breads are around 65-75 percent while most pizza doughs are 80-100% percent. Math is not my best subject so I keep this formula handy so I can look at it and just plug in the numbers when adjusting the hydration of doughs. Knowing how to do this will help you when you have issues with your bread baking or changing your recipe to a sourdough recipe.

How to figure the hydration of your dough
Basic Pizza Recipe
260g water
303g hard white or hard red wheat flour
1/4 tsp (heaping) yeast 3g
1/4 tsp.  (heaping) salt  3g

260g water = .858 x 100 = 86%
303g flour


Now this recipe is simple, it doesn't have milk, honey, butter, and other items that may effect this number. Most of the time this ratio is good enough since the other ingredients are usually small amounts. If the recipe has large amounts of other ingredients you will need to look up on the internet what the hydration is and adjust accordingly. A good example is milk, it is about 87% water and the rest is milk solids. So is your recipe has 260g of milk instead of water the actual hydration of the milk is 226g  (260g x.87) = 226g You will be using the 226g when figuring the hydration of the dough.

Flour milled from North American hard wheat may have a protein content of 11-14%. It will absorb much more water than, say, a French flour with a protein content in the 8-10% range. You will even see variations from one bag of wheat to another when baking. You may have to adjust the hydration of your dough. 

If you are working with a flour that has a  weaker gluten like Spelt. You may  want to reduce the hydration in the dough to get the desired results depending on what you are making for example like pizza.


0 Comments

Pizza Recipe

12/16/2022

0 Comments

 
This is an easy recipe that you can make with or without your sourdough starter. This recipe makes 1 medium pizza with a hand tossed crust. You can double it or change the thickness of the crust as you like. So here is the basic recipe without the starter.

 Basic Recipe No Sourdough Starter 
Oven: 400 - 425 degrees F.
Bake: In 2 steps: 1 (first the plain crust about 7-10 minutes)
                            2 (bake again after the toppings are added)
Recipe:
260g water
303g hard white or hard red wheat
3g (heaping 1/4 tsp.) yeast
1/4 tsp salt

Directions:
Mix by hand on in the mixer with the paddle attachment until all of the flour is combined. 
At this point you can put it into the fridge overnight for the next day baking if you like. If you are having for dinner start this at least 3-4 hours before serving.
If you are baking the same day you are making the crust take the dough out of the bowl and place on the counter. With wet hands pick up the dough and let it stretch towards the counter and fold over the dough. Do this a couple of times. 
Lay the dough on the counter and cover with the bowl and let it sit for about 15 minutes. Repeat this stretch and fold until the dough starts to hold some shape. It may take an hour or so.
Once you have developed the gluten you need to place it in the pan, or on parchment paper on the pizza screen. Stretch out the dough taking your time to rest the dough between stretchers  if it will not stretch out. 
Once it is the size you want it put a bit of olive oil over the dough and cover it with a piece of plastic to raise. 

Overnight Dough
If you put the dough into the fridge overnight remove a couple of hours before needing to bake. Do the same stretch and fold method a few times. You do not need to wait between the stretch and folds. The dough will be ready to put into the pan or on the parchment paper. 

0 Comments

Compare Tangzhong vs Yudane Methods

5/20/2022

1 Comment

 
Both methods will give you lighter and fluffier breads. I have not found that much difference in the texture or rise. I think it depends what works best for your baking schedule.

The most apparent difference between the two methods is the time till ready to use. Tangzhong can be used as soon as it cools to room temperature while Yudane should be rested for about 8 hours. Yudane is simpler to make however, incorporating Yudane into the dough is more difficult since the mixture is stiffer.

The hardest part is the math involved to get your recipe to 75% hydration before using either method. 
Tangzhone
Recipe needs to be 75% hydration
% of total flour 5 to 10%
Flour to liquid 1:5
Ready to use once cooled
Mixture - like rough
​
​
Yudane
​
Recipe needs to be 75% hydration
% of total flour 20%
Flour to liquid 1:1
Ready to use 8 - overnight
​Mixture - thick paste
1 Comment

Converting Your Recipes To Yudane

4/21/2022

1 Comment

 
Convert your recipes to use the Yudane technique. It will give you wonderful results that you can do with any breads. An added benefit is it will stay fresh much longer. Yudane is a technique where you pour boiling water over some of the flour and let it sit 8 hours to overnight. This method is great for doughs that you are going to let sit overnight in the fridge.
The heated starch granules, attract water molecules. This causes the granules to swell and soften, absorbing and trapping water. The flour absorbs twice as much hot liquid as cold liquid, which is why the heating process is essential. 
Yudane: Ratio is 1:1 (1 part water to 1 part flour -20% of the flour in recipe) 
  • Boil the water and pouring over the flour and mix.
  • Put into the fridge to cool for at least 8 hours - overnight.
  • Good option to use for indirect dough
Original Recipe
Yields: 24 Buns - 47g ea.
Bake: 350

Recipe Adjusted to 75% Hydration & Tangzhong
Yudane 20% of recipe
128g flour (1 cup)
128g water (1/2 cup)
Heat water on stove or microwave and pour over the 128g flour and stir. Let this sit for 8 hours or put into fridge overnight.

Dry Ingredients
514g Hard White ( 2 1/3 c)
3/4 tsp. dried malt powder (you can omit if you like)
8g Salt (3/4 tsp.)
10g Yeast (3 1/2 tsp.)

Liquid
45g Cane Syrup (honey) (2 T. +1 tsp.)
346g Water (c)

20g Butter (1 1/2 T.)
10g Soy Flour (1 1/2 T.) omit if you like

Directions
  • Add the yudane mixture to the liquid ingredients and mix.
  • Add the dry ingredients to the mixer then the liquid ingredients. Mix until just moistened and let sit for 5 minutes.
  • Now develop the gluten with the mixer (mix 3 minutes with dough hook) Remove from the mixer and place the dough on the counter and flatten it out.
  • Soften the butter and add the soy flour to form a paste. Spread the paste onto the dough and cut the dough into pieces and add back to the mixer bowl.
  • Knead until the butter mixture is incorporated into the dough. The dough will now be softer. If should only take about 2 minutes.
  • Bulk proof for 20-30 minutes
  • Shape into 24 round balls about 45g - 47g each.
  • Add Shine: 1 large egg yolk + 2T. water mix in a small bowl and brush the buns before proofing them.
  • Proof for an addition 20 minutes until about the size you want them.
  • Pre-heat the oven to 350 degrees
  • Put into the oven and bake at 350 for 15 minutes
1 Comment

Converting Your Recipes To Tangzhong

4/20/2022

0 Comments

 
Convert your recipes to use the Tangzhong technique. It will give you wonderful results that you can do with any breads. An added benefit is it will stay fresh much longer. Tangzhong is a technique where you cook some of the flour in a liquid and then add it to the dough. It's perfect for direct doughs because you can use it as soon as it cools down a bit. As the starch granules are heated, water is attracted to the molecules. This causes the granules to swell and soften, absorbing and trapping water. The flour absorbs twice as much hot liquid as cold liquid, which is why the heating process is essential. 
Tangzhone: The ratio is 5:1 (5 parts water to 1 part flour) - usually
  • Involves cooking the flour and liquid together on a stovetop or microwave to form a paste.
  • Cool to under 115 degrees and add to the rest of the liquid ingredients.
  • Good option to use for a direct dough.
  • The higher percentage of the flour that is pre-gelatinized the softer rolls.
Original Recipe
Yields: 24 Buns - 47g ea.
Bake: 350

Recipe Adjusted to 75% Hydration & Tangzhong
Tangzhong 5% of recipe
32g flour (3 1/2T)
160g water (2/3 c)
Cook on stove on low heat until you see your stirring marks as it thickens. It only takes a few minutes. Cool to below 115 degrees so it does not kill the yeast. Add to the other liquid ingredients and stir.

Dry Ingredients
610g Hard White ( 4 2/3 c)

3/4 tsp. dried malt powder (you can omit if you like)
8g Salt (3/4 tsp.)
10g Yeast (3 1/2 tsp.)

Liquid
45g Cane Syrup (honey) (2 T. +1 tsp.)
314g Water (1 1/3 c)

20g Butter (1 1/2 T.)
10g Soy Flour (1 1/2 T.) omit if you like

Directions
  • Add the tangzhong mixture to the liquid ingredients and mix.
  • Add the dry ingredients to the mixer then the liquid ingredients. Mix until just moistened and let sit for 5 minutes.
  • Now develop the gluten with the mixer (mix 3 minutes with dough hook) Remove from the mixer and place the dough on the counter and flatten it out.
  • Soften the butter and add the soy flour to form a paste. Spread the paste onto the dough and cut the dough into pieces and add back to the mixer bowl.
  • Knead until the butter mixture is incorporated into the dough. The dough will now be softer. If should only take about 2 minutes.
  • Bulk proof for 20-30 minutes
  • Shape into 24 round balls about 45g - 47g each.
  • Add Shine: 1 large egg yolk + 2T. water mix in a small bowl and brush the buns before proofing them.
  • Proof for an addition 20 minutes until about the size you want them.
  • Pre-heat the oven to 350 degrees
  • Put into the oven and bake at 350 for 15 minutes
0 Comments

Oat Bran Broom Bread

7/25/2020

0 Comments

 
This recipe is from Peter Reinhart's book and is simple to make. It makes one large loaf and is best to use finely ground whole grain flour. His method is a bit different than most when baking but it's the method that I have had the most success with in obtaining light high loaves.
Soaker
184g hard red or hard white flour (1 1/3c + 1T.)
28g  oat bran (4T.)
14g flax seeds (1 1/2 T.)
4g salt (1/2 tsp.)
198g water (3/4 c. + 2T.)
  • Mix all the soaker ingredients together in a bowl until all of the flour is hydrated and the ingredients form a ball of dough.
  • Cover and place in the fridge, this is good for 3 days.
Biga
227g hard red or hard white flour (1 3/4c.)
1g instant yeast (1/4 tsp.)
170g water (3/45 c.)
  • Mix all of the biga ingredients together in a bowl and form a ball of dough. It will be tacky, let it rest a few minutes and knead a few times until smoother. Cover and place into the fridge. This is good for up to 3 days

Final Dough
The next day or the day of baking take the biga and soaker out of the fridge. I use them cold but you can let come to room temperature. You will be adding the final ingredients to them.
In a small container mix together:
56g hard red or hard white flour (7 T.)
5g salt (5/8 tsp.)
7g instant yeast (2 1/4 tsp)
42g honey, or agave nectar or brown sugar (2 1/2 T)

14g vegetable oil (1 T.)

  • Lay the biga on the counter and flatten into a disk, then lay the soaker on top and flatten into a disk.
  • Cut thru the disk,  into about 12 pieces and put into your mixing bowl. As you are cutting the dough add the final ingredient to the cut up pieces.
  • Finally add the vegetable oil to the mixing bowl.
  • Put the dough hook on and mix for 3 minutes at low speed. The dough will be soft and slightly sticky. If it seems too sticky let the dough rest 5 minutes and come back to see how it feels. If it needs more flour or water adjust as needed. Test to see if you have a windowpane.
  • Bulk proof for 45-60 minutes until it is about 1 1/2 times it original size.
  • Shape as a freestanding batard or place into a greased loaf pan. I use a 9 inch pullman pan.
  • Cover so the top stays moist and let it raise another 45-60 minutes.
  • Preheat the oven to 425 degrees, I use a steam pan in the bottom of the oven while preheating.
  • Place the loaf into the oven and lower the temperature to 350 degrees. Bake for 20 minutes then rotate the pan if needed and continue baking another 20 minutes.
  • To test for done, the loaf will reach an internal temperature of 195 degrees. It will be rich brown and have a hollow sound when thumped on the bottom.

0 Comments

Making Your Own Yeast

4/22/2020

0 Comments

 
Yeast is a hot commodity lately, it's no where to be found in the supermarkets. There is a way to make your own yeast using fresh or dried fruit and even potatoes will work. This does take a few days to get the yeast going. Watch The Video
Creating yeast water couldn’t be easier, simply combine fruit and water, and you’ll be ready to bake naturally leavened bread in about week. Yeast is all around us, all we have to do to harness it's power. When you create yeast water you are harvesting the yeast that naturally occurs in fruit and vegetable skins or pulp. Avoid using mango, pineapple, kiwi and papaya. these fruits contain a protease enzyme. This enzyme destroys protein and inhibits gluten development.
Supplies Needed:
  • 34oz jar glass is best but plastic will work
  • Funnel

Recipe: From PJ Hamel at King Arthur Flour
  • 500g (2 1/4 cups) of water (tap water is fine)
  • 50g (1/4 cup) of granulated sugar
  • 2 dried dates (pitted or whole)
Note: You can use other fruits like organic raisins about 1-2 T. Also different types of sugar would work, even molasses or honey.

Directions:
  • Add the fruit, water and sugar to the jar and screw the cap on the jar. Shake vigorously to dissolve the sugar. Loosen the cap a half-turn and put the bottle somewhere warm 78.8°F is optimal. I put the bottle on my freezer or the top of the hot water tank would work in my house.
  • Shake the bottle twice a day for 4 days. Unscrew the cap daily to let out any pressure buildup, screw it back on, then shake well.
  • By the end of 4 days, the water should be frothy on top, and you’ll definitely be able to smell the fruit fermenting.

Day 5: Add the following to the bottle:
  • 1 dried date
  • 5g (1 teaspoon) salt
  • 20g (1 1/2 tablespoons) granulated sugar
  • 400g (1 3/4 cups) water
Shake the bottle vigorously to dissolve the sugar. Put it back in its warm spot, and shake twice a day, uncapping and recapping each time, for 4 more days.

Baking
  • Each bottle of yeast water will yield about six average-sized loaves of bread, minus the 200g you need to save for future loaves.
  • Use the yeast water instead of the water or liquid in the bread.
  • It may take longer for your loaf to raise, that will depend on the amount of the yeast water used and the strength of the yeast in the water.

Save 200g yeast water plus add the following for future use
  • 700g tap water
  • 35g sugar
  • 3.5g salt
  • 2 dried dates
  • Shake twice a day for 2 to 3 days, until the yeast water is foaming nicely. Strain out the dates, and store water in the refrigerator.
  • Yeast water makes a bread with mild, rather than an assertive sourdough tang. This can be a pro or con, depending on your personal taste.

Pros
  • There’s very little upkeep; once yeast water is made it can live in the refrigerator for up to a couple of months without being fed.
  • Yeast water isn’t fed with flour and there’s no discard; so you’re not throwing away flour, as you might with a standard starter.
Cons
  • Since there’s no discard with yeast water, you don’t have the chance to make a lot of yummy recipes that call for sourdough starter discard.
  • Making a starter with yeast water takes longer: up to around 16 hours, as opposed to around 6 to 8 hours for a standard sourdough starter.

0 Comments

Focaccia

3/23/2020

0 Comments

 
Focaccia bread are the pizzas of northern Italy they are usually baked in sheet pans and are around 1 inch thick. This is a high hydration dough that is usually topped with simple ingredients like onions, rosemary, and olives. You can top it with what ever you like. This recipe is from Peter Reinhart's "Whole Grain Breads" cookbook.
Ingredients:
4 c. hard red or hard white flour (510g)
1 1/4 tsp. salt (10g)
1 1/4 tsp. instant yeast (4g)
2 c. +2 T. water (482g) warm water
1 1/2 tsp. honey
1 1/2 T. olive oil (21g)

Directions:
  1. Place all the ingredients in your mixing bowl except the olive oil. Mix for 2-3 minutes on low speed. The dough will be very sticky but smooth, if needed add a bit extra flour.
  2. Now add the olive oil and mix another 15 seconds, long enough to just coat the dough. Let the dough rest for 5 minutes. At this point the dough should have some structure not batter like. If it is still too wet and feels like batter add more flour and mix again. The dough should pass the window pane test.
  3. Prepare a 17 x 12 inch sheet pan by lining it with parchment paper and oiling it with 1 tablespoon of olive oil.
  4. Grease your hands with olive oil and dump the dough onto the parchment paper in the pan and spread the dough out. It might be difficult to spread and will only cover about half the pan that is fine. Cover with plastic and let it sit overnight in the refrigerator. It will raise slightly overnight.
  5. The next day remove the pan from the refrigerator about 4 hours before you plan to bake it. Remove the plastic and drizzle 1-2 tsp olive oil over the top. Now with your fingertips press out the dough, starting from the center of the pan moving out to all the corners. This will create dimples as you press. You may have to stop several times and let the dough rest about 10-20 minutes and continue stretching it out.
  6. Once the dough is stretched out loosely cover the dough with plastic and let it rest at room temperature for about 2-3 hours depending on the room temperature. 
  7. Prepare you toppings, Pre-heat the oven to 500 degrees. Once you have it in the oven reduce the temperature to 450 degrees and bake for 15 minutes. Add any cheeses at the last 3 minutes of baking
  8. Remove from the oven and let it cool for a few minutes before slicing. If you want a crisp crust remove the parchment paper and put the slices on a screen to crisp up the bottom crust. If you like a soft crust leave it too cool on the parchment paper.
0 Comments
<<Previous

    Yeast Bread
    Education


    Archives

    December 2022
    May 2022
    April 2022
    July 2020
    April 2020
    March 2020
    February 2020
    July 2019
    March 2019
    August 2018
    June 2018
    January 2017
    April 2016
    October 2015
    July 2015
    February 2015
    January 2015

    Categories

    All
    English Muffins
    Flat Breads
    Hamburger Buns
    Making Yeast Bread
    Pizza Crust
    Rolls
    Understanding Ingredients
    Yeast

    RSS Feed

Powered by Create your own unique website with customizable templates.