Whole Grain 100
Email: [email protected]
  • Welcome
  • Price Sheet
  • Store & Classes
  • Baking Education
  • Recipes
  • Grain Education
  • Health & Nutrition

How To Make Milk Kefir

7/24/2017

2 Comments

 
PictureLIVE MILK KEFIR GRAIN
Kefir is a probiotic dairy drink you can make yourself. I can not stress how much it has improved my digestion. If you are considering making kefir here are some good reasons why everyone should drink kefir. ....Link  My husband and I have been drinking kefir for about 5 years now and we  love it. Our kefir is smooth creamy and effervescent with a very mild taste.

How you make your kefir and your kefir starter (grains) all have an effect on how your kefir will taste. There are many different ways to brew your kefir some folks are interested in growing the kefir grains to sell, while others like us just want the best tasting kefir for our personal use. i am going to show  how we brew our kefir. This method will produce the best tasting kefir but will not allow your kefir grains to grow in size rapidly. There are no wrong ways to brew kefir it will depend on your taste buds and goals.

There are 2 types of kefir; milk kefir and water kefir. We make milk kefir because it's far more nutritious then the water kefir. I am lactose intolerant and have NO problem drinking the milk kefir. In fact, the kefir has allowed my digestive system to heal to the point I now can enjoy ice cream.

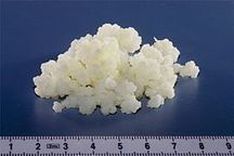
In order to make kefir you will need the live kefir starter, they are called live kefir grains. You can buy them on line or if you know someone who makes milk kefir you probably can get a starter. Also available are the starter grains in a powder form, most of the time these will only make kefir for a short period of time before you will need a new starter. Buy the live kefir grains, they will last forever, (they are a pet) as long as you feed them and take good care of them you can pass them on to your children.

Equipment Needed:
  • 2 glass quart jars with lids (we use half gallon jars)
  • Plastic strainer
  • Glass mixing bowl or large glass measuring cup
  • Plastic large spoon to stir
  • Milk (any type will work but I think whole milk taste best)

Plastic Strainer
Half gallon jar of kefir.
Strainer sitting on large glass measuring cup.
This is our schedule, you will have to see what works best for your daily life. My husband strains the kefir after dinner and makes new kefir. He then puts it in the cupboard before we go to bed. In the morning we place it in the fridge, it can stay there for up to 5 days. When we need more kefir to drink he will strain the bottle after dinner and repeat the process.

Placing the kefir into the fridge allows it to mellow in taste and will slow the fermentation process so it will not have a strong taste.
Kefir just out of the fridge ready to strain.
Whey at the bottom of the jar.
Larger kefir grains.
Straining the kefir.
Instructions:
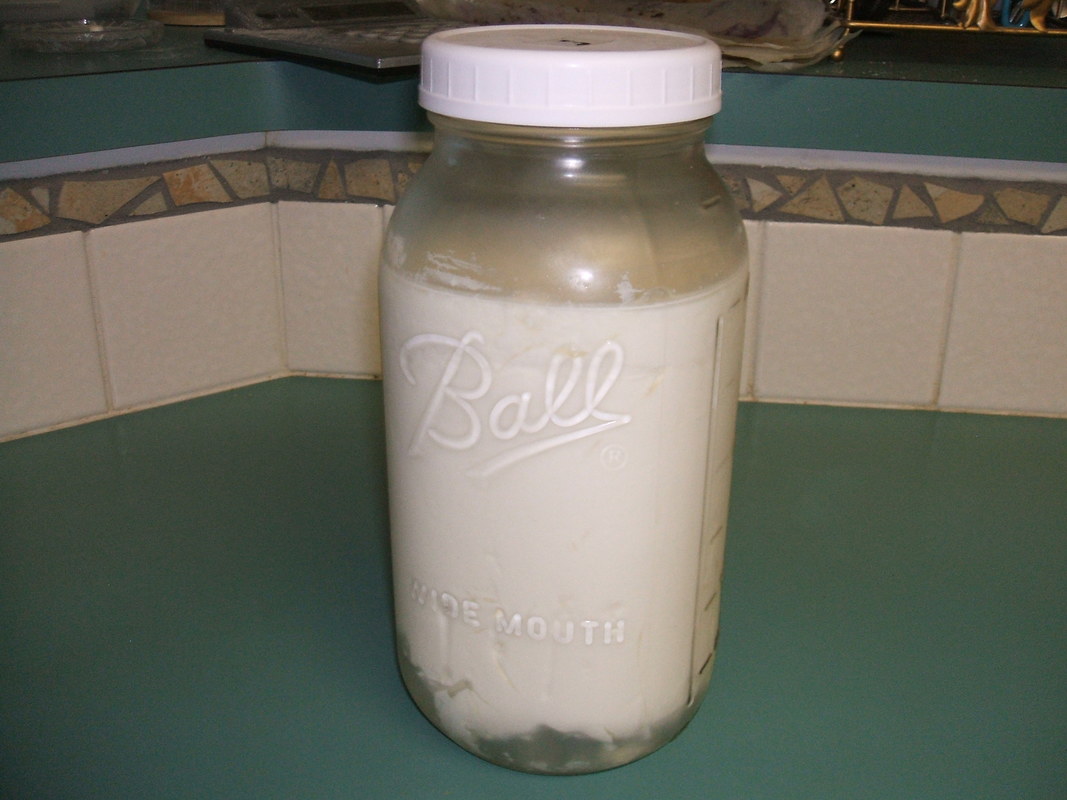
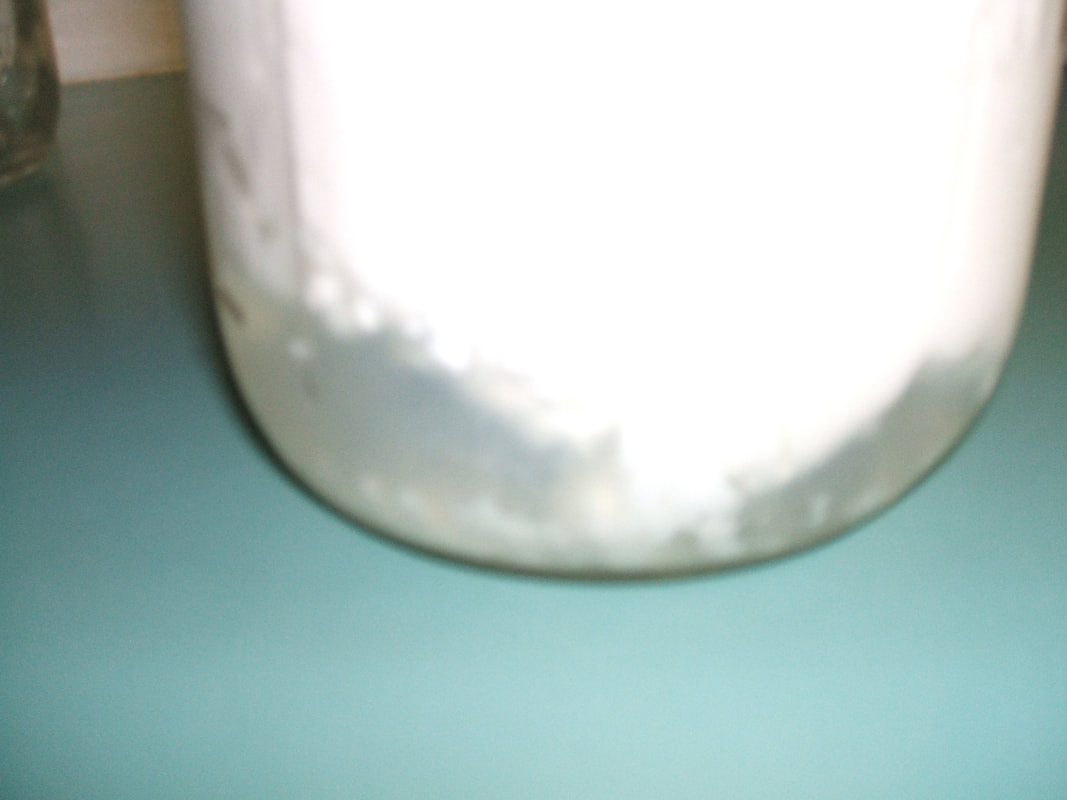
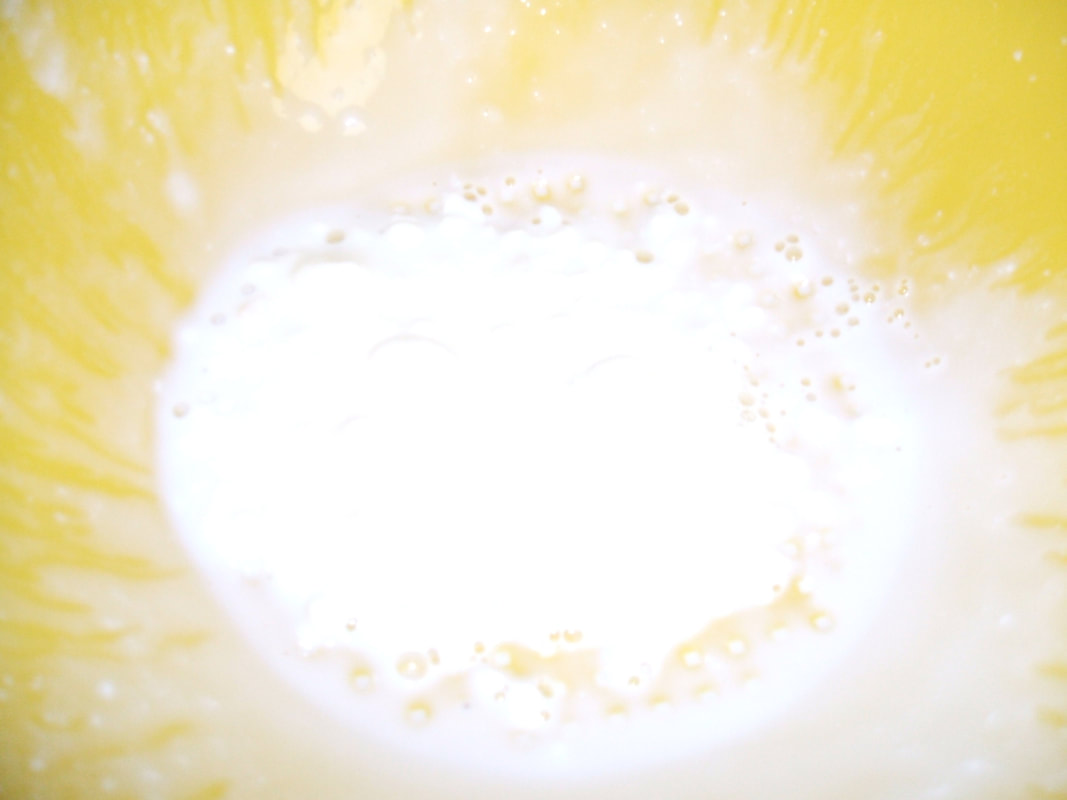
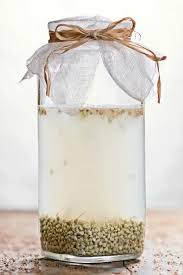
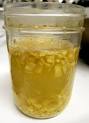
  • After dinner we take the bottle of kefir that has not been strained it usually looks like the second picture with the whey at the bottom of the bottle and it's thick.
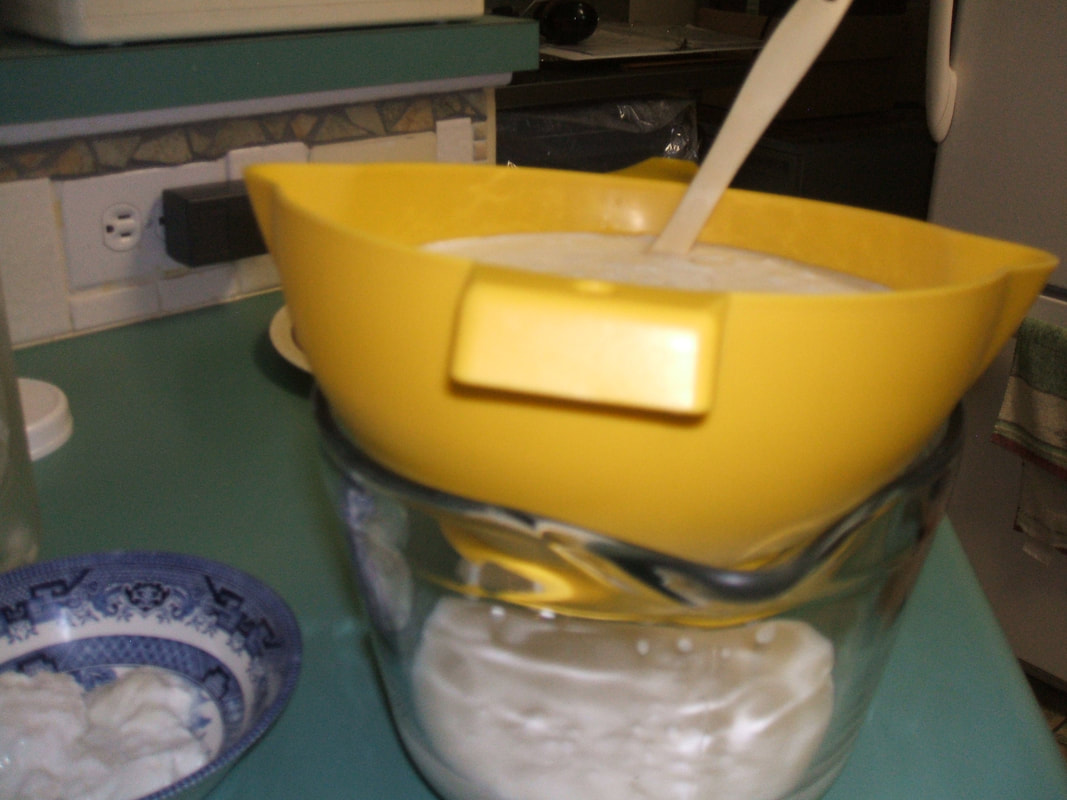
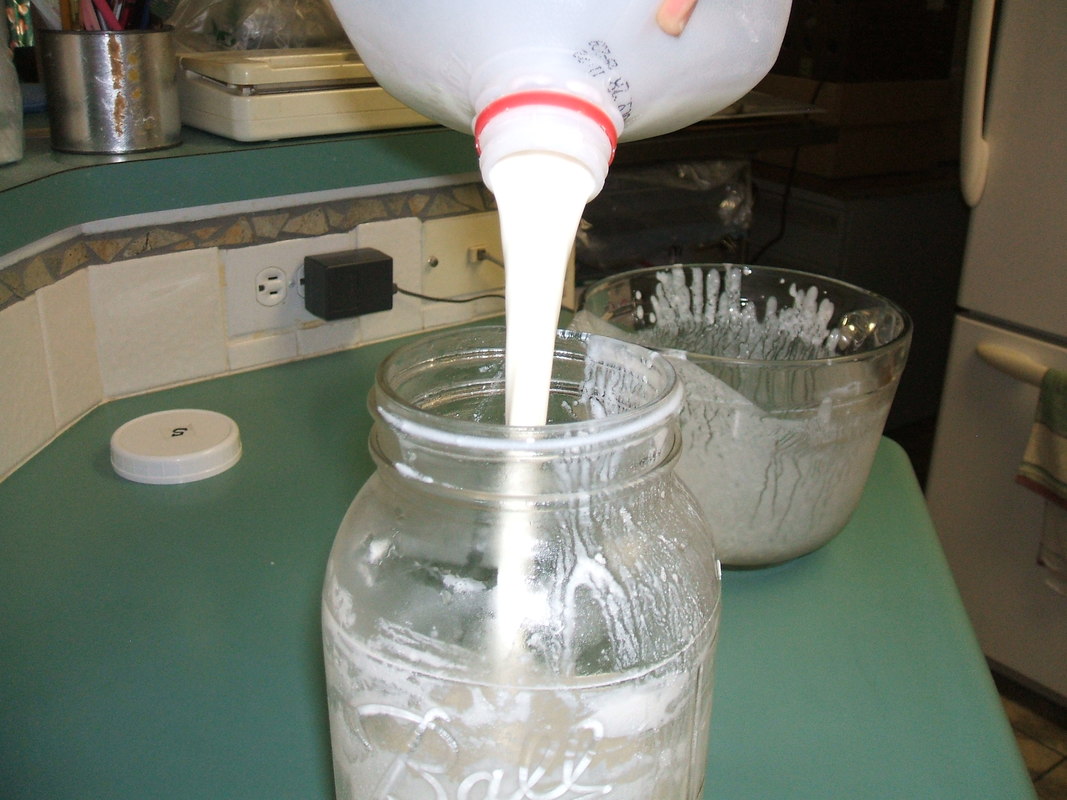
  • Place the strainer over your glass container and pour the contents of the jar of kefir into the strainer. Give it a stir or shake, if it needs help going thru the strainer.
  • Most of the kefir grains will stay in the strainer and the liquid that is dropping into the glass bowl is the kefir you will be drinking.
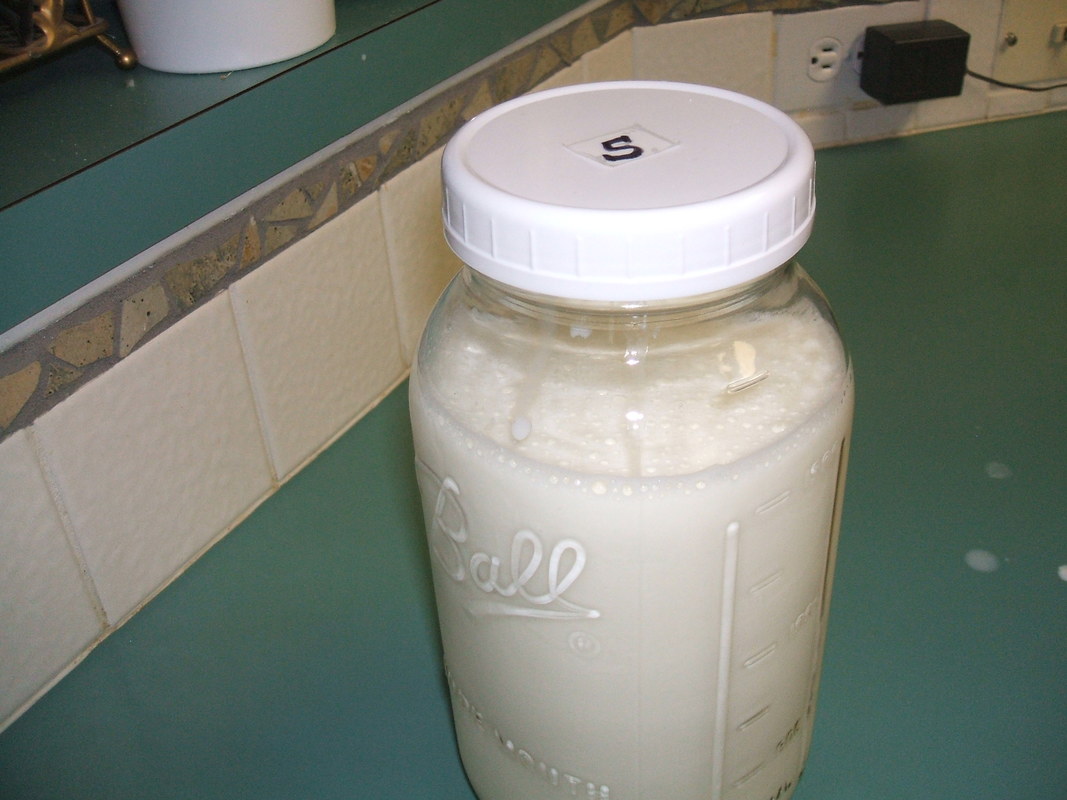
  • Pour the strained kefir into a new jar with a lid and put it into the fridge so it will get cold and ready for consumption.
  • The kefir grains in the strainer will be used to make the next batch of kefir. Place them into a clean glass jar and add milk to about 3/4 full.
  • Your pets dogs and cats will also benefit from daily kefir, our dog Mike loves kefir and waits for his treat.
Kefir grains in the strainer.
Larger kefir grains.
Adding milk after placing the grains into the jar.
Give the contents a quick stir.
Ready for the fridge.
Mike enjoying kefir!
Place the kefir to brew in the cupboard over night.
Enjoy your kefir with your cookies!
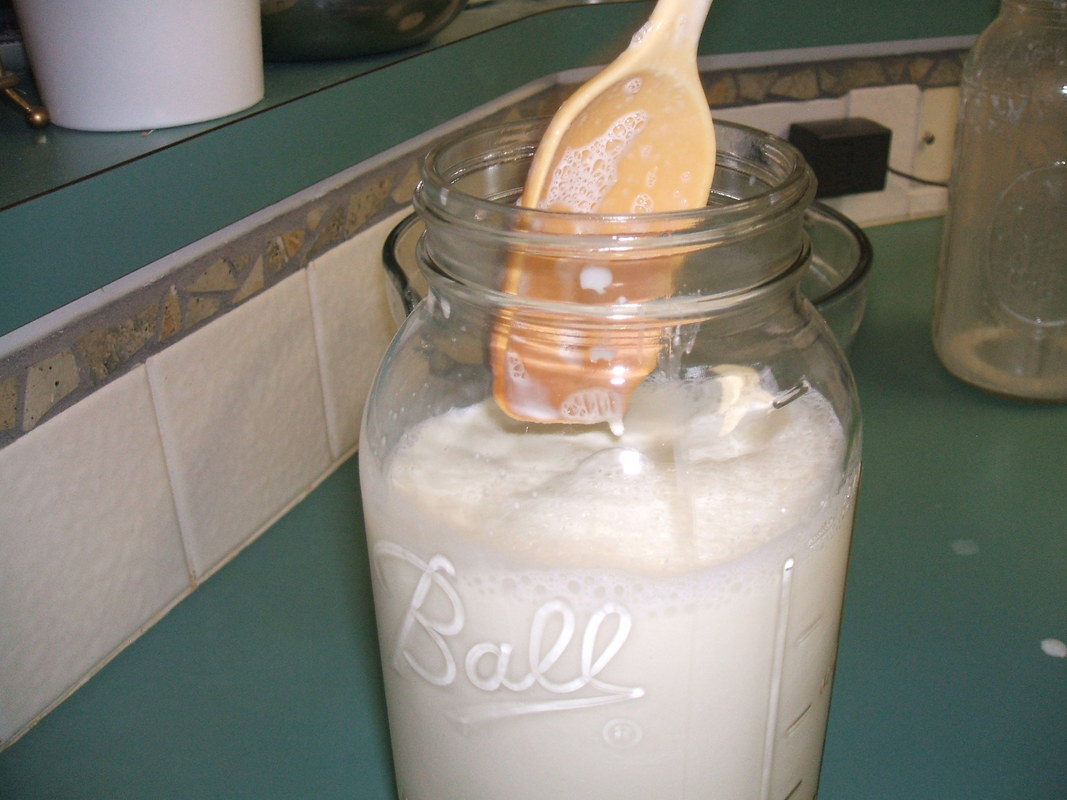
  • To brew your new batch, place in a dark cupboard over night. It depends on the temperature in your home how fast it brews. In the summer since it's warmer it will take 8 - 10 hours. In the winter it may take up to 12 hours or more.
  • In the morning we open the cupboard and check on the kefir. I will be thick and you will see the whey at the bottom of the jar broken out.
  • Place it into the fridge until you need to brew another batch.
Tips:
  • Once your kefir grains have grown some, divide them so you have 2 jars going. Rotate them, that way in case you drop a jar or something happens you will still have your kefir starter grains.
  • If you need to go out of town, add your grains to a large volume of milk and put into the fridge. They will be fine for a week or so. When you get back strain them and give them new milk to feed on.
  • Make cheese, with your kefir.
  • Add fresh fruit for smoothies, and honey for a sweet treat.
  • Use the kefir like you would buttermilk in recipes.
  • Makes a great ranch dressing!
For everything you ever wanted to know about kefir
go to www.Doms Kefir
2 Comments

How To Make Rejuvelac

6/27/2016

1 Comment

 
Picture

Enzyme-rich Drink and Digestive Aid
Keep in mind this is less of a beverage and more of a ‘tonic’ that can be taken in small amounts (4 ounces or less) at different times a day to improve digestion. It’s especially great about 20 minutes before a meal.


Rejuvelac is easy to make but it is takes a couple of days. You must first sprout your grains then ferment the sprouted grains. Choose whole, raw, non-GMO and preferably organic grains that have not been heat treated or radiated.  Once you have some high quality grains, like soft wheat berries you are ready to make Rejuvelac.

Sprouting the Grains:
  • Take 1 cup of dry grain and rinse it thoroughly in clean pure water.
  • Soak it over night, or about 8 hours, in a 1 quart mason jar with a loose lid.
  • Place a clean mesh lid on the top of the jar and strain out the water. 
  • Fill the jar again with pure water, stir and strain again.
  • Flip the jar over, with the mesh lid angled downward, into a dish to drain.
  • Rinse your jar of grains once a day.
  • Watch for sprouting hairs after day one, it usually takes between 1-2 days depending on the room temperature.
After your grains are sprouted you are on to the fermentation process.

Fermentation:
  1. Using a clean, sanitized quart jar and mesh lid, add your sprouted grains to the jar.
  2. Fill the jar 3/4 full with cool filtered or distilled water.
  3. Cover your quart jar with a loose lid or a mesh lid and cloth over the top.
  4. (As with all ferments, it is important not to use a tightly screwed lid as they may potentially explode.)
  5. Ferment on a counter-top or cupboard space, but keep out of direct sunlight.
  6. Gently swirl the jar a couple times a day to move the grains around.
  7. Allow to ferment for 1-2 days or until it becomes slightly cloudy with some bubbles.
  8. Sometimes a slight film may develop on top which can be scraped off.
  9. When it is ready to decant, strain the liquid out and save. You can compost the sprouted grains.
  10. Store the liquid in the refrigerator for up to 2 weeks. If the final liquid outcome looks and tastes pleasant, like it should, these are good signs of a successfully fermented liquid drink.

Potential Rejuvelac Contamination

Use common sense like any food preparation and there will not be any issues.  It's a good idea to make sure all your equipment is thoroughly clean and sanitary.  In addition, it is advised to place a loose lid and clean cloth securely over your jar and culture it in a ventilated, yet clean environment away from dust and foot traffic.

There are some that suggest that you can use the sprouted grains again for a second batch of Rejuvelac. A second batch may be made by filling the jar and soaking for 24 hours. After that the berries will be spent and may be put outside for the birds or compost. 

To Your Health
Tamara

Sources:
http://www.superfoods-for-superhealth.com
wikipedia.org
www.culturedfoodlife.com
http://naturalepicurean.com

1 Comment

Rejuvelac

6/27/2016

0 Comments

 
Picture

I believe you are what you eat, but as we age our body does not work as efficiently as it did when we were young.  We are now just starting to understand that about 70% of our immune system is in our digestive tract. If you have stomach issues,  and you know who you are, this simple drink may help with digestion by increasing the enzymes in your digestive tract.


What is Rejuvelac

It is essentially the fermentation of sprouted grains in pure water for a 1-2 day period of time.  It's traditionally made from wheat berries, but can also be produced from other varieties like rye, kamut, barley, millet or quinoa, each having there own special flavor.  It's one of those fermented foods that can't be purchased from the health food store, you must make it yourself.

Benefits
When you consume foods that cannot be efficiently broken down by the body, you are left with undigested waste material and toxins that get trapped inside the gut, causing bloating, constipation, obesity, fatigue and lowered immune response.  Consuming lacto-fermented foods, like rejuvelac, can be a valuable asset to overall health.

Rejuvelac
  • Filled with life-giving digestive enzymes.
  • Loaded with prebiotics and probiotics.
  • Because Rejuvelac is a pre-digested food, all the proteins are broken down into amino acids making them easy to digest and assimilate.
  • Because the nutrients are so quickly absorbed, Rejuvelac increases our energy instead of decreasing it.
  • Drinking Rejuvelac helps digestion, and is a very efficient cure for stomach and colon problems.
  • You can use Rejuvelac, instead of water in almost any live food recipes.
  • Rejuvelac cleanses your colon and fills it with friendly bacteria such as Lactobacillus Bifidus.
  • "The traditional Rejuvelac recipe made from wheat berries is rich in vitamins, minerals and amino acids", writes Deirdre Rawlings in her book, "Fermented Foods for Health." Namely, this beverage is rich in the vitamins E, K, C, B-1, B-3; the minerals magnesium, potassium and manganese; and amino acids.

So What Does It Taste Like
Although you wouldn't think that water sitting around for a couple of days with sprouted grains in it would taste all that great, the fermentation process actually produces a very clean tasting, tangy drink with a citrus-like aroma.
Many people describe it has a mild citrus or lemony taste, with a slight bubble. How to make it?

Sources
http://www.superfoods-for-superhealth.com
http://rawmazing.com
wikipedia.org

0 Comments

Why Everyone Should Drink Kefir

5/10/2016

4 Comments

 
If you know me, you know I am a huge fan of milk kefir. Unfortunately, there are still many of you that don't know what kefir is or how this simple fermented drink could change your life. I am lactose intolerant, and had bloating, gas, indigestion so bad I have even gone to the Emergency Room thinking I am having a heart attack. I know what you are thinking… Why would I drink milk kefir if I am lactose intolerant since Kefir is a milk product. True, kefir is traditionally a milk product, but it is a fermented milk product and that fermentation changes the chemical composition of foods? Kefir’s low lactose content may actually make it possible to improve lactose intolerance.

I now drink kefir at every meal, and do not suffer any longer from digestive issues. It has also helped my lactose intolerance issue, I can eat some ice cream without suffering from the bloating and pain. I saw this article written by Shantha Kalia and could not of done a better job talking about the benefits of kefir.

What is kefir?
Kefir is a fermented product that originated in the Caucasus. It gets its name from the Turkish word ‘keif,’ which means ‘good feeling.’  Kefir is a unique cultured dairy product due to the combination of lactic acid and the alcoholic fermentation of lactose.

What distinguishes it from the traditional fermented milk product (yogurt) is that it's made from kefir grains, which are basically a symbiotic community of bacteria and yeasts. The kefir grains – or the microorganisms – are held together by a polysaccharide matrix, called kefiran. Kefir grains produce kefir by their microbial activity. The symbiotic relationship of the microbes results in a relatively stable and specific balance of bacteria and yeast. Kefir grains were passed from generation to generation among the tribes of the Caucasus.

This probiotic food contains several health benefits. It has antibacterial, antifungal and anti-carcinogenic properties. It is known to not only reduce symptoms of lactose intolerance, but also known to lower cholesterol and stimulate the immune system. Probiotics – which kefir contains in abundance – are known to improve gastrointestinal health by maintaining healthy gut bacteria.

Nutrition Facts
Kefir contains high concentrations of vitamin B12, calcium, magnesium, vitamin K2, biotin, folate, protein, enzymes and probiotics. These unique set of nutrients benefit the body in many ways.

Here are 5 main reasons you should be drinking kefir, even if you are lactose intolerant.

1. Improves Lactose Intolerance:
Fermentation changes the chemical composition of dairy products like milk, rendering it relatively low in lactose. An enzyme, β-galactosidase – which is essential to digest lactose – is present in the microbes in the fermented milk, according to researchers at Ohio State University who published their results in the Journal of the American Dietetic Association. Some bacterial cells die in the intestinal tract and release the enzymes that digest the lactose. It is suggested that microbes in kefir may be able to colonize the intestines and benefit health by shielding them from harmful disease-causing bacteria.

TIP: If you struggle with lactose problems, try adding kefir to your diet in small amounts to see how well you tolerate it.


2. Provides benefits for the digestive system:
Kefir contains viable microorganisms (lactobacillus and bifidobacterium) that inhabit and colonize the digestive system, protecting it from diseases such as leaky gut, irritable bowel syndrome and inflammatory bowel disease. Kefir improves digestion, alleviates some common digestive problems like gas, bloating, indigestion, etc. It promotes regular bowel movements and has a stimulatory effect on the motor and emptying function of the stomach. Milk, milk whey, cheese and butter have an inhibitory effect on this function. Russian physicians have successfully used kefir to treat peptic ulcers in the stomach and duodenum.

3. Boosts immunity:
Kefir has a stimulating effect on the immune system and improves its disease-fighting capacity. Nearly 70% of your immune system resides in your gut. Kefir is able to modify the balance of the immune cells in the intestinal mucosa. When your immune system is functioning normally, it usually controls bacteria and yeast in the body to prevent infections. Certain medications you may be taking can decrease your body’s immunity and therefore, increase your chances of getting sick from bacteria and yeast. Kefir is an excellent source of nourishment for the elderly, pregnant and nursing women, kids and those who are immunocompromised.

4. Anticarcinogenic properties:
The anti-cancer property of kefir is thought to have originated in the polysaccharide content of kefir grains. Kefir benefits cell damaged by radiation treatment. When pelvic malignancies are treated with radiotherapy, stem cells in the crypts of the intestine are destroyed. However, intake of kefir has shown to decrease the damage by protecting the colonic cells.

5. Antimicrobial properties:
Antimicrobial activity in kefir is associated with the production of lactic acid, carbon dioxide and ethanol. These compounds not only reduce the food borne pathogen in your body, but also aid in the treatment and prevention of gastroenteritis and vaginal infections. Kefir acts against pathogenic bacteria Salmonella, Helicobacter, Shigella, Staphylococcus, E. coli, Proteus vulgaris, etc.

Kefir is available at Walmart and most health food stores, but it's not the same as what you make fresh at home. If you want all the health benefits go to Amazon on line and order "LIVE KEFIR GRAINS". The grains are not expensive and once you have them, you have them for life. On line many places sell dried kefir grains which make it easier to ship but some of the micro organisms have been killed due to the drying process, do not buy the dried grains.

If you have any questions email me or stop by at the Farmer's Market and I will be happy to share what ever I know about this wonderful drink.

Tamara

4 Comments

Lacto-Fermentation

2/16/2015

0 Comments

 
Lacto-Fermentation
Fermented foods have been important in the past as a way to preserve ones garden produce, meat, and even milk since there was no refrigeration. Today's diets don't incorporate fermented foods often, which is a shame they are tasty and very healthy.

Fermentation for most people brings to mind beer or wine, certain yeasts convert the sugars in the grape juice or grains into the fermented product, alcohol. With lacto-fermentation it's bacteria that is responsible for the process.  The “lacto” term refers to a specific species of bacteria, called Lactobacillus. You may be familiar with "Lactobacillus acidophilus" which is commonly used in the process of making yogurt. The Lactobacillus strain of bacteria converts the sugar in the substance, to lactic acid. 

Health Benefits
Lactic acid is a natural preservative that inhibits the growth of harmful, bacteria. This allowed people to preserve foods for extended periods of time. Lactic acid also promotes the growth of healthy bacteria in the intestinal tract. That is why lacto-fermented foods are considered probiotic foods.

Beyond preservation advantages, lacto-fermentation also increases the vitamin and enzyme levels, as well as digestibility, of the fermented food. In addition, lactobacillus organisms produce antibiotic and
anti- carcinogenic substances that may contribute to good health. That is  another reason to have an abundant amount of lactobacilli residing in your intestinal tract.

Fermentation
The diets of every traditional society have included some kind of lacto-fermentated food. In Europe they have been primarily dairy, sauerkraut, grape leaves, herbs, and root vegetables. the Alaskan Inuit, ferment fish and sea mammals. The orient is known for pickled vegetables and kimchi in particular.

Here in America pickles and relishes are part of our food tradition. But the kind of pickles and sauerkraut that can be purchased in most grocery stores today are not at all the same products our ancestors knew. Most pickling is done with vinegar, which offers more predictable results, but no lactic acid. However, with just a little patience, instruction, and minimal supplies, it's possible to learn the time-honored art of lacto-fermentation.


How It Works
Lacto-fermentation really is more art than science. The science part is simple: lactobacillus (from a prepared culture, fresh whey, or just naturally occurring) plus sugar (naturally present in vegetables and fruits), plus a little salt, minus oxygen (anaerobic process), plus time, equals lactic acid fermentation.

The length of fermentation can vary from a few hours to two months or more. The ideal temperature is around 72°F, but warmer or cooler temperature will still work. (Some strains of bacteria require specific temperature ranges.) The length of time is dependent more on the flavor you prefer than anything else and since the flavor level of lacto-fermented vegetables increases with time you will want to sample often until you are experienced enough to know what works for your tastes. You don’t want to introduce a lot of oxygen to the fermentation process as this increases the chance of spoilage. Lacto-fermentation is generally done in an airtight container or a crock with a water seal that prevents air from contaminating the culture. If you have a reliable recipe to follow, you can make minor adjustments as you see fit.

The important thing is not to be intimidated by lacto-fermentation. You are not going to make your family sick by giving them home-fermented foods. Unless it smells unmistakably putrid (in which case common sense says throw it away), fermented foods are some of the safest foods you can eat. They are easy for even a beginner to prepare and it doesn’t take long to gain enough confidence to venture beyond basic yogurt or sauerkraut to an endless variety of vegetable and/or fruit combinations.

Sources:
Culturesforhealth.com

0 Comments

Ginger Ale

2/2/2015

0 Comments

 
Picture
Ginger Ale
You will be adding your Ginger Bug to the "wort" or base. You may use any type of base as long as it has sugar, the sugar is for the enzymes. You have to add real sugar not any  type of artificial sweetener it seems like a lot of sugar but there is only 2-3% left after the enzymes convert it to carbonation.  For your wort you could use sweetened tea, fruit juices, herbs or any combination you like.  The recipe below is for Ginger Ale, you could cut the recipe in half if you like.

The WORT = the base
Bring to  a boil:

  • 1/2 gallon of water
  • 3-6 inches of fresh grated ginger root peel and all
simmer 20 minutes, add water to taste (let it cool down a bit first!). While still warm, add
1 1/2  cup of sugar
Pour the whole thing into a gallon container. Let it cool to room temp, add the juice of two lemons (or oranges), which will slow down the fermentation.
Then add  1/2 cup of your prepared ginger bug (either with or without the sediment – keep some sediment for making more bug). You can cut this recipe in half if you would like. The ginger bug is always added to the wort in the ratio of 1/4 cup ginger bug per quart of sweetened wort.

Keep the jar on the counter, with cheesecloth, and stir twice a day. Keep it warm (room temperature) and keep an eye on it.  It could take from 3 days to to 1-2 weeks (again, depending on the temperature) to get ready. Taste it once in a while. If the bubbles rising up at the edge, it’s usually ready.

Replace the water in your ginger bug and add your equal amount of  grated ginger and sugar and set it on the counter to ferment  for a day or two before putting back into the fridge to rest for the next use. The ratio of ginger and sugar to water are always 1/4 cup water add 1 - 1 1/2 T. each of grated ginger and sugar. So for this recipe you added 1/2 cup ginger bug you will replace 1/2 cup water in your ginger bug jar and add 2 - 3 T. grated ginger and sugar.
  • BOTTLE: CARBONATION
Bottle the beer. Leave the bottles out for 1-2 more days.

Keep an eye on them!  It's alive so when you put the liquid in the corked or capped bottle it will be building up pressure.    Corking is better, for the beginner, than capping. If the fermentation runs out of room in the bottle, it will blow out the cork, or it will explode a capped bottle. Both are messy, but the latter is more so, and dangerous. If you add fruits (and thus more sugar, i.e., food for the bacteria), then cut the fermentation and carbonation times in half and watch them even more closely.

When the yeast ferments the sugars (which it will keep doing unless it gets too cold), it produces CO2. Closing off the container at this point will force that CO2 into the liquid instead of letting it escape, thus carbonating your soda, or making it fizzy.

After several days, put the bottles in the fridge to stop the fermentation. It is ready to drink.

0 Comments

How To Make A Ginger Bug

2/2/2015

0 Comments

 
Picture
I was looking thru my Bon Appetite magazine this month and came upon an article about making mixed drinks using the Ginger Bug. I had no idea what the Ginger Bug was, so after investigating I started one using the instructions below. 

How to create a ginger bug to use as the beneficial culture to make healthy fermented homemade sodas like old fashioned ginger ale or root beer.
Author: Wellness Mama Recipe type: Cultured – Beverage Ingredients
  • 1-2 fresh ginger roots
  • ½ cup white sugar (important for starting the culture. Honey, stevia or other sweeteners will not work)
  • 2 cups of water
  • Quart size mason jar
Instructions
  1. Cut a piece of ginger root about 1.5 inches long to make 2-3 tablespoons of grated ginger. You can also finely chop instead of grating. There is some debate about if it is better to peel the root or not. My genera rule is that non-organic ginger gets peeled and organic just gets rinsed before grating.
  2. Place the ginger in a quart size mason jar and add an equal amount of white sugar (2-3 tablespoons). Nourishing Traditions insists that white sugar is needed to create the bug and I’ve had the best success with this, but a local friend claims that unrefined sugar or sugar with 1 tsp of molasses added works better. Try what you have and adapt as needed. ( I did add the molasses to my mix)
  3. Add 2 cups of filtered water to the mason jar. Make sure that the water has been filtered so that it does not contain chlorine which can affect the culturing process.
  4. Stir with a non-metal spoon and lightly cover. I cover with a coffee filter and rubber band.
  5. Each day for the next five days, stir the mixture at least once and add 1 tablespoon of grated ginger root and 1 tablespoon of sugar. (note: depending on temperature, it may take up to eight days of adding sugar and ginger to create the desired culture).
  6. You can tell if culture is active if there are bubbles forming around the top of the mixture, it “fizzes” when stirred and it takes on a sweet and mildly yeasty smell. It will also become somewhat cloudy and opaque. If mold appears on the top, scrape it off if it can be removed. It this happens more than once, you will need to start again. If the mixture hasn’t taken on these characteristics by the 7-8th day, you need to discard it and start again.
  7. Keep the culture away from other cultures like sauerkraut, kombucha  or kefir it can cross culture.
  8. Once the ginger bug has cultured, it can be used to create fermented sodas and drinks at the ratio of ¼ cup ginger bug starter per quart of sweetened herbal mixtures (for ginger ale or root beer) or diluted fruit juice (for fruit flavored sodas).
Notes: To keep the bug alive and continue growing it, you will need to feed it regularly. Add 1 teaspoon of minced ginger and 1 teaspoon sugar per day if kept at room temperature. You can also “rest” it in the fridge and feed it 1 tablespoon each of ginger and sugar once a week. To reactivate it, remove and let it reach room temperature and begin feeding it again.

0 Comments

    Health & Nutrition

    Fermented Foods

    Archives

    November 2020
    February 2020
    December 2019
    July 2017
    June 2016
    May 2016
    September 2015
    February 2015
    January 2015

    Categories

    All
    Digestion
    Fermented Drinks
    Fermented Foods
    Kefir
    Vitamins
    Whey

    RSS Feed

Powered by Create your own unique website with customizable templates.