Coming from a baking background I want my jars to be consistent with the same amount of liquid and vegetables in each jar. I use this stacking technique for any type of canning product like soups, stews, and chili. It also allows you to adjust the recipe size for your needs. So you can make 4 jars or 8 and they will all be exactly the same.
You take each ingredient by weight in the recipe and divide it between the number of jars the recipe will make. For example if the recipe makes 7 pints and calls for 1 onion. Weigh your onion for this example mine is 120 grams. Chop up the raw onion and place in a small container labeled 120g. Do this for each ingredient.
You can do this the day before and place the containers in the fridge overnight. If the recipe makes 7 pints of soup you will divide each ingredient weight by 7 pints (120g divided by 7 = 17g of onion in each jar).
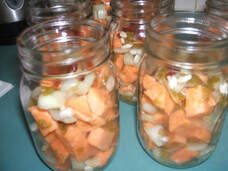
The idea is to add each ingredient to the jar and stack the next ingredient on top, hence the name stacking. I have found instead of adding each ingredient to each jar I put all the ingredients for one jar in a small bowl mix them up. Then I add this to the jar. This I think gives me a better end product because the ingredients are mixed when cooked. Repeat this process until you have all your jars filled.
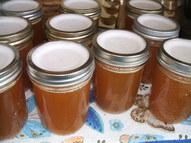
I heat the liquid and fill to 1- 1 1/4 inch head space. Then place in the pressure canner and begin to heat the jars. When the jars are hot, I remove each de-bubble, wipe the rims and put the lid and rings on. Pressure can the proper time. The soup basically cooks in the jars and each jar has the exact same amount of ingredients. I love this method it's easy and consistent from jar to jar.
I hope this will inspire you to try this method for making wonderful soups.
You take each ingredient by weight in the recipe and divide it between the number of jars the recipe will make. For example if the recipe makes 7 pints and calls for 1 onion. Weigh your onion for this example mine is 120 grams. Chop up the raw onion and place in a small container labeled 120g. Do this for each ingredient.
You can do this the day before and place the containers in the fridge overnight. If the recipe makes 7 pints of soup you will divide each ingredient weight by 7 pints (120g divided by 7 = 17g of onion in each jar).
The idea is to add each ingredient to the jar and stack the next ingredient on top, hence the name stacking. I have found instead of adding each ingredient to each jar I put all the ingredients for one jar in a small bowl mix them up. Then I add this to the jar. This I think gives me a better end product because the ingredients are mixed when cooked. Repeat this process until you have all your jars filled.
I heat the liquid and fill to 1- 1 1/4 inch head space. Then place in the pressure canner and begin to heat the jars. When the jars are hot, I remove each de-bubble, wipe the rims and put the lid and rings on. Pressure can the proper time. The soup basically cooks in the jars and each jar has the exact same amount of ingredients. I love this method it's easy and consistent from jar to jar.
I hope this will inspire you to try this method for making wonderful soups.

 RSS Feed
